
Having problems getting your firewall to let go of your SSH connections?
Trying to make your Windows VPS more secure but don’t know how to use port forwarding?
Not to worry, because here you’ll find easy, step-by-step instructions on port forwarding on Windows VPS.
I’ve tried to stick to explaining everything in plain English so everyone can actually use this tutorial without googling everything. Finally, I’ll also introduce a smart little shortcut that lets you bypass the problem altogether. But what exactly is port forwarding and why should you care? When should you consider port forwarding?
These are the questions that I’ll answer in the first section of this tutorial. If you already know about them or if you’re in a hurry to get things done, you can skip ahead to the instructions.
What is Port Forwarding?
Port forwarding may seem a complicated concept from a user’s nightmares or as simple as a few clicks, depending on what you are going to do with it. On paper, at least, port forwarding is easy enough to define: it’s mapping an IP address and port number to another IP address and another port number.
Why would anyone want to do that? It’s because one of the two pairs is external and the other internal. First off, however, a short definition. While an IP address is a way to find individual devices, a port identifies the services or applications that the device is running on the network. You may also want to change the remote desktop port for your Windows VPS.
Your local network, for example, is made up of your laptop, your printer, a webcast device, a smart TV, your WiFi-connected phone, etc. Each of these has its own IP address and each communicates using different ports. But all these are internal addresses, valid only in your Local Area Network (LAN). Most of these addresses are by default something like 192.168.1.1, meaning they are far from unique.
On the Internet, however, there are servers and routers and other devices and these are identified with a set of unique, fixed IP addresses. These are, of course, external addresses (and ports, when communication is involved). Standing between the two are routers or Network Address Translators, which allow internal computers to communicate with outside services (like web services) while staying hidden.
If a host on the external network wants to connect to one of your devices on the internal network, it has to know what IP address and port that device is using to connect to the router. This is made even safer by your firewall, which effectively blocks all but a few ports, stopping communication. Together, they provide an extra layer of security against hackers or DDoS (direct denial of service) attacks. Of course, you can always take a more active role and scan your ports using Netcat listener. But what if you want to let some communication get through?
 Windows VPS Hosting
Check out our affordable Windows VPS plans, featuring powerful hardware, minimal latency, and a free Windows of your choice!
Claim your Free WindowsWhy is Port Forwarding Important?
Port forwarding is vital if you’re planning on hosting an online game or using a specific application to share your remote desktop. Of course, there is the most well-known use of port forwarding, the SSH connection. The Secure Shell connection uses a specific port that has to be opened by the firewall. Also, as part of added security measures, you may have to change the default SSH port, adding an extra challenge to any would-be hackers.
Without defining which port the data should go through, you can do none of these things. There is also the issue of port forwarding rules for your firewall. If you don’t configure your firewall correctly, it can cut off important services from connecting to the Internet.
There are other threats as well: once I had made the mistake of assigning two different apps to the same port, and of course, none of them worked anymore. It took me a while to figure it out and that can be very damaging if you’re running a business.
With the stage set and the stakes properly introduced, we now get to do some actual port forwarding. So, no more words, just ports.
How to Configure Port Forwarding on Windows VPS?
If you have a Windows VPS, port forwarding will be even more important, because you will definitely need to set up an SSH connection. You also need to let clients connect to your web server. There are different ways to configure port forwarding on Windows VPS, but we will only discuss the simple, GUI solution. The command-line solution works just as well but it’s much more work.
Also Read : List of the 6 Best Firewalls for Windows 10 for 2022
There are only a few simple steps to configure port forwarding on Windows VPS. Follow these steps one by one, using the Windows Firewall as the main tool. The steps are the same on Windows 10, Windows Server 2019, and other Windows editions.
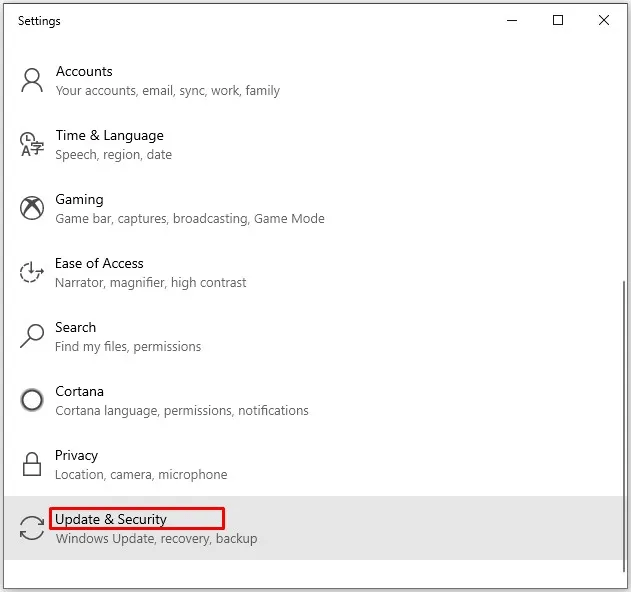
Step 1: Open Settings
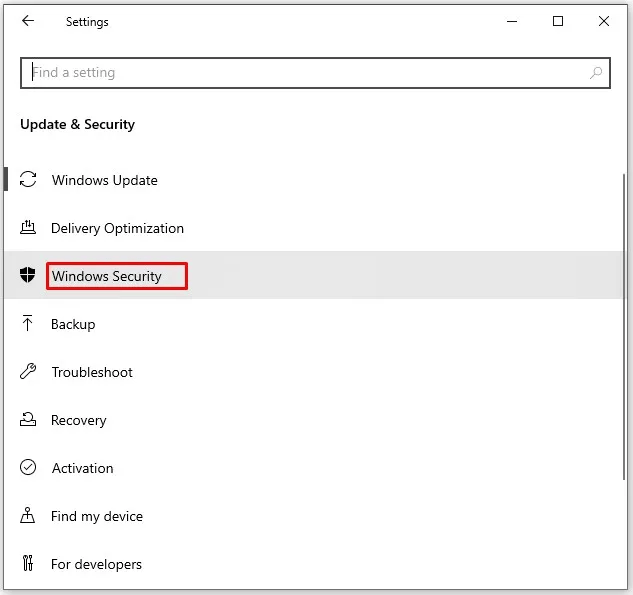
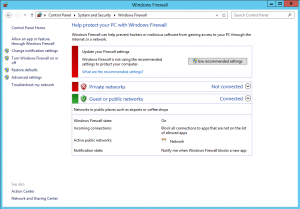
First, open the Settings feature (or Control Panel, as it used to be called) from the Start Menu by doing a quick search. Once you get to the main Settings screen, navigate to System & Security. Next, click on Windows Security (or Windows Firewall).
Now, on the screen you’re seeing, there is usually a sidebar on the left. Look through its items and click on Advanced Settings. If there is no sidebar, try looking at the bottom of the screen.
Step 2: Open Defender Settings
Now, a new window will pop up, titled “Windows Defender Firewall with Advanced Security.”
Step 3: Look for Inbound Rules
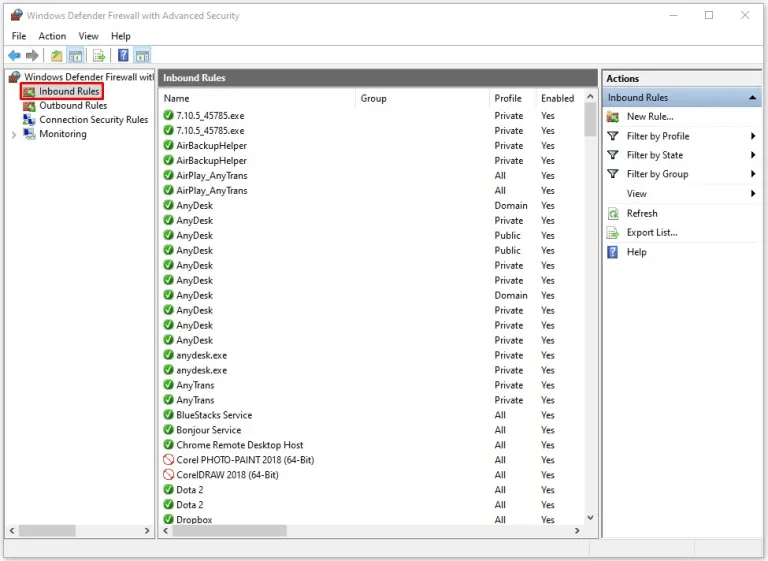
On your left, you will find two interesting categories which are going to be our focus here. These are the Inbound Rules and the Outbound Rules.
But what does Windows mean by these words? Let’s see a definition:
- Inbound rules: These rules determine the traffic allowed to come through to the internal network (your PC or VPS, for example) — this takes the form of defining which sources and which ports are allowed access.
- Outbound rules: These rules determine the traffic allowed to go out from your system to the external network (usually the Internet) — once again, this is controlled using ports.
Windows VPS Hosting
Check out our affordable Windows VPS plans, featuring powerful hardware, minimal latency, and a free Windows of your choice!
Claim your Free WindowsStep 4: Define a new rule
Let’s start to really configure port forwarding on Windows.
First right-click on the Inbound Rules option and choose “New Rule” from the menu.
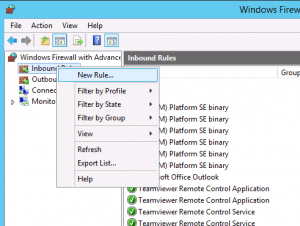
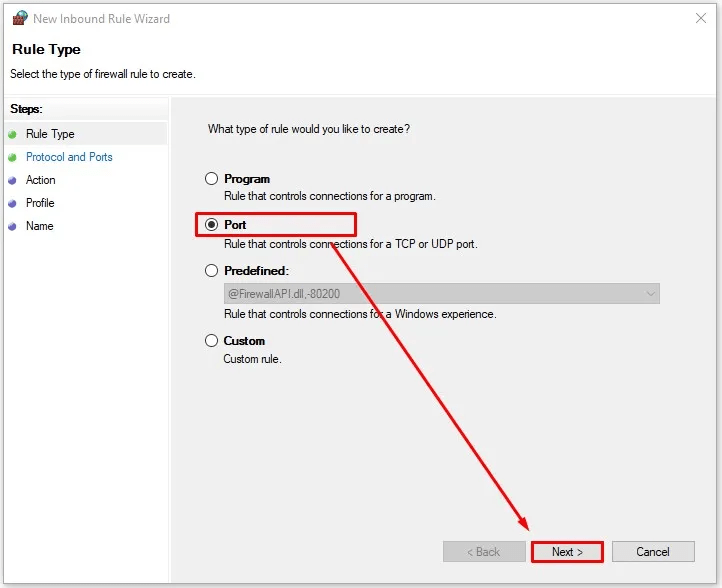
A Wizard window will pop up to guide you through the rest of the steps. As you can see from the screenshot below, there are different types of rules you can define using the Windows Firewall. Since we’re configuring port forwarding, however, select Port from the list before clicking on Next.
Step 5: Enter Details
Now comes the main step in the Wizard, where you have to define the type and number of the ports you want to configure for forwarding.
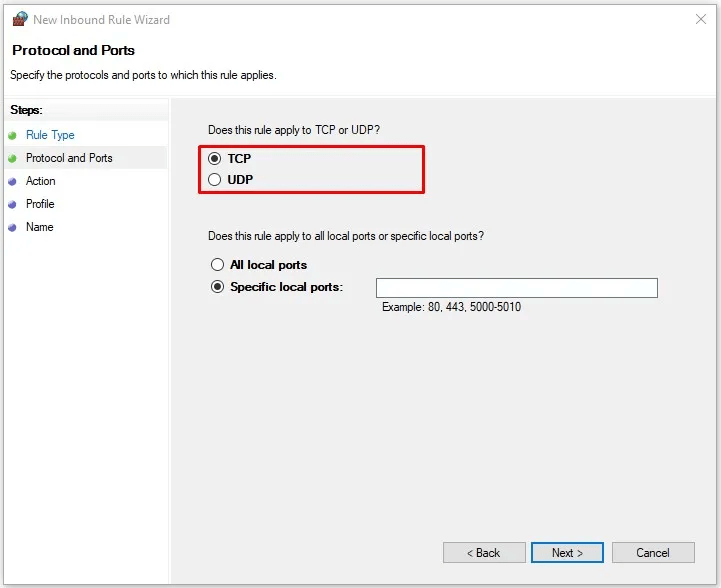
The first question is about the type of protocol this port is going to use in its communication. Both TCP and UDP are data transport protocols but they do differ in some key areas. For example, UDP is faster but has a higher packet loss rate than the slower TCP. If you’re not sure which protocol will be used by the port and the service it runs, it’s best to go through the wizard twice and add the rules for both types.
Step 6: Create Rule
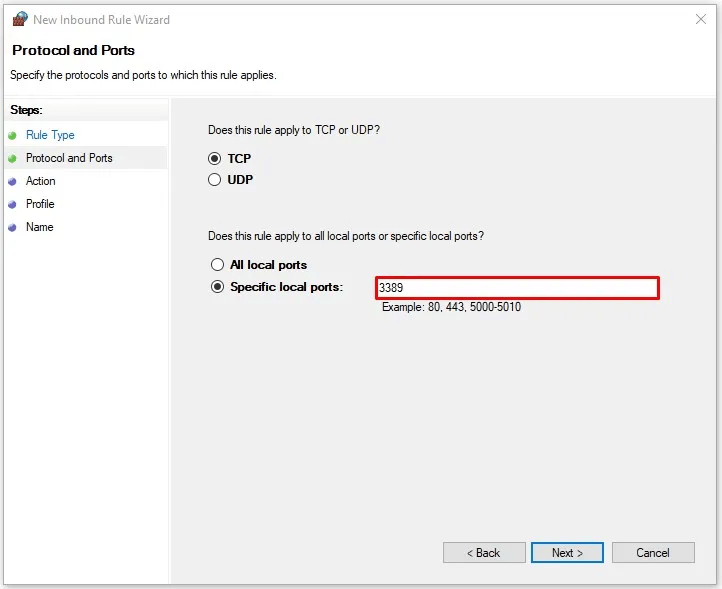
The next part on this screen involves another choice, this time between applying the rule to all ports or just the ports you are going to define here. It’s usually not a good idea to select the “All local ports” option, no matter the context. Choose “Specific local ports” and switch to the text box to define them.
If you want to introduce a rule for more than one port at a time, you can separate them using a comma, for example:
“8080, 443, 3000”
Of course, you can also define a larger number of ports in a range. To do that, you need to write the first and the last port number in the range and separate them using a hyphen:
“8000-8800”
You can also combine these two methods, getting all the ports in one place:
“443, 3000, 8000-8800”
Step 7: Choose Rule Type
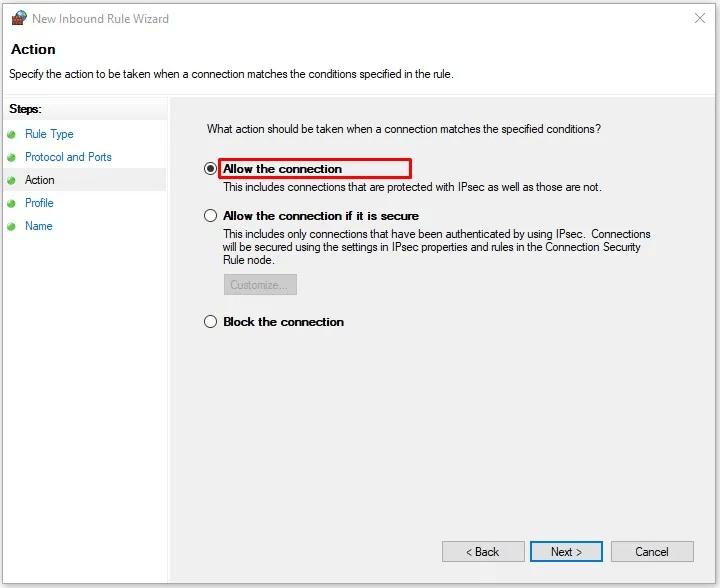
On this screen, you can decide what rule you want to set for the ports you’ve identified. Do you want them to accept data (be forwarded to)? If so, select the first option, “All the connection.” If instead, you want to make sure there is no port forwarding, you can choose “Block the connection.” There is also a third choice, but it’s not relevant to what we’re trying to do here.
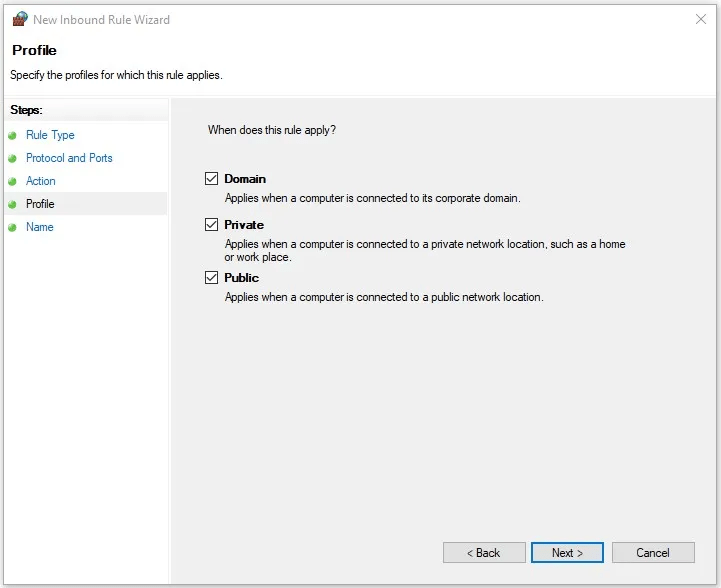
Step 8: Determine Rule Reach
At this point, the Wizard will ask you “When does this rule apply?” You may want to choose Public because with a VPS corporate and private networks are out of the question. You can also play it safe and check all three boxes. Click Next to go to the last step of the Wizard.
Step 9: Finalize Rule
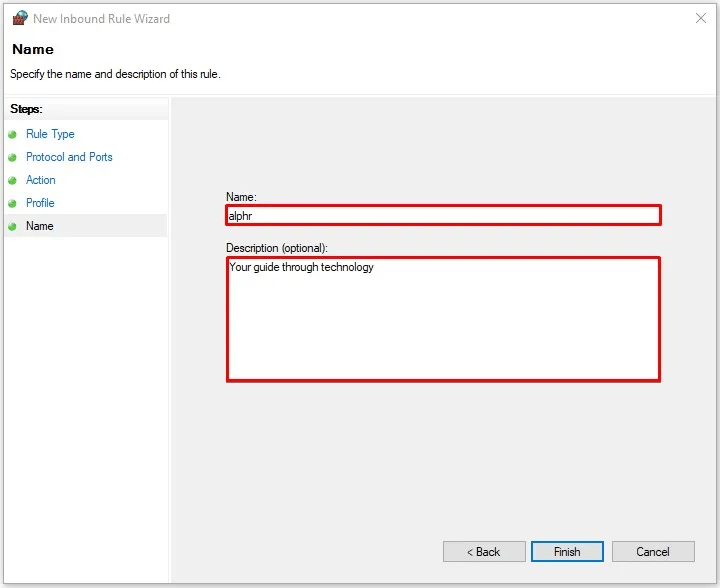
On this screen, you are going to give this rule a name and perhaps even a description. The name is not optional and is needed to finalize the rule. The description is optional but if you take the time, it will help you find the rule later on. Click Finish and you will be, obviously, finished!
Step 10: Outbound Rules
Well, technically, you’ve only finished setting up an Inbound Rule. You may need to go back and do the same thing over again in case you also need to define an Outbound Rule. But that should be no challenge since all the steps are the same.
Also Read: change Remote Desktop port in Windows VPS
You’re Done — or Are You?
If you’ve followed the steps so far, you’ve learned how to configure port forwarding on Windows VPS. You can use that knowledge to solve any future problems. Of course, there is always the chance that things won’t be solved so easily. After all, a network administrator is paid to do this type of thing because it’s actually very complicated beneath the surface. For example, how do you know if a port is already being requested by another application when you’re assigning it? How do you use port forwarding to secure your web server?
Windows VPS Hosting
Check out our affordable Windows VPS plans, featuring powerful hardware, minimal latency, and a free Windows of your choice!
Claim your Free WindowsThese are good questions with answers too complicated to include here. That’s why I promised a shortcut that can get you through the whole thing, letting you completely bypass the problem. RouterHosting offers top-tier, optimized Windows VPS solutions that are geared for security and reliability. With port forwarding initially configured, you won’t have to worry about setting up an SSH connection. Plus, if there are any new apps or if you run into some unforeseen problem, you can always count on our 24/7 caring support staff to get you through it. Hosted on a high-performance hardware with NVMe storage and 1 Gbps bandwidth, using our Windows VPS is a treat. So, don’t waste your time with configuring port forwarding on Windows — get a Cloudzy Windows VPS and we’ll do it for you; that and a lot more.

![How to Make a Modded Minecraft Server? 👾 [2024 Guide]](https://cloudzy.com/wp-content/uploads/How-to-Host-a-Modded-Minecraft-Server-1-420x234.png)


0 Comment