CloudzyはユーザーにカスタムISOをアップロードして利用する柔軟性を提供します
ファイルをアップロードでき、より自分好みにカスタマイズした仮想プライベート
サーバー (VPS) を使用できます。この機能は、事前に用意されたテンプレートでは
特定のオペレーティングシステムまたは構成が必要です
満たせないニーズを持つユーザーに特に便利です。このガイドに従うことで、
カスタム ISO をアップロードし、アップロード済みの ISO から VPS をデプロイする方法を学べます。
ISO、およびVPSを効率的に管理します。あなたが経験豊富なIT
プロフェッショナルでも初心者でも、このステップバイステップガイドが役に立ちます。
Cloudzyのカスタムイメージ機能を最大限に活用してください。
前提条件
Cloudzy でカスタム ISO を使用する前に、以下が整っていることを確認してください。
以下の前提条件:
-
Active Cloudzy Account: アクティブな Cloudzy アカウント: アクティブである必要があります
Cloudzyを使ったアカウント。 -
クレジット残高が十分です: アカウントに以下があることを確認してください
仮想プライベートサーバーを作成・デプロイするのに十分なクレジット。 -
カスタムOSインストールとネットワークの知識
設定: オペレーティングシステムのインストールに関する知識
ネットワーク設定の構成は非常に重要です。 -
ISO ファイルの公開アクセス可能な HTTPS リンク:
カスタムISO ファイルに使用する HTTPS リンクを取得します。このISO ファイル
正常にアップロードされるまで一般公開でアクセス可能である必要があります。
アップロードする方法
Cloudzy上のカスタムISO
Cloudzy でのカスタムISO のアップロードは簡単なプロセスです。
以下の手順に従って始めましょう:
カスタムISOにアクセス
機能
-
Cloudzyアカウントにログインします。
-
に移動 サービス ページをクリックして
カスタムISO タブ。
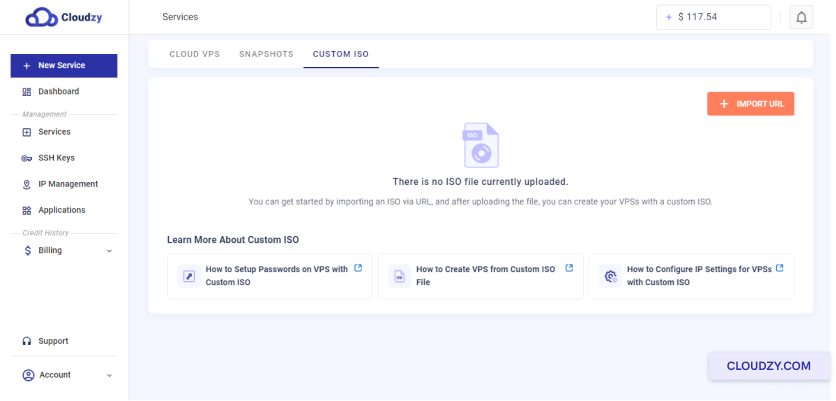
アップロードを開始
プロセス
クリックしてください URLをインポート アップロードを開くボタン
ウィンドウ
ISOの詳細を提供
-
アップロード ウィンドウで、使用したいISO ファイルの URL を入力します。
アップロードします。URL が HTTPS リンクであり、公開されていることを確認してください。
アクセス可能 -
ISO ファイル名を指定します。ファイル名の末尾は以下のようにしてください。
.iso (例えば、 linux.iso).
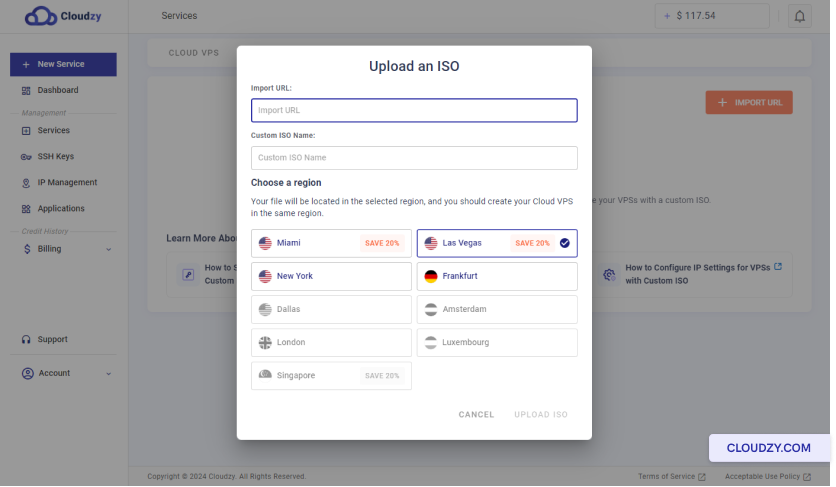
リージョンを選択
ISO をアップロードするリージョンを選択します。このリージョンは、
VPS を作成する予定のリージョンと同じである必要があります。
アップロードを完了する
-
クリックしてください ISO をアップロード を開始するボタン
アップロードプロセス -
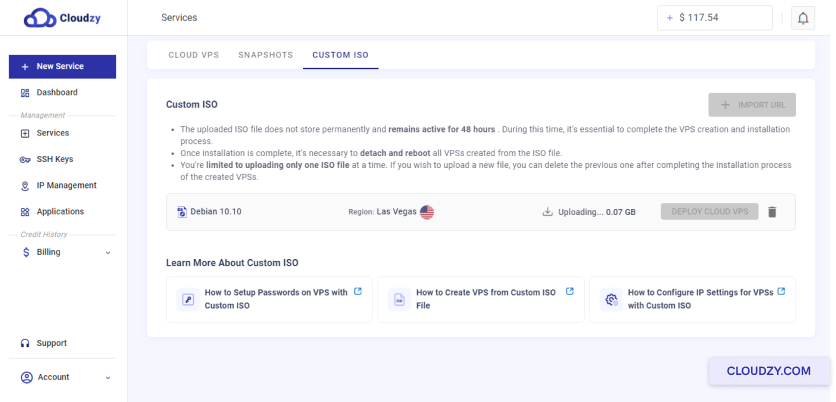
アップロードの完了を待ちます。進捗状況は以下で監視できます。
ザ カスタムISO タブ。
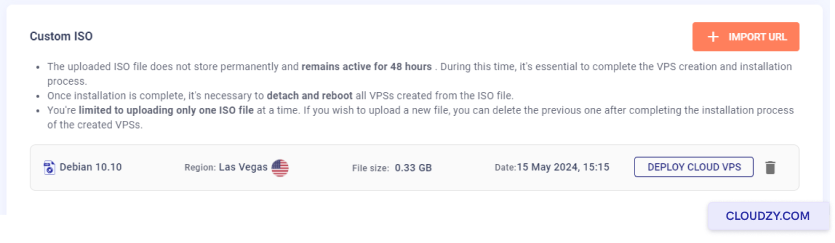
アップロードを確認する
アップロードが完了すると、アップロードされたISO ファイルが一覧に表示されます。
以下 カスタムISO タブ。
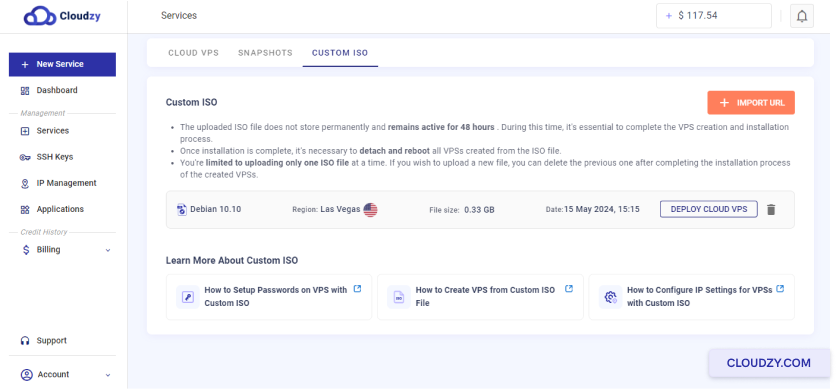
このISO を使用して Cloud VPS をデプロイできるようになります。
以下の手順に従うことで、カスタムISO を簡単に Cloudzy アカウントにアップロードし、
新しい VPS のデプロイに向けて準備できます。
デプロイ方法
カスタムISOを使用したVM
Cloudzyでカスタムイメージ(ISO)を使用して仮想マシン(VM)をデプロイできます
複数の方法で実行できます。以下の手順に従って VM をデプロイしてください。
正常に。
方法1:
カスタム ISO タブから Cloud VPS をデプロイ
- カスタムISO タブに移動します。
-
Cloudzyアカウントにログインします。
-
に移動 サービス ページをクリックして
カスタムISO タブ。
- VPSをデプロイする:
-
アップロードされたISOファイルを見つけます カスタムISO
タブ。 -
クリックしてください クラウドVPSをデプロイ の隣のボタン
ISOファイル
- VPS を構成してください:
-
ISO がアップロードされたリージョンを選択します。
-
目的のプランを選択してください (vCPUs、メモリ、ストレージ、
帯域幅)。 -
VPS のホスト名を入力します。
-
クリック 今すぐデプロイ あなたのVPSを作成するために。
メソッド
2: サービス ページからカスタムISO 経由で新しい VM をデプロイする
- クラウド VPS ページの作成にアクセスしてください:
-
Cloudzyアカウントにログインします。
-
クリックしてください 新しいサービス ボタンをオンにする
サイドバー
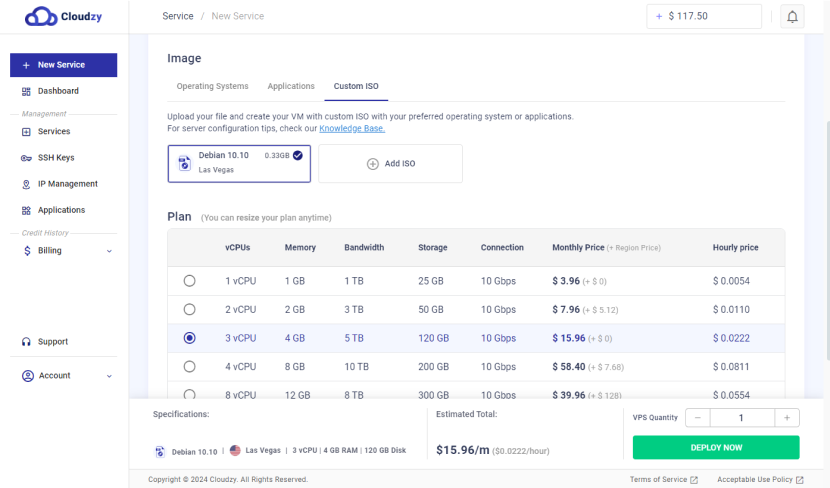
- カスタムISOを選択:
-
に クラウド VPS を作成 ページを選択してください
カスタムISO タブ。 -
リストからアップロードされたISO ファイルを選択します。
- VPS を構成してください:
-
リージョンが ISO のアップロード先のリージョンと一致していることを確認してください
アップロード済み。 -
目的のプランを選択してください (vCPUs、メモリ、ストレージ、
帯域幅)。 -
VPS のホスト名を入力します。
-
クリック 今すぐデプロイ あなたのVPSを作成するために。
追加ステップ
- VPSコンソールにアクセス:
VPS がデプロイされたら、VNC ボタンを使用してアクセスできます。
VPSコンソールを続行してOSセットアップを行います。

- デタッチして再起動:
OS のセットアップが完了したら、 デタッチ &
再起動 ボタンをクリックしてISO ファイルを削除し、VPS を再起動します。

- 確認と管理:
前に戻る サービス ページと
カスタムISO VMから作成されたVMのリストを表示するタブ
ISO ファイル
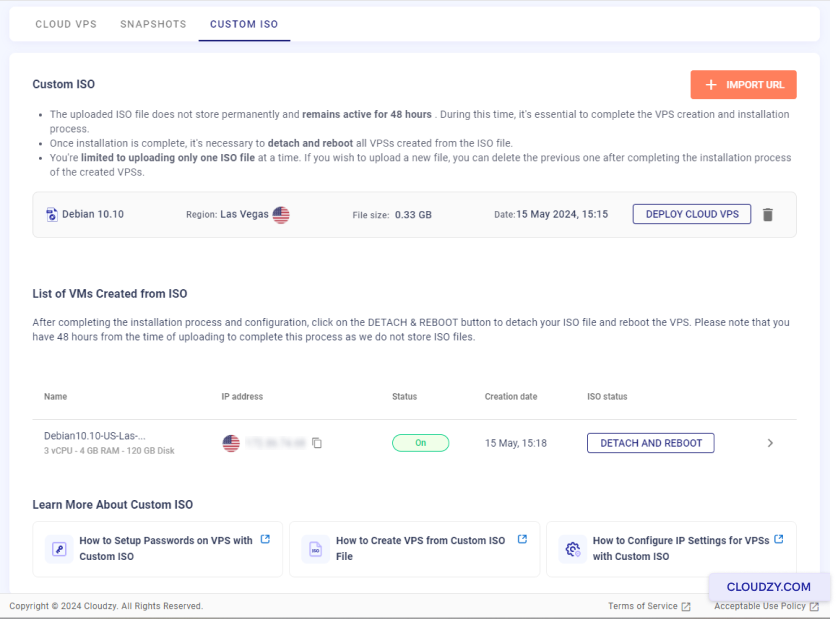
このセクションから VM を管理でき、再起動やISO ファイルの切り離しなどが可能です。
ここから実行できます。
重要な注意事項
- リージョン制限:
同じ地域にのみ、ISO ファイルがアップロードされた場所に VPS をデプロイできます
アップロードされました。別のリージョンにデプロイする必要がある場合は、削除する必要があります
現在のISOを再度アップロードして、希望するリージョンに配置します。
- 時間制限
あなたは持っています 48時間 アップロードから
CloudzyはISOを保存しないため、デプロイとセットアップのプロセスを完了してください
ファイルは永続的に保存され、ISO ファイルは 48 時間後に自動削除されます。
これらの方法に従うことで、カスタム ISO を使用して VM をデプロイできます。
Cloudzy。VPSのセットアップをあなたのニーズに合わせてカスタマイズし、柔軟に構成できます。
特定のニーズ
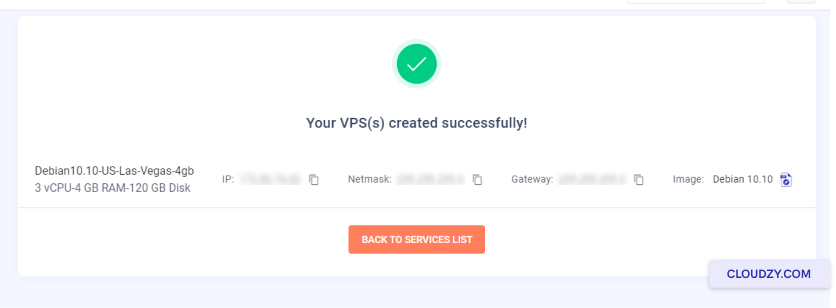
構成中
新しいカスタム VPS の IP アドレスと DNS
新しいカスタム仮想プライベートサーバーは事前に設定されていない場合があります
IPアドレス。IPアドレス、サブネットマスク、および
VPS作成プロセス中に提供されたデフォルトゲートウェイ。その後、使用してください。
Cloudzy パネルで利用可能な VNC ボタンで VPS コンソールにアクセスできます
IPアドレスを設定します。
DNS 構成では、以下のようなパブリック DNS サーバーを使用できます:
Google Public DNS:
-
プライマリ: 8.8.8.8
-
セカンダリ: 8.8.4.4
Cloudflare DNS:
-
プライマリ: 1.1.1.1
-
Secondary: 1.0.0.1
OpenDNS:
-
プライマリ: 208.67.222.222
-
セカンダリ: 208.67.220.220
これらの設定を構成することで、VPS が適切に動作することを確保できます
ネットワーク接続と DNS の解決。ご不明な点がございましたら、
お気軽にお問い合わせください 送信する
チケット.