

인터넷 프로토콜의 최신 버전은 다양한 장점을 갖추고 있어 배워볼 만한 가치가 충분합니다. 가장 먼저 드는 질문은 '어디서부터 시작해야 할까?'일 것입니다. 답은 간단합니다. 시작점으로 Ubuntu에서 IPv6(Internet Protocol version 6)를 활성화하는 방법을 이해하는 것이 좋습니다. 이 가이드를 통해 Ubuntu 서버에서 IPv6를 활성화하는 각 단계를 익힐 수 있습니다. 본격적으로 시작하기 전에, IPv6의 개념과 장점을 먼저 살펴보겠습니다.
IPv6란 무엇인가요?
IPv6(Internet Protocol Version 6)는 IPv4를 개선하고 궁극적으로 대체하기 위해 설계된 차세대 IP 주소 표준입니다. 컴퓨터, 스마트폰, 홈 자동화 기기, IoT 센서 등 인터넷에 연결된 모든 디바이스는 서로 통신하기 위해 IP 주소가 필요합니다. 기존 IP 주소 체계인 IPv4는 연결 디바이스의 폭발적인 증가로 인해 할당 가능한 주소가 고갈되고 있습니다. IPv4와 IPv6의 차이점에 대해 더 알아보려면 다음을 읽어보세요: ""IPv4 vs. IPv6: IPv6가 IPv4를 대체하는 방법“
IPv6의 장점은 무엇인가?
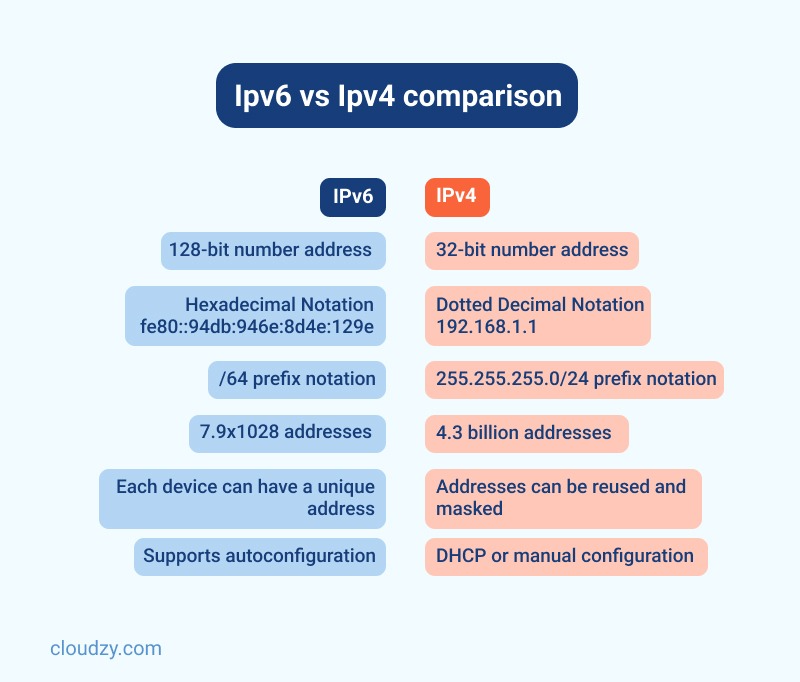
IPv6는 최신 인터넷 프로토콜 버전으로, IPv4와 유사하게 동작합니다. 두 프로토콜 모두 인터넷 연결 디바이스 간 통신에 필요한 고유 IP 주소를 제공합니다. 다만 IPv4와 비교했을 때 한 가지 중요한 차이점이 있습니다. IPv6는 a를 사용합니다. 128비트 IP 주소.
IPv6의 주요 장점은 다음과 같습니다:
- 자동 구성 지원
- 사설 주소 충돌 없음
- 멀티캐스트 라우팅 개선
- 더 간결한 헤더 형식
- 간소화되고 효율적인 라우팅
- 향상된 서비스 품질 (플로우 레이블링)
- 내장 인증 및 지원
- 유연한 선택지와 확장성 제공
- 간편한 관리 (DHCP 불필요)
IPv6는 왜 도입되었는가?
IPv6는 주소 공간 고갈 문제를 해결하기 위해 명시적으로 설계되었습니다. 이미 1980년대에 전문가들은 주소 고갈 문제에 대한 우려를 제기했습니다. 또한 IPv4 주소 체계가 도입된 직후부터 확장성과 기능적 한계 등 다양한 문제점이 드러났습니다.
관련 글: MikroTik에서의 DNS 설정
Ubuntu에서 IPV6 설정 방법
다음은 시스템에서 Ubuntu IPv6를 활성화하기 위한 단계별 안내입니다.
1단계: sysctl.conf 파일 편집
Ubuntu 설정의 첫 번째 단계는 IPv6 서버에 로그인하는 것입니다. 루트 액세스. 그런 다음 sysctl.conf 파일의 일부 설정을 변경해야 합니다. 파일을 편집 모드로 여세요. 이 가이드에서는 vim 편집기를 사용하지만, 원하는 파일 편집기를 사용해도 됩니다.
vim /etc/sysctl.conf
파일 끝에 다음 내용을 추가하세요:
net.ipv6.conf.default.disable_ipv6 = 0
net.ipv6.conf.all.disable_ipv6 = 0
파일을 저장하고 닫습니다.
2단계: interfaces 파일 편집
편집이 필요한 또 다른 파일은 다음 경로에 있는 interfaces 파일입니다. /etc/network/. 아래 단계를 진행하기 전에, 먼저 /etc/network/interfaces 파일의 백업 복사본을 만들어 두세요.
vim /etc/network/interfaces
interfaces 파일에 다음 줄을 추가하세요:
iface eth0 inet6 static
pre-up modprobe ipv6
address IPv6-IP-Address
netmask 64
gateway IPv6-IP-Gateway-Address
interfaces 파일을 저장하고 닫습니다. IPv6-IP-Address와 IPv6-IP-Gateway-Address는 반드시 할당받은 Ubuntu IPv6 정보로 대체해야 합니다.
3단계: 네트워크 서비스 재시작
서버에서 Ubuntu IPv6 주소를 활성화하는 세 번째 단계는 변경 사항을 적용하기 위해 네트워킹 서비스를 재시작하는 것입니다.
service networking restart
4단계: Ubuntu IPv6 설치 확인
아래 명령어를 사용하면 Linux 운영 체제에 올바른 IPv6 주소가 적용되었는지 확인할 수 있습니다.
ifconfig eth0
다음 예시를 통해 각 단계를 이해하세요:
eth0 Link encap:Ethernet HWaddr 06:0c:6c:01:12:98
inet addr:103.25.202.165 Bcast:103.25.202.255 Mask:255.255.255.0
inet6 addr: fe80::40c:6cff:fe01:1298/64 Scope:Link
inet6 addr: 2400:c980:0:2::2/64 Scope:Global
UP BROADCAST RUNNING MULTICAST MTU:1500 Metric:1
RX packets:2505260 errors:0 dropped:14 overruns:0 frame:0
TX packets:640650 errors:0 dropped:0 overruns:0 carrier:0
collisions:0 txqueuelen:1000
RX 바이트:203319645 (203.3 MB) TX 바이트:74852651 (74.8 MB)
이 줄에 주목하세요:
inet6 addr: 2400:c980:0:2::2/64 Scope:Global
이 줄은 올바른 IPv6 주소가 표시되고 있음을 확인해요.

루트 액세스와 NVMe 스토리지로 Ubuntu VPS를 즉시 실행하세요.
Ubuntu VPS 배포Ubuntu에서 IPv6 비활성화하는 방법
이 섹션에서는 시스템에서 Ubuntu IPv6 프로토콜을 비활성화하는 방법을 설명합니다. 다소 심화된 내용이므로 모든 세부 사항을 꼼꼼히 확인하세요. 터미널을 열고 (CTRL+ALT+T) 시작해봅시다! 터미널에서 입력하는 대부분의 명령어에는 루트 권한 (sudo).
첫 번째 방법: Sysctl을 사용하여 IPv6 비활성화
Ubuntu에서 IPv6를 비활성화하는 첫 번째 방법을 살펴보겠습니다.
1단계: Ubuntu IPv6 주소 확인
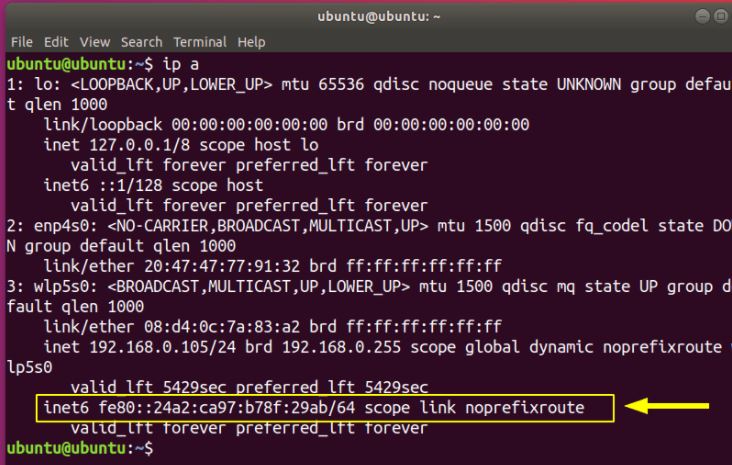
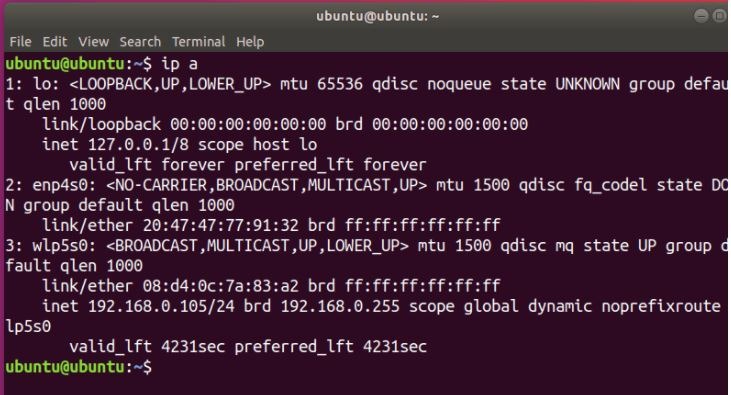
먼저 시스템에 IPv6가 활성화되어 있는지 확인해야 합니다. 다음 명령어로 Ubuntu의 IP 주소를 확인할 수 있습니다:
ip a
위 명령어를 실행하면 IPv6가 활성화된 경우 아래와 유사한 IPv6 주소가 표시됩니다:
2단계: sysctl 명령어 사용
이제 sysctl 명령어를 사용하여 Ubuntu 운영 체제에서 IPv6를 비활성화합니다:
sudo sysctl -w net.ipv6.conf.all.disable_ipv6=1
sudo sysctl -w net.ipv6.conf.default.disable_ipv6=1
sudo sysctl -w net.ipv6.conf.lo.disable_ipv6=1
3단계: Ubuntu IPv6 비활성화 결과 확인
Ubuntu에서 IPv6를 활성화할 때와 마찬가지로, 비활성화가 올바르게 적용되었는지도 확인해야 합니다. 다음 명령어를 다시 입력하세요:
ip a
아래와 같이 시스템에서 IPv6를 비활성화했으므로 IPv6 항목이 표시되지 않아야 합니다.
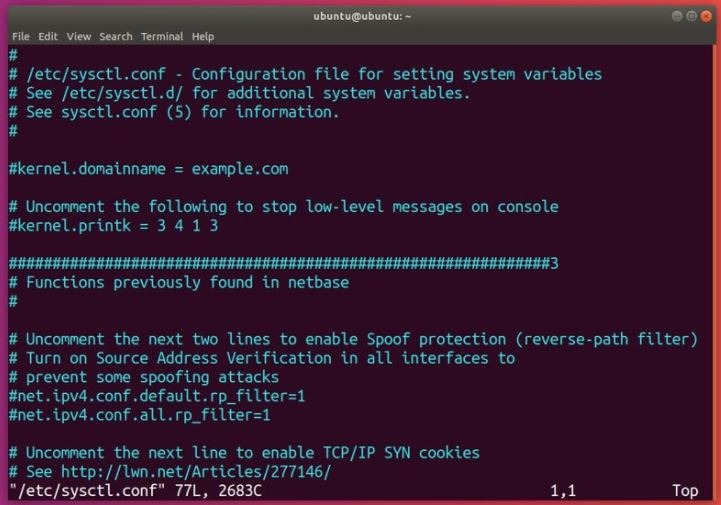
주의할 점은, 이 명령어들은 Ubuntu 운영 체제에서 IPv6를 일시적으로 비활성화합니다. 즉, 다음 번에 시스템을 재부팅하면 IPv6가 다시 활성화됩니다. 이 설정을 영구적으로 유지하려면 /etc/sysctl.conf파일을 수정하면 됩니다. 이전 섹션과 마찬가지로 vim으로 파일을 편집합니다. 관리자 권한이 필요합니다 (sudo 사용):
파일에 다음 줄을 추가하세요:
net.ipv6.conf.all.disable_ipv6=1
net.ipv6.conf.default.disable_ipv6=1
net.ipv6.conf.lo.disable_ipv6=1
설정을 적용하려면 다음 명령어를 실행하세요:
sudo sysctl -p
재부팅 후에도 Ubuntu IPv6가 여전히 활성화되어 있다면, 다음 파일을 생성해야 합니다. /etc/rc.local 그리고 아래 내용을 입력하세요. 이 작업은 root 권한으로 수행해야 합니다.
#!/bin/bash
# /etc/rc.local
/etc/sysctl.d
/etc/init.d/procps restart

exit 0
이제 chmod 명령어로 파일에 실행 권한을 부여합니다:
sudo chmod 755 /etc/rc.local
이 명령어는 sysctl 설정 파일에서 커널 파라미터를 수동으로 읽어옵니다. 이 과정은 부팅 시에 실행됩니다.
또한 읽어보세요: Debian 대 Ubuntu
두 번째 방법: GRUB을 사용하여 IPv6 비활성화
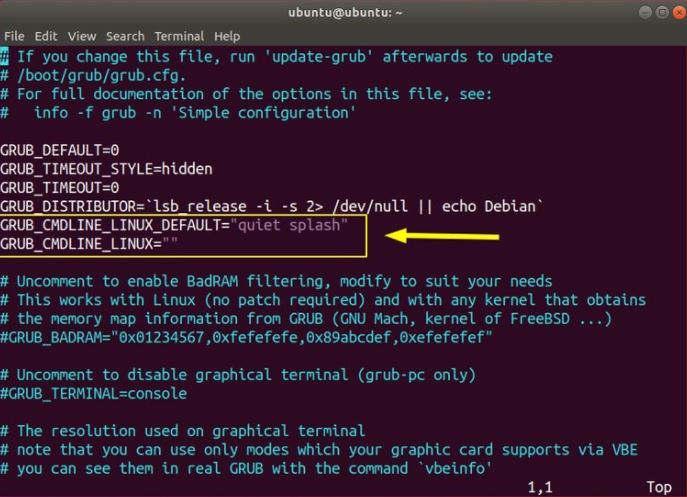
Ubuntu에서 IPv6를 비활성화하는 두 번째 방법은 GRUB 를 설정하고 부팅 시 커널 파라미터를 전달하는 것입니다. 이를 위해 /etc/default/grub 파일을 편집해야 합니다. 관리자 권한이 있는지 확인하세요:
GRUB_CMDLINE_LINUX_DEFAULT와 GRUB_CMDLINE_LINUX를 편집하여 부팅 시 IPv6를 비활성화합니다:
GRUB_CMDLINE_LINUX_DEFAULT="quiet splash ipv6.disable=1"
GRUB_CMDLINE_LINUX="ipv6.disable=1"
파일을 저장하고 update-grub 명령어를 실행합니다:
sudo update-grub
이 방법을 사용하면 재부팅 후에도 설정이 유지됩니다.
마무리: Ubuntu IPv6 구성
IPv6는 주소 공간 문제를 해결하기 위해 도입되었지만, 그 외에도 사설 주소 충돌 방지, 멀티캐스트 라우팅 개선, 향상된 서비스 품질, 기본 내장 인증, 더 단순하고 효율적인 라우팅 등 다양한 장점을 제공합니다. Ubuntu에서 IPv6를 활성화하는 방법을 아는 것은 그만큼 중요합니다. 이 글에서 살펴본 것처럼, Ubuntu는 다양한 환경에서 활용할 수 있는 가장 사용자 친화적인 Linux 배포판 중 하나입니다. Cloudzy는 고성능 하드웨어로 구성되어 Ubuntu의 기능을 최대한 활용할 수 있도록 최적화된 Ubuntu VPS도 제공하고 있습니다.
자주 묻는 질문
Ubuntu에서 IPv6를 활성화하는 방법은?
일반적으로 Ubuntu에 IPv6를 설정하는 과정은 세 단계로 이루어집니다. sysctl.conf 파일 편집, interfaces 파일 편집, 그리고 네트워크 서비스 재시작입니다.
IPv6를 활성화하면 어떻게 되나요?
IPv6는 더 많은 기기 지원, 향상된 보안, 더 효율적인 연결 등 여러 이점을 제공합니다. 일부 구형 소프트웨어는 예상대로 동작하지 않을 수 있지만, IPv6를 활성화한 상태에서도 대부분의 네트워크는 정상적으로 작동합니다.
Linux에서 IPv6 주소를 확인하는 방법은?
IPv6 주소와 기본 라우트를 확인하는 일반적인 Unix 명령어는 다음 두 가지입니다:
- ifconfig -a를 실행하고 inet6 항목을 찾아 IPv6 주소를 확인합니다.
- netstat -nr를 실행하고 inet6 또는 Internet6 등의 항목을 찾아 IPv6 구간을 확인한 후, default 또는 :: 또는 ::/0 을 찾습니다.
IPv6를 사용하면 인터넷 속도가 빨라지나요?
일부 웹 및 클라우드 서비스 업체들이 IPv6와 IPv4의 속도를 측정한 결과, IPv6에서 웹사이트 로딩 속도가 중앙값 기준 5%, 상위 5% 구간에서는 15% 더 빠른 것으로 나타났습니다. 빠른 속도가 중요하다면 IPv6를 사용하는 것이 유리합니다.



토론
댓글
토론에 참여하려면 로그인하세요.