Cloud VPS を作成するには、2つの方法があります。1つ目は
Cloudzy ウェブサイトで Cloud VPS プランの 1 つを選択することで
注文を入力する方法です。2つ目は Cloudzy パネル内で、
目的の仕様で Cloud VPS をデプロイする方法です。どちらの方法でも、柔軟な価格で
目的の VPS を取得できます。以下のセクションでは、
各方法をステップバイステップで案内し、選択できるようにします
要件と好みに最適なプランを説明します。
1. クラウドを閲覧
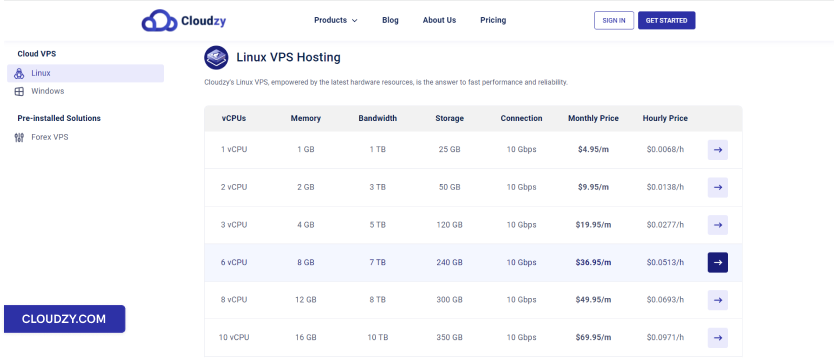
価格ページからのVPSプラン
ステップ1:お好みを選択してください
プラン
プランを探索 Cloudzy 価格ページ そして選択
ニーズに合ったプランを選択できます。この例では、8 GB RAM を選択しています。
Linux VPS.
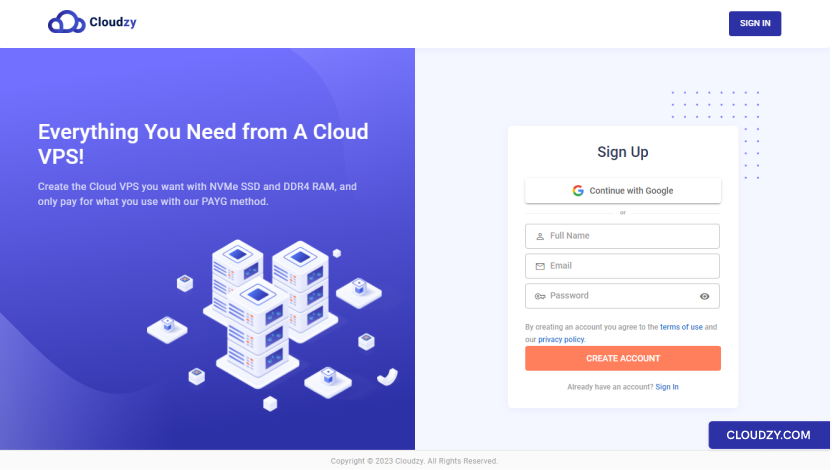
ステップ2:アカウントを作成
ご注文を完了する前に、アカウントを作成する必要があります。手順は以下の通りです。
登録フォームにお名前、メールアドレス、パスワードを入力してください
強力なパスワード。または Google アカウントでサインアップすることもできます。
選択する Googleで続行 オプション

ステップ3:
サーバーの場所、OS、詳細オプションを選択
アカウントにログインすると、以下のことができます:
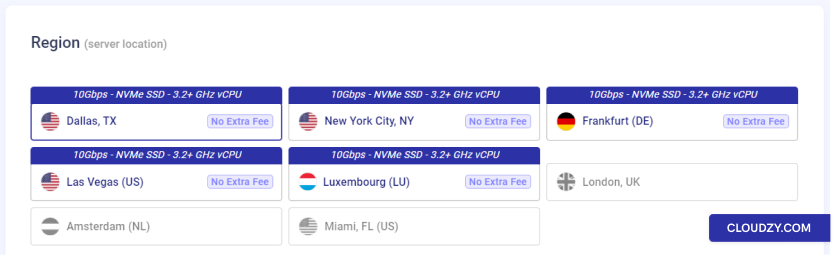
サーバーの場所を選択
に 地域 (サーバーロケーション) セクションで選択してください
Cloud VPS を作成するリージョンを選択してください。
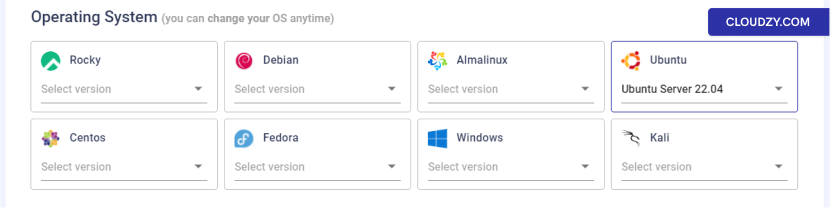
b. クラウド VPS のオペレーティングシステムを選択する
次に、使用するオペレーティングシステムのバージョンを選択できます
使用する
注意: いつでも好きなときにOSを変更できます。
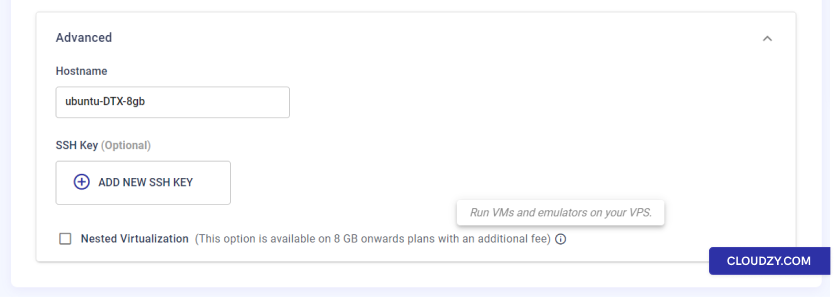
c. 詳細オプション(オプション)
Cloud VPS に割り当てられるホスト名を選択できます。
デフォルトでは、作成プロセスが VPS に強力なパスワードを割り当てます
当社のデータベースに保存されることはありません。ただし、SSHの使用をお勧めします
VPSを管理するためにパスワードベースのログインの代わりにキーペアを使用します。もし
SSH キーの使用も推奨しています。このセクションで SSH キーを追加できます。
確認できます ネストされた仮想化 チェックボックス
(8GB プラン以上のみ)、VM とエミュレーターを実行したい場合
あなたのCloud VPS。
デプロイ今すぐ実行
これらの設定をすべて完了したら、次をクリックできます
今すぐデプロイ ボタン
ステップ 4: クレジットを追加
クレジットが足りない場合は、 残高不足
ポップアップが表示されるので、クリックしてください に追加
クレジット.
ステップ 5: 支払い方法と
クーポン
クラウドをデプロイするには、まずアカウント残高にチャージする必要があります。
VPS。以下に記載されているように 残高不足 ポップアップ内
前のステップで、追加できるクレジットの最小額は最小クレジット額です
5日間の利用に必要な額です。チャージしたい金額を入力できます
アカウントで設定するか、プリセットから選択できます。クーポンをお持ちの場合は、
それらを追加してください クーポン セクション。最後に、あなたは
お好みの支払い方法を選択してクリックできます。
精算 支払いゲートウェイに進むボタン
ページ。
ステップ 6: Cloud VPS をデプロイする
お支払いが確認されると、Cloud VPS がデプロイされます
自動的に実行されます。選択したOSに応じて、デプロイメントは
プロセスには最大5分かかる場合があります。
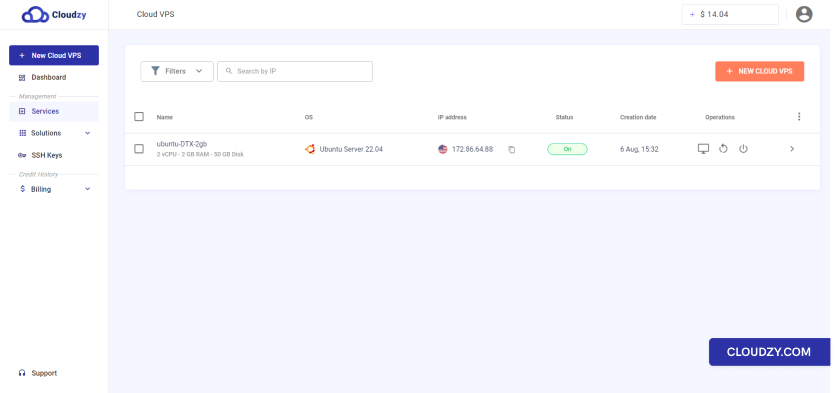
ステップ7: Cloud VPSへのアクセス
デプロイプロセスが完了したら、Cloud VPSにアクセスできます
(から サービス サイドバーに表示されます。以下の情報は
作成した Cloud VPS はメールで送信されます。
注意: Cloud VPS を保護するため、提供されたパスワードは
安全で、プライベートな場所に保管してください。
2. Cloud VPSをデプロイする
パネル内
クラウド仮想プライベートサーバーは管理と保守が簡単です
Cloudzy パネルで、独自の Cloud VPS を作成するには
これらのステップに従ってください:
ステップ1: アカウントを作成する
アカウントがない場合は、以下で作成できます Cloudzy作成したら
アカウントを使用するには、アカウントのクレジット残高を以下で増やす必要があります
あなたが望むCloud VPSを作成するために(これについては説明します
さらに詳しく)。
ステップ2: に移動
新しい Cloud VPS タブ
アカウントにログインした後、以下に移動してください 新しい
Cloud VPS タブ。
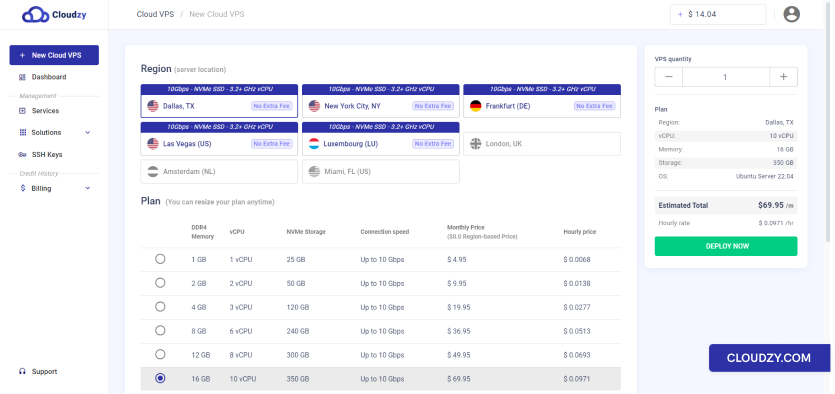
ステップ 3: 選択
Cloud VPS 仕様
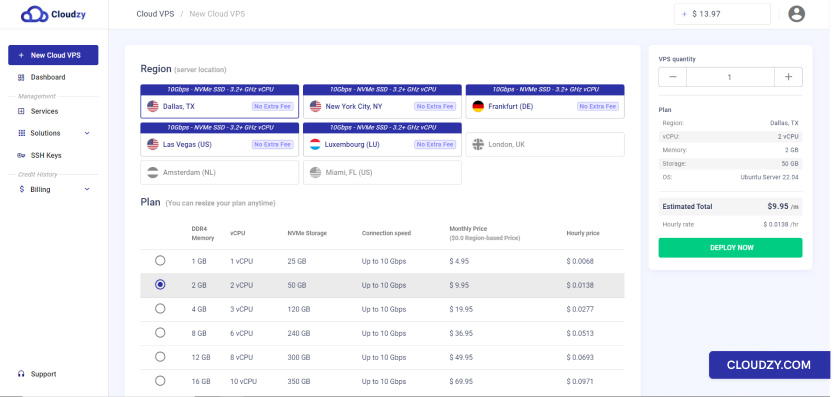
サーバーの場所を選択
に 地域 (サーバーロケーション) セクションで選択してください
Cloud VPS を作成するリージョンを選択してください。
b. 希望するプランを選択
仕様
メモリ (RAM) の指定された容量のプランを選択できます
ストレージ、および Cloud VPS に必要な CPU コア。
注意: いつでも選択されたプランをリサイズできます
欲しい
c. オペレーティングシステムを選択する
次に、使用したいオペレーティングシステムを選択できます。
注意: いつでも好きなときにOSを変更できます。
d. 詳細オプション(オプション)
Cloud VPS に割り当てられるホスト名を選択できます。
デフォルトでは、作成プロセスが VPS に強力なパスワードを割り当てます
当社のデータベースに保存されることはありません。ただし、SSHの使用をお勧めします
VPSを管理するためにパスワードベースのログインの代わりにキーペアを使用します。もし
SSH キーの使用も推奨しています。このセクションで SSH キーを追加できます。
確認できます ネストされた仮想化 チェックボックス
(8GB プラン以上のみ)、VM とエミュレーターを実行したい場合
あなたのCloud VPS。
今すぐデプロイ
これらの設定をすべて完了したら、次をクリックできます
今すぐデプロイ 右側のサイドバーのボタンをクリックします。
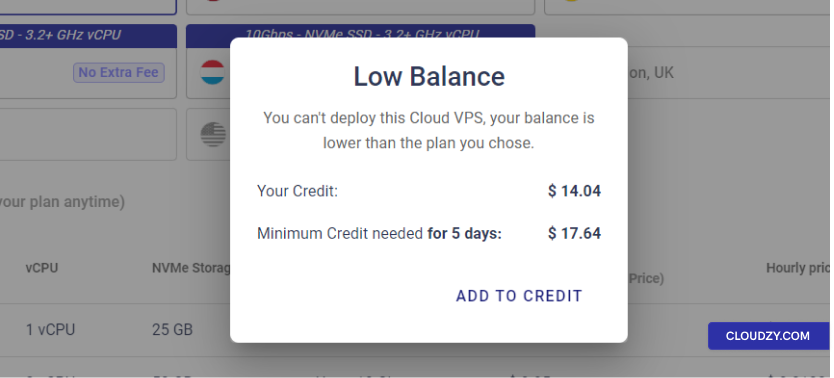
ステップ 4: クレジットを追加
クレジットが不足している場合、 残高不足 ポップアップ
表示されますのでクリックできます クレジットに追加.

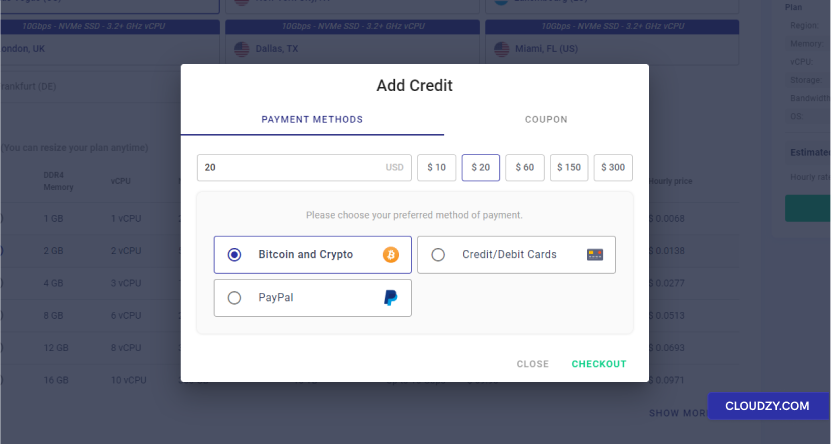
ステップ5: 支払い方法
とクーポン
クラウドをデプロイするには、まずアカウント残高にチャージする必要があります。
VPS。以下に記載されているように 残高不足 ポップアップ内
前のステップで、追加できるクレジットの最小額は最小クレジット額です
5日間の利用に必要な額です。チャージしたい金額を入力できます
アカウントで設定するか、プリセットから選択できます。クーポンをお持ちの場合は、
それらを追加してください クーポン セクション。最後に、あなたは
お好みの支払い方法を選択してクリックできます。
精算 支払いゲートウェイに進むボタン
ページ。

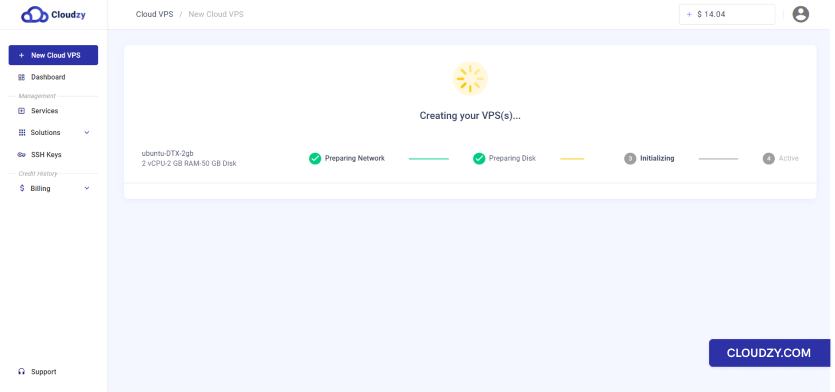
ステップ6: クラウドをデプロイする
VPS
お支払いが確認されると、Cloud VPS がデプロイされます
自動的に実行されます。選択したOSに応じて、デプロイメントは
プロセスには最大5分かかる場合があります。

ステップ7:クラウドへのアクセス
VPS
デプロイメント プロセスが完了すると、Cloud VPS にアクセスできます
完了します。作成した Cloud VPS の情報が送信されます
メールでお送りします。
注意: Cloud VPS を保護するため、提供されたパスワードは
安全で、プライベートな場所に保管してください。

このガイドがCloud VPSサービスの購入を簡単にするのに役立つことを願っています
必要な場合は、プロセス中に質問がある場合や問題が発生した場合
注文プロセス、お気軽に チケットを作成
当社のカスタマー サポート チームにお問い合わせください。
同じカテゴリー デプロイと設定