このガイドではRemote中のオーディオ有効化のプロセスについて説明します
デスクトップセッション。ときには、ユーザーが視覚的にインタラクションする必要があります。そして
リモートシステムを使って音声で対応します。このような場合、音声は
リモートコンピューターからローカルデバイスへの送信は非常に
重要です。例えば、リモートシステムのサウンドにアクセスできると、
遠隔サポートまたは協働環境における生産性とコミュニケーション
環境の設定方法を説明します。以下では、両方の
リモートでのシームレスなオーディオ統合のためのリモートマシンとローカルマシン
デスクトップセッション。
前提条件
プロセスを開始する前に、次の前提条件を確認してください
満たされている:
-
リモートデスクトップアクセス: リモートが必要です
ローカルコンピュータとリモートコンピュータ間でデスクトップアクセスを設定します。 -
管理者権限: 必ず確認してください
リモートおよびローカルマシンのシステム設定を変更するための管理者権限
設定 -
サウンドハードウェア ローカルコンピュータは以下が必要です
スピーカーやマイクなどのオーディオハードウェア。 -
ソフトウェアをアップデート: ローカルが確実に
システムは最新のオペレーティングシステムパッチとドライバで更新されています。
特に音声デバイス向け。 -
基本的な技術知識: 使い慣れた
リモートデスクトップインターフェースと基本的なコンピューター設定(サウンドなど
設定)。
ステップ
1: リモートコンピュータでリモートオーディオを有効にする
まず、VPSへのリモートデスクトップ接続を確立します。その後
接続されている場合は、以下の手順に従ってください:
- リモートコンピュータの音声設定にアクセス:
右クリックしてください 音声アイコン システムトレイ内で
選択 音声。この操作で 音
設定 オーディオデバイスを管理できるウィンドウ。
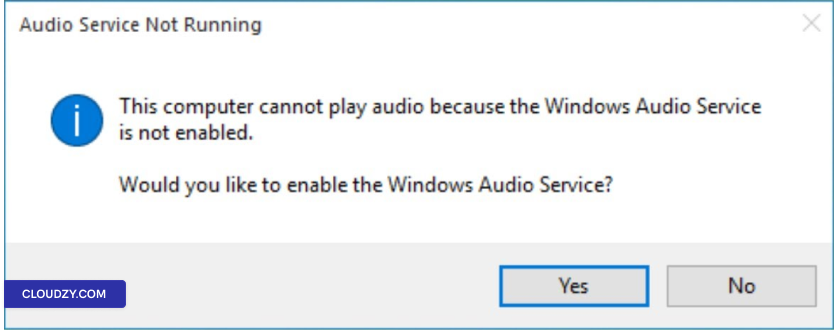
- オーディオサービスプロンプトに応答:
オーディオサービスが実行されていないというメッセージが表示された場合は、
クリックする あり Windows オーディオサービスを有効にするため。この
確実に音声再生のための必要なオーディオサービスを
録音は稼働中です。
- オーディオサービスを手動で有効にする:
必要に応じて、オーディオサービスを手動で開始または再開します。押してください
Windows キー + R、入力 services.msc,
そして押してください Enter。検索 Windows Audio
リストから右クリックして選択します 開始 or
再起動.
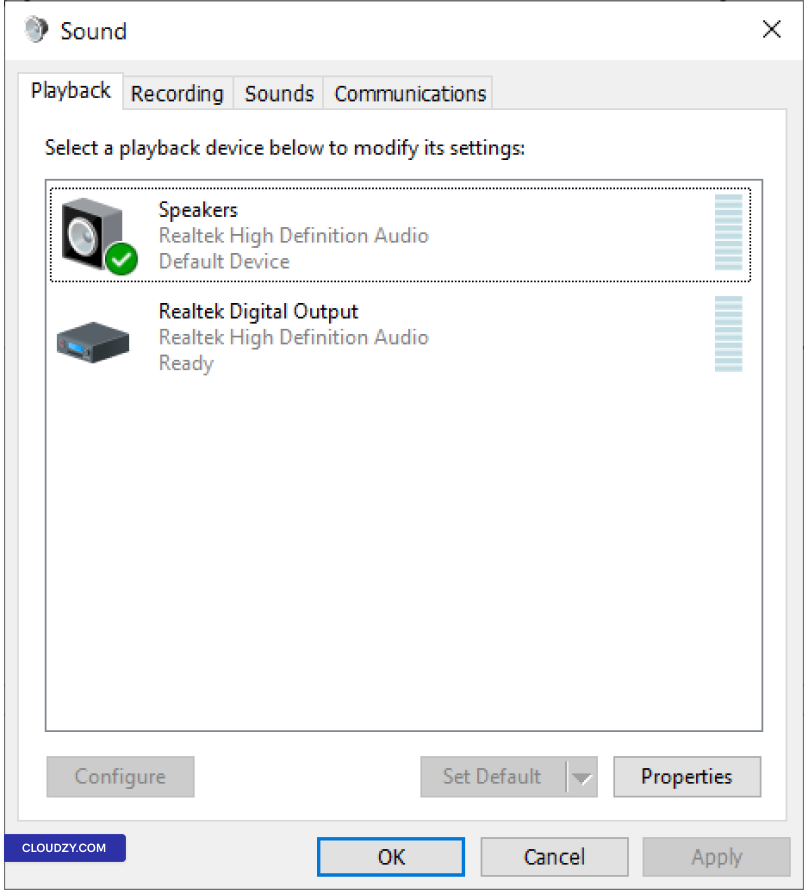
- デフォルト再生及び録音デバイスを設定:
以内に 音 設定、以下の
再生 タブで、正しい再生デバイスが
有効になっており、デフォルトに設定されていることを確認してください。同様に、
記録 タブで、デフォルト録音を有効にして設定します
必要に応じてデバイス。
これらの手順を完了することで、リモートコンピュータが
オーディオの出力と入力を処理できるよう設定されます。
ステップ2:
リモートデスクトップクライアント設定の構成
- リモートデスクトップ接続クライアントを開く:
ローカルコンピュータで、 リモートデスクトップ
Connection クライアントを開きます。スタートメニューの
Windows Accessoriesから見つけるか、以下を入力して起動できます
mstsc の中に 実行する ダイアログ (Windows キー +
R).
- 高度な設定にアクセス:
接続する前に、クリックしてください オプションを表示 明かす
詳細設定。インターフェースが拡張され、オーディオを含む
設定オプション
- ローカルリソースに移動:
に移動 ローカルリソース タブ。このタブには
ローカルデバイスとリソースの追加設定が表示されます。
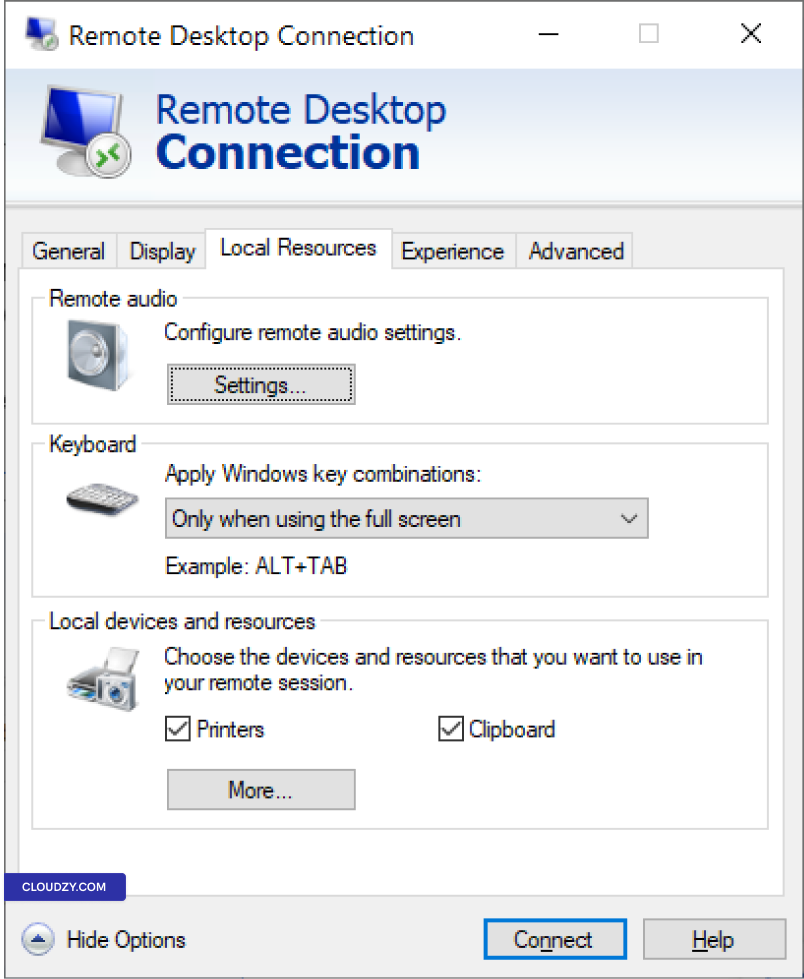
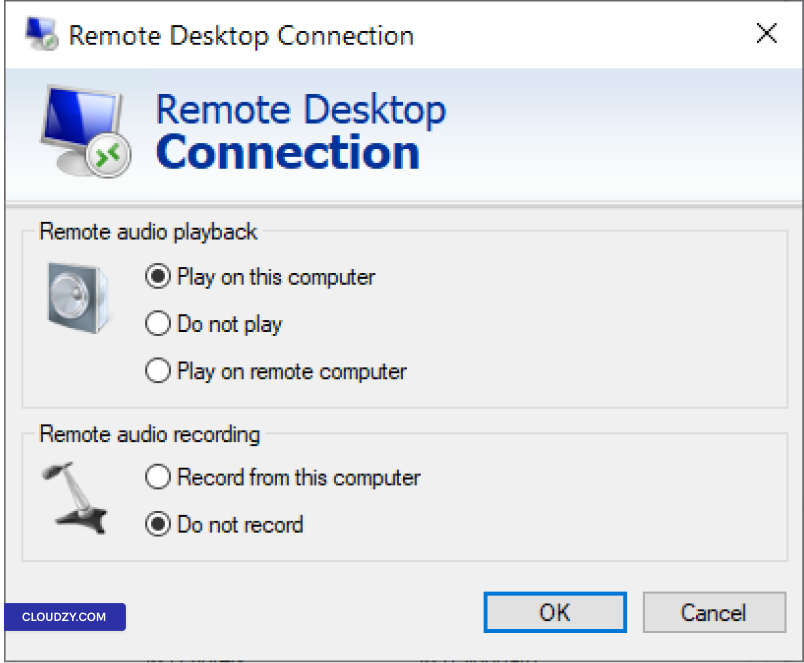
- リモートオーディオ設定を構成:
クリックしてください 設定 ボタンの下
リモートオーディオ セクション
ここから選択 このコンピュータで再生 音声用
再生。これでローカルコンピュータのスピーカーがオーディオを再生します。
オプションとして、ローカルコンピュータに接続したマイクを
リモートコンピュータのオーディオ入力に使用する場合は、 記録
このコンピュータから.
- 保存して接続:
これらの設定を保存してからリモートに接続してください
いつもどおりコンピューターを使用します。
これらの設定調整により、リモートデスクトップクライアントで
そのオーディオはリモートコンピュータからローカルマシンに送信されます
リモートデスクトップセッション中に選択します。詳しい情報や
その他のサポートが必要な場合は、サポートチームまでお気軽にお問い合わせください 送信する
チケット.
同じカテゴリー Windows / RDP