Cloudzy VPS で One-Click App を使用して PostgreSQL をデプロイすることは
堅牢なデータベースを構築するための迅速かつ直接的な方法
環境について説明します。このガイドではリージョン選択から
VPS設定を確認してPostgreSQLにアクセスしています
インストール完了まで、各ステップを順を追って説明します。新規開発用データベースのセットアップから、
テスト、本番環境での利用まで、この包括的なチュートリアルがセットアップを確実にサポートします。
あなたの PostgreSQL サーバーは稼働中で、セキュアな状態で、準備万端です
時間がかかりません。
前提条件
始める前に、以下の準備ができていることを確認してください:
-
Active Cloudzy Account: アクティブな Cloudzy アカウント: 確認してください
アクティブな Cloudzy アカウント。 -
利用可能なサービスクレジット: 確認してください
Cloudzy アカウントに新しい VPS をデプロイするのに十分なクレジットがある。 -
オペレーティングシステム互換性: PostgreSQL
One-Click App は以下の Ubuntu バージョンに対応しています: Ubuntu
Server 20.04、Ubuntu Server 22.04、およびUbuntu Server 24.04。
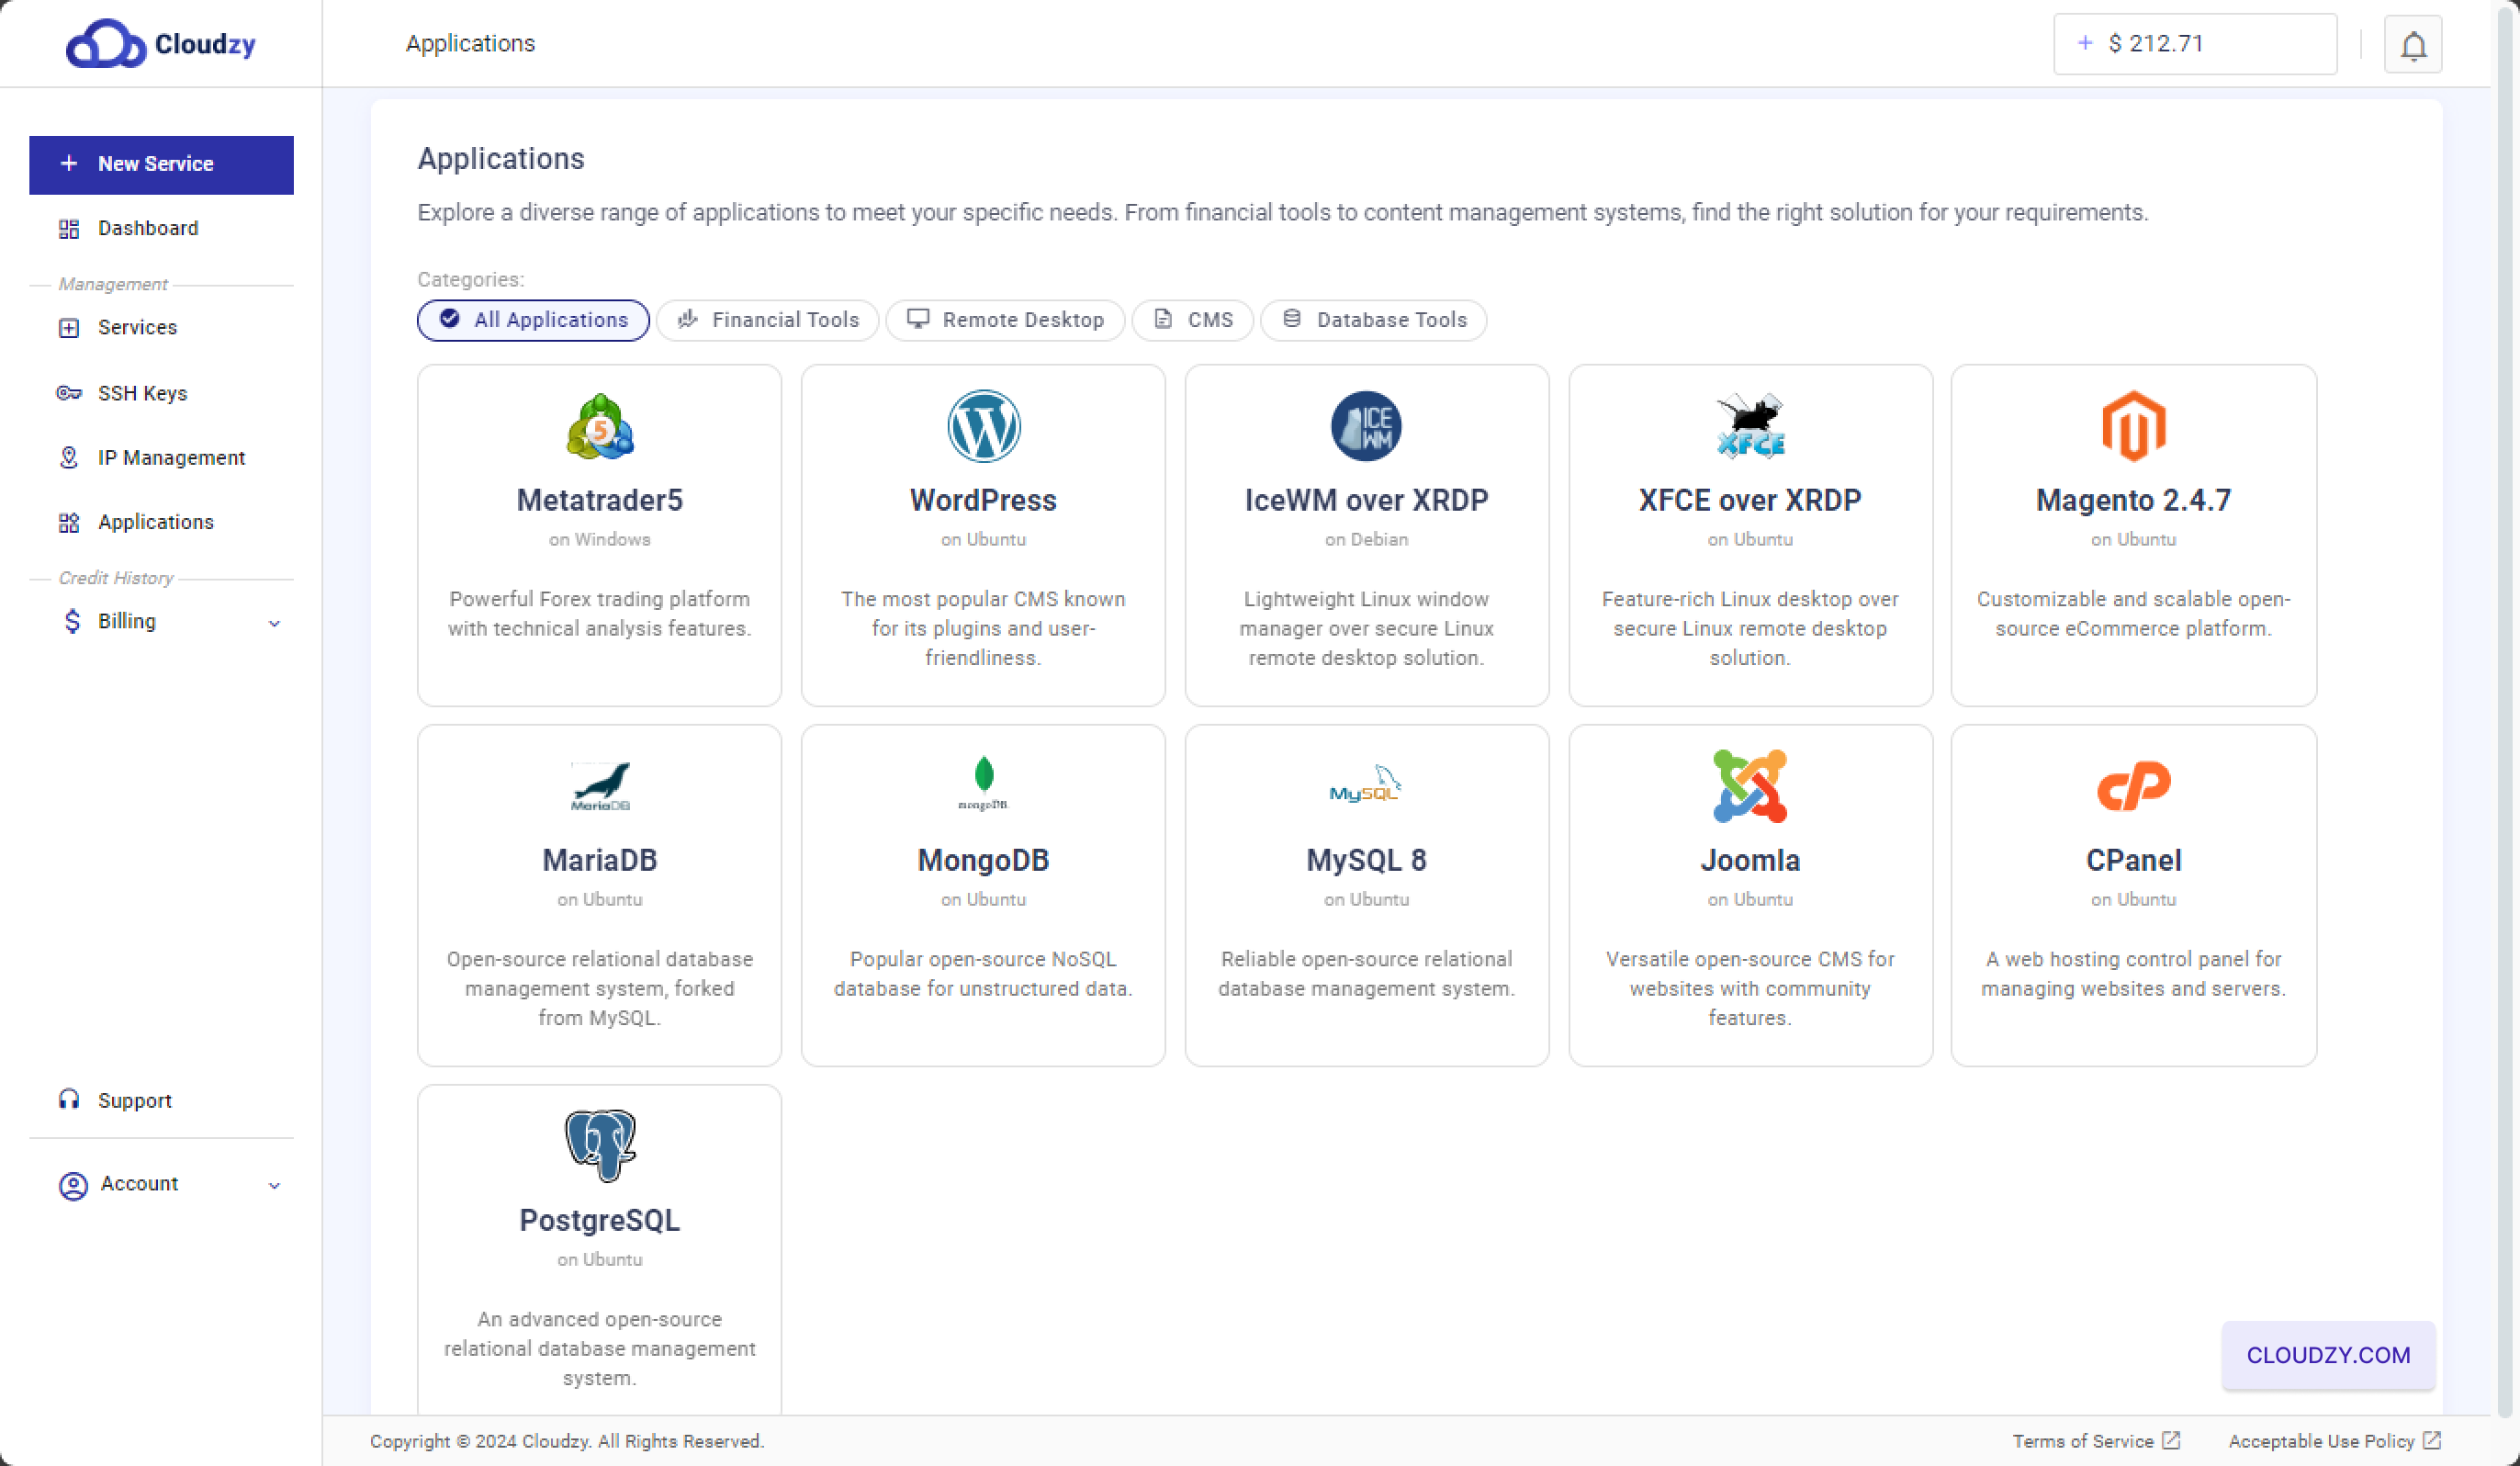
ステップ1:
アプリケーションメニューからPostgreSQLを選択してください
-
Cloudzy アカウントにログイン: ログイン開始
Cloudzy コントロールパネルを使用してアカウントにログインしてください。 -
アプリケーションに移動: に移動
左側のメニューの「アプリケーション」セクション。 -
PostgreSQLを選択: アプリケーションセクションで、
「すべてのアプリケーション」カテゴリーで以下を探して選択してください
PostgreSQL アプリケーション。次のページに進みます
ステップで、VPS を PostgreSQL で設定できます。
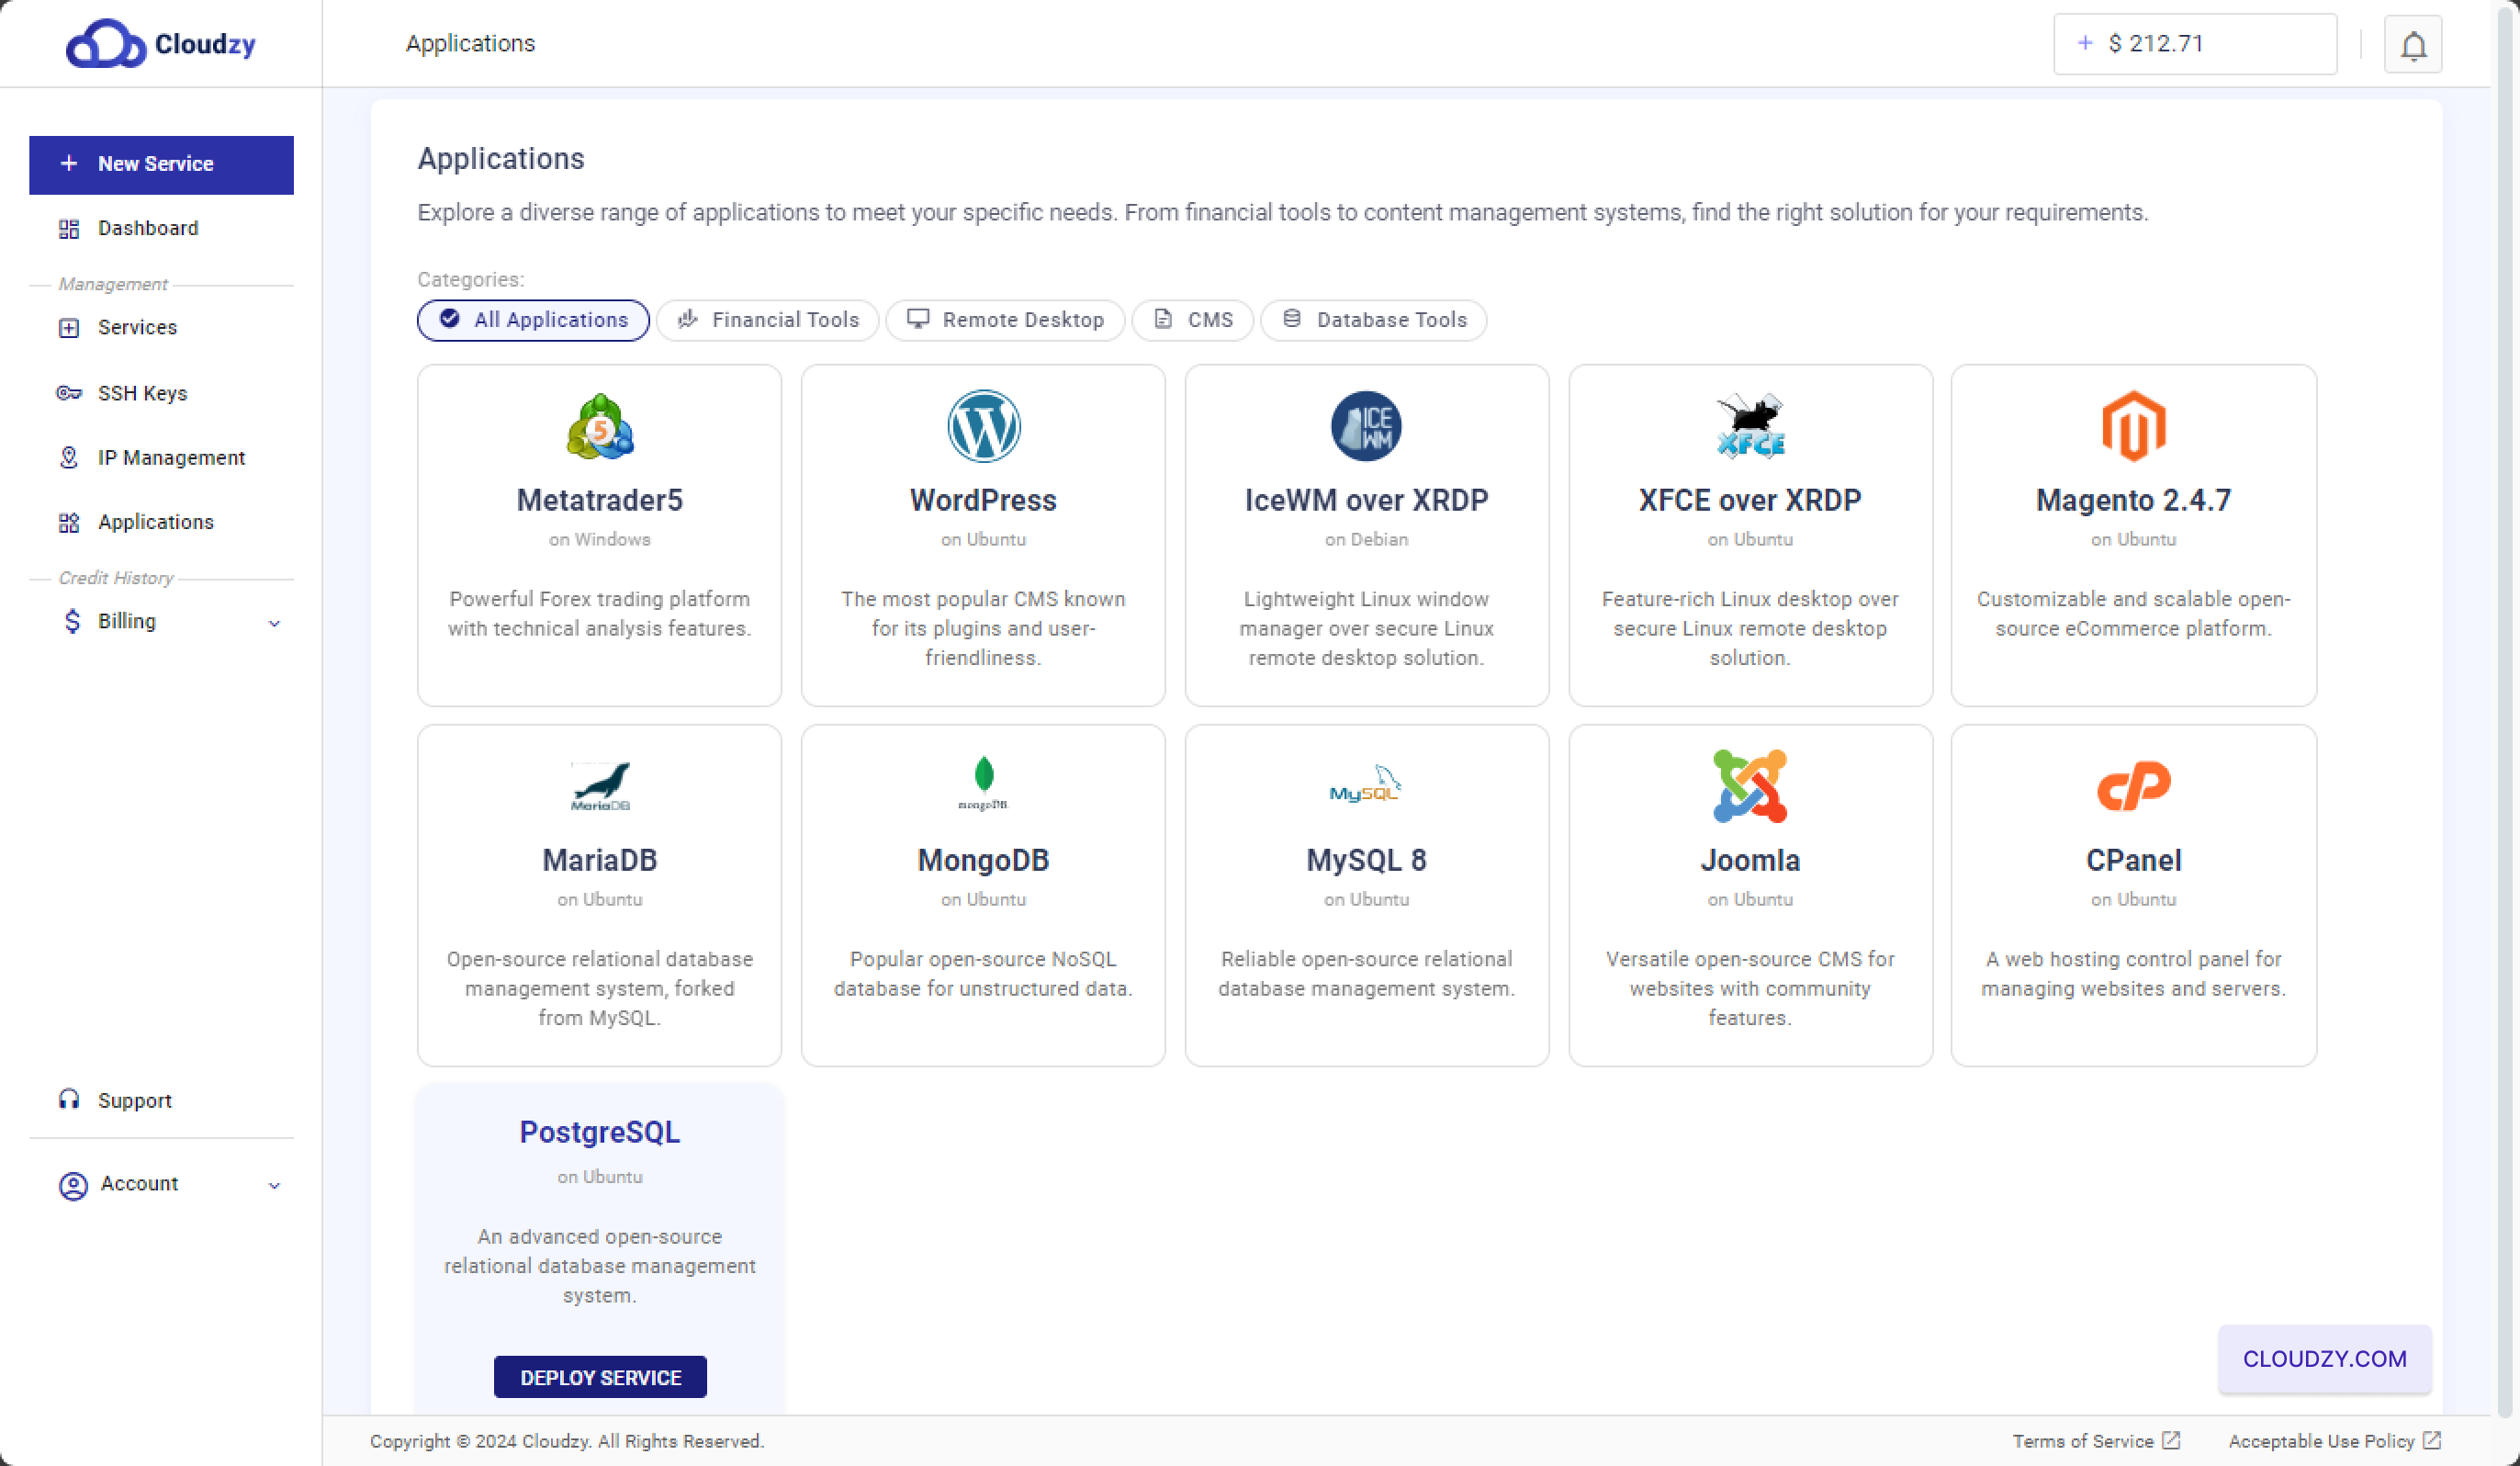
- サービスをデプロイをクリック: 青色の「Deploy Service」
PostgreSQL アプリケーションを選択すると、ボタンが表示されます。クリックしてください
このボタンをクリックして PostgreSQL VPS のセットアップを開始します。
ステップ 2: 設定を構成する
VPS
-
サーバーの場所を選択: に
設定ページで、サーバーのロケーションを選択するよう求められます
利用可能なオプションから選びましょう。最高のパフォーマンスを得るには、
あなたのオーディエンスがいる地域に合わせて選べます。選択肢には以下が含まれます
Miami、Las Vegas、Frankfurtなどの地域。 -
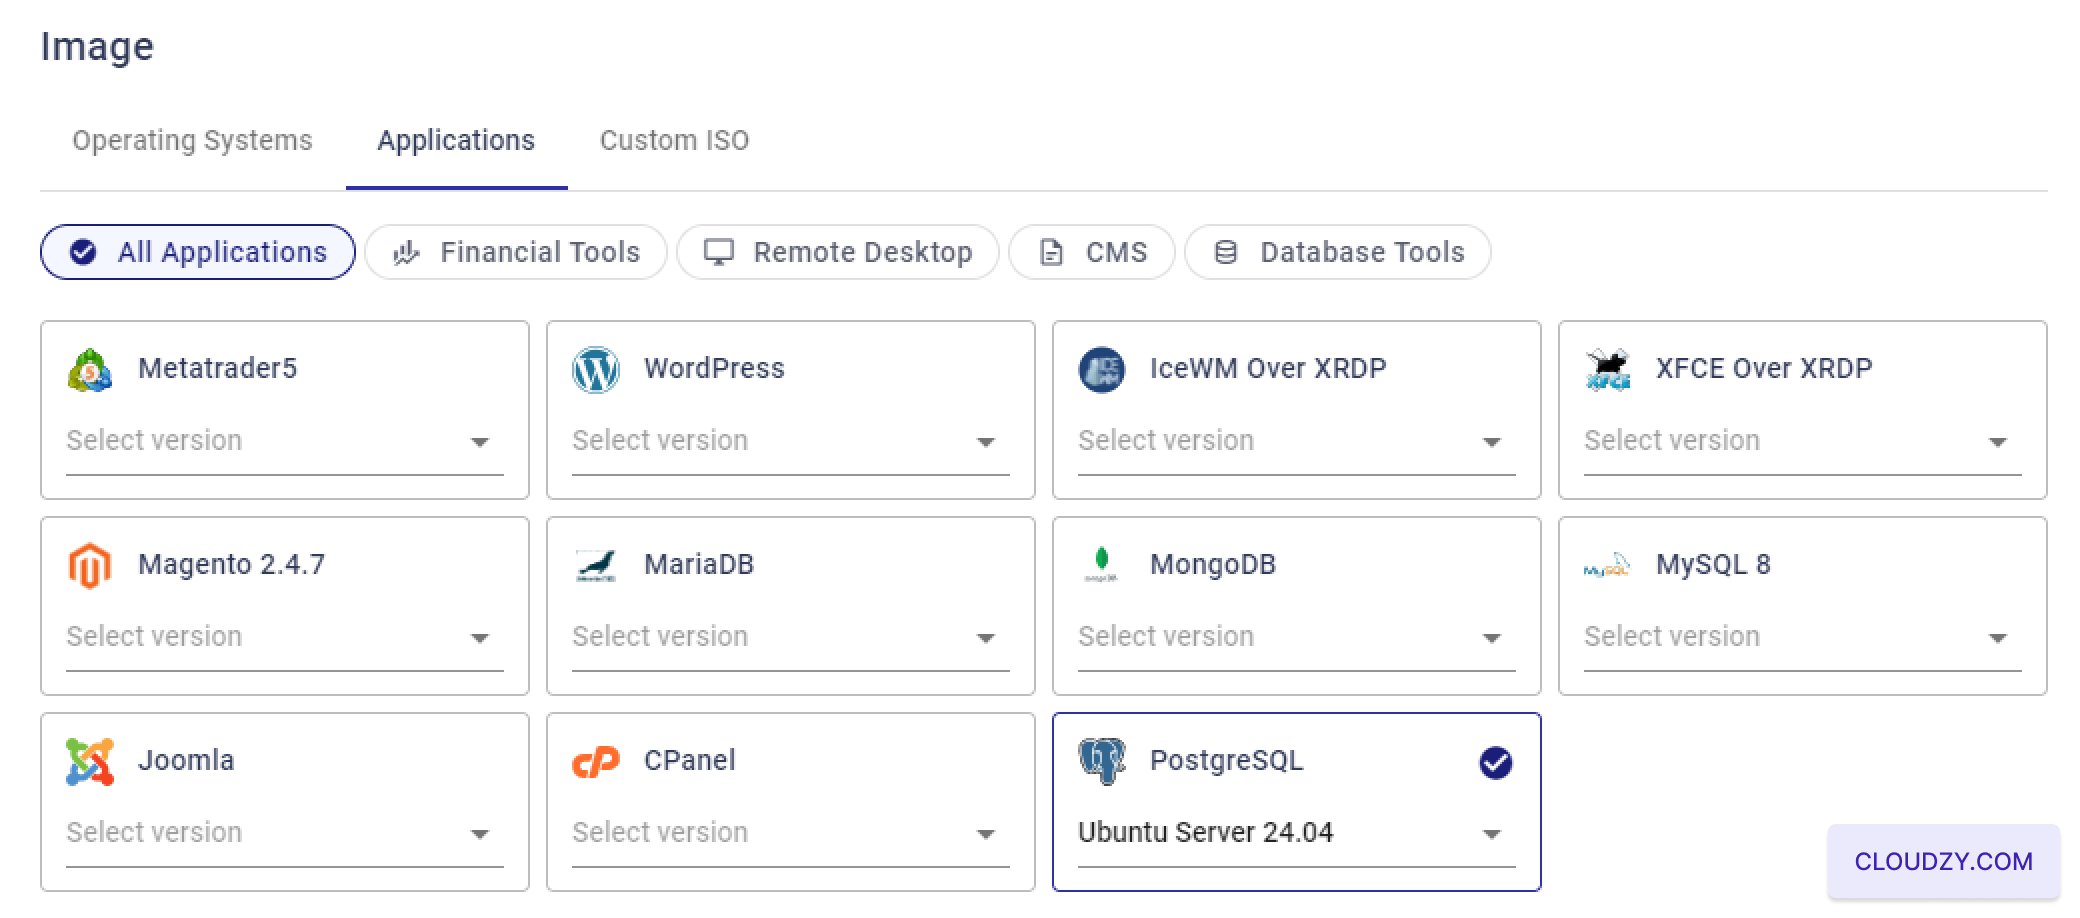
オペレーティングシステムを選択:
「イメージ」セクションで、次のオペレーティングシステムを選択します
PostgreSQL は動作します。PostgreSQL ワンクリックアプリは以下に対応しています
Ubuntu サーバー 20.04, 22.04、そして
24.04。あなたのニーズに最適なバージョンを選択してください
要件
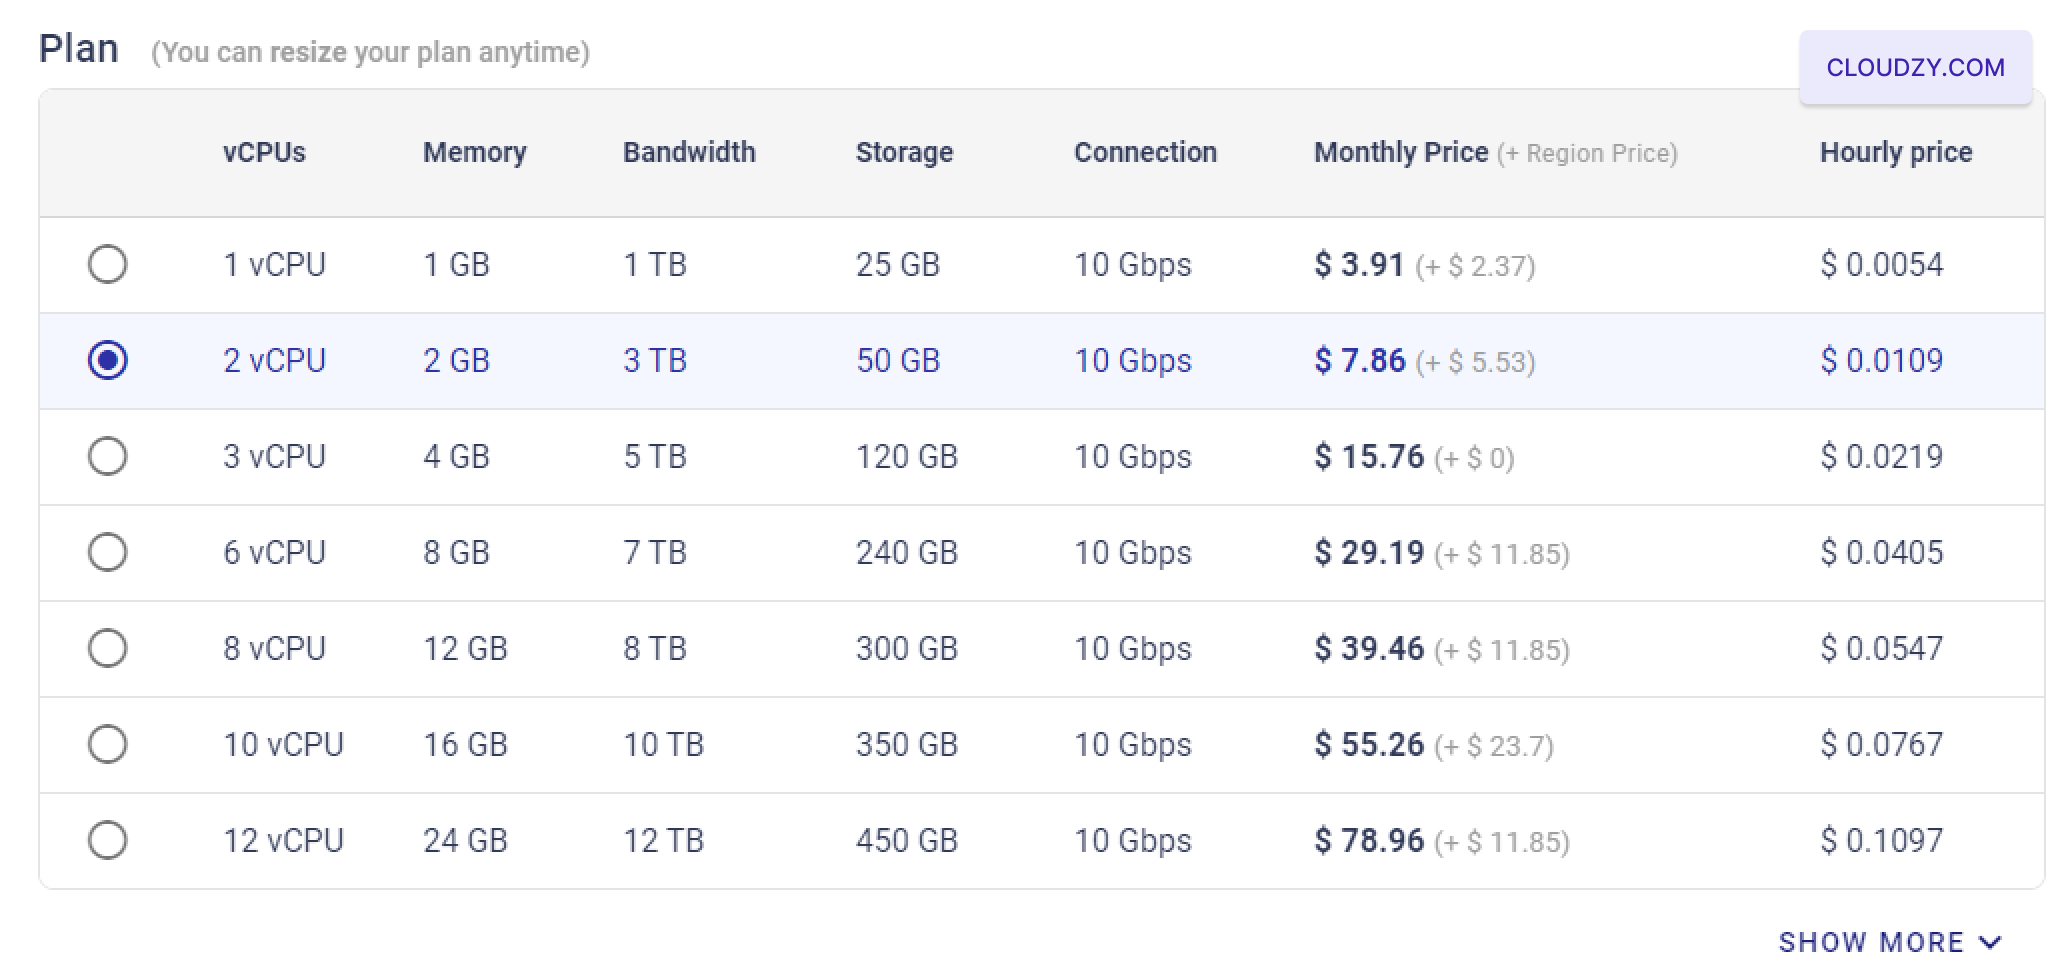
- VPSプランを選択してください: VPS プランを選択してください。
CPU、メモリ、ストレージ、帯域幅の観点から、あなたのニーズに合致しています。詳しくは
中程度の負荷であれば、2個のvCPU、2 GBのRAMを搭載したプランを選ぶのが良いでしょう。
とストレージ 50 GB。
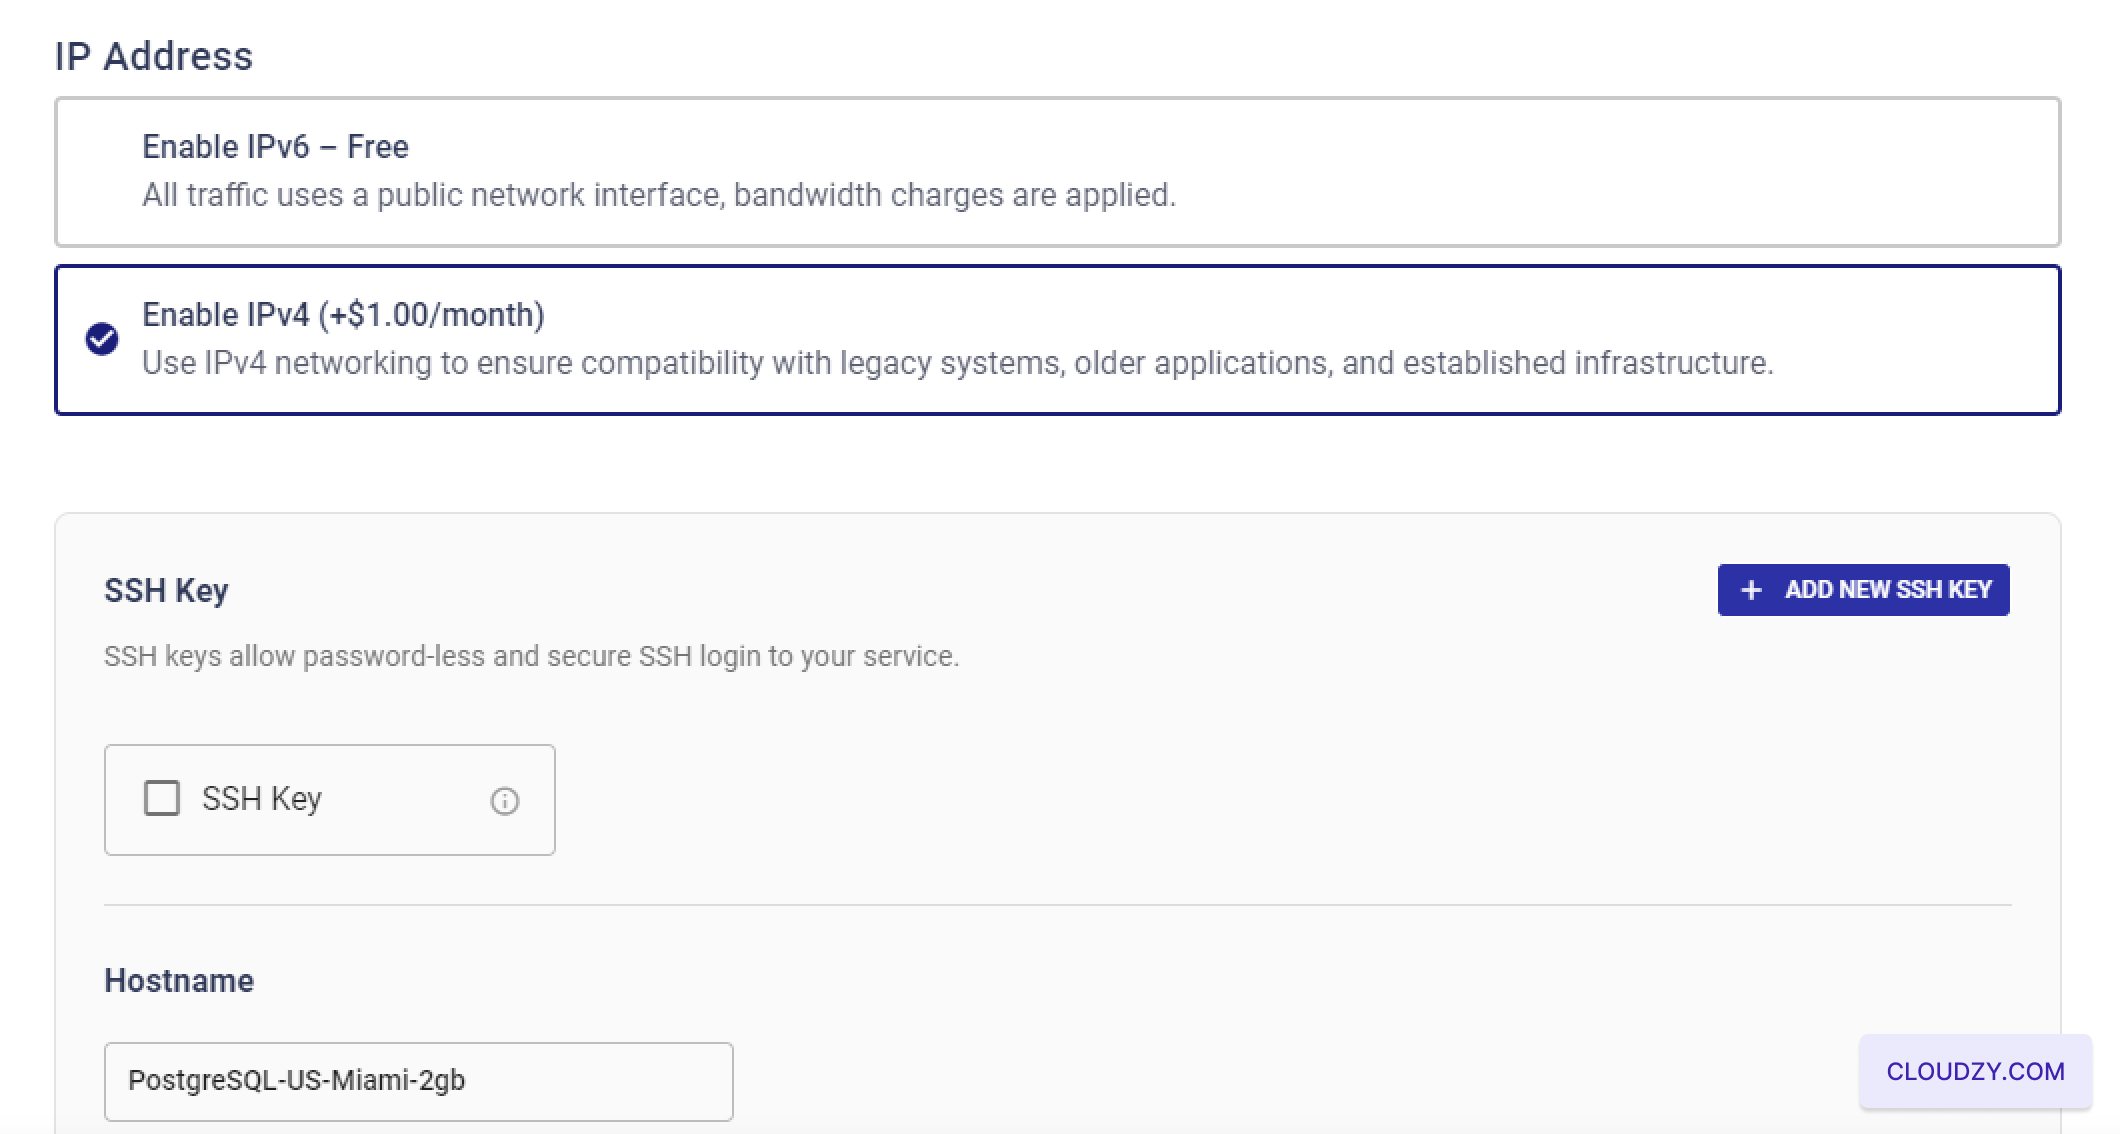
- SSH キーを設定する (オプション):
VPS に安全にパスワードなしでアクセスするには、SSH キーを追加できます
「Add New SSH Key」をクリックして進めます。セットアップまたは使用方法についてサポートが必要な場合は
SSHキー、確認してください https://cloudzy.com/kb/linux/connection/[].
SSH キーを使用しない場合は、このステップをスキップできます。また
IPv4 と IPv6 のオプションを検討してください。価格は条件によって異なる場合があります
ご選択の内容で
- ホスト名を割り当てる: VPSのホスト名を入力してください。
これは「PostgreSQL-US-Miami-2gb」のようなものか、その他のカスタム
サーバーを簡単に識別できる名前。
- ホスト名を割り当てる: VPSのホスト名を入力してください。
これは「PostgreSQL-US-Miami-2gb」のようなものか、その他のカスタム
サーバーを簡単に識別できる名前。
- レビューとデプロイ: すべて再確認してください
設定を確認し、「Deploy Now」をクリックします。
ボタンで PostgreSQL VPS のデプロイメントを開始します。システムが
その後、セットアップ処理を開始します。進行状況は
プログレスバー

ステップ3: アクセス
PostgreSQLサーバー
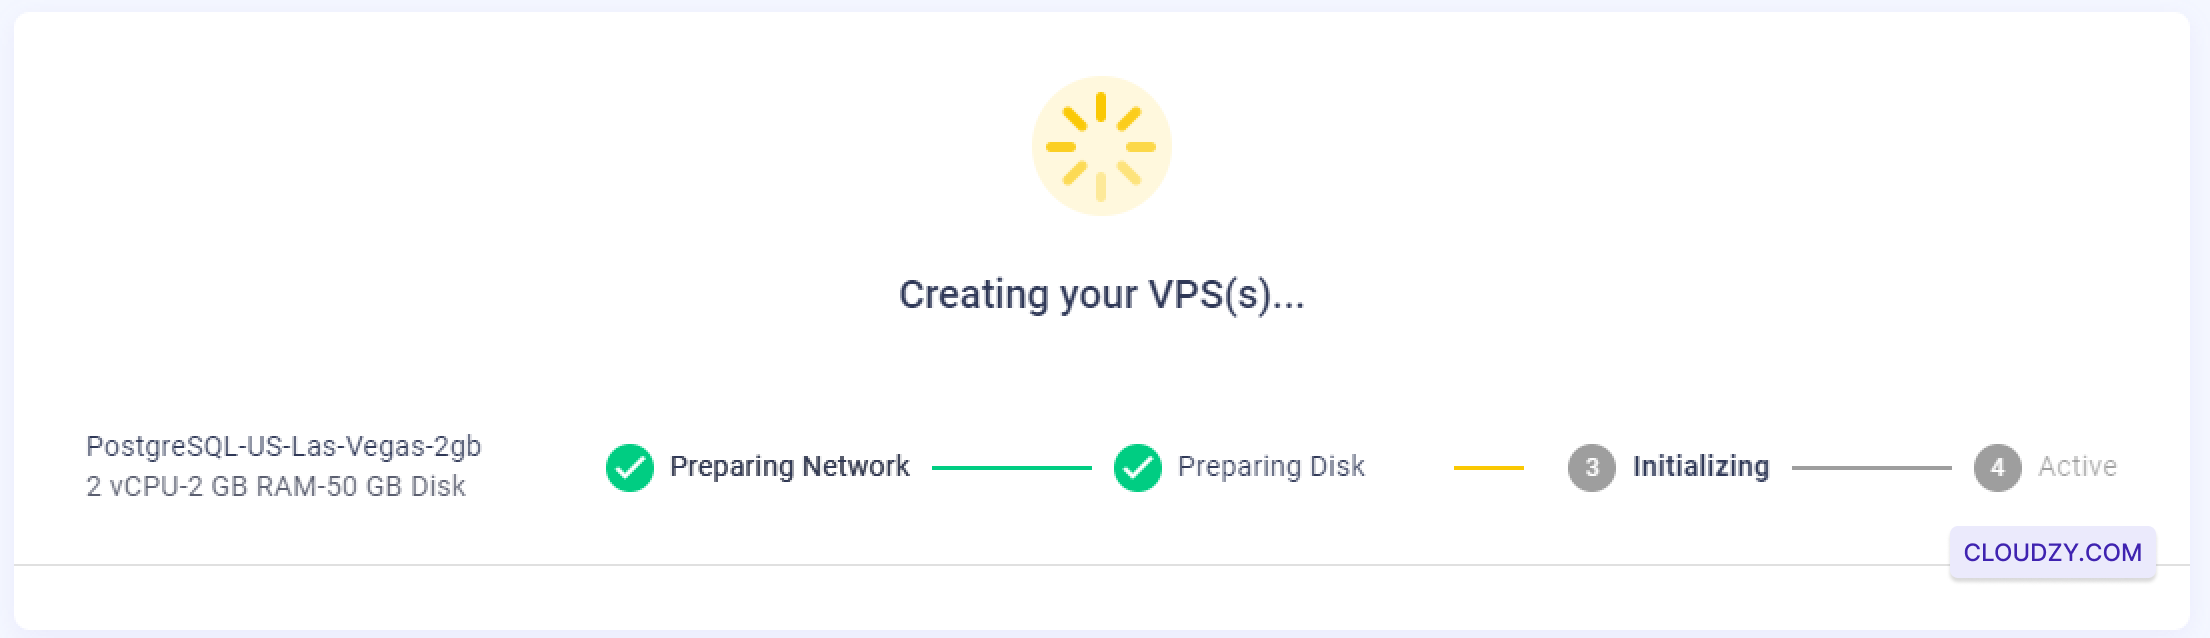
- VPS 作成を待機中: 「Deploy Now」をクリック後、
システムが VPS の作成と設定を開始します。このプロセスは
通常数分で完了し、その間、進捗状況が表示されます。
ネットワークの準備中、ディスクの準備中などのステップを示すインジケーター
「初期化中」、そして「アクティブ」。
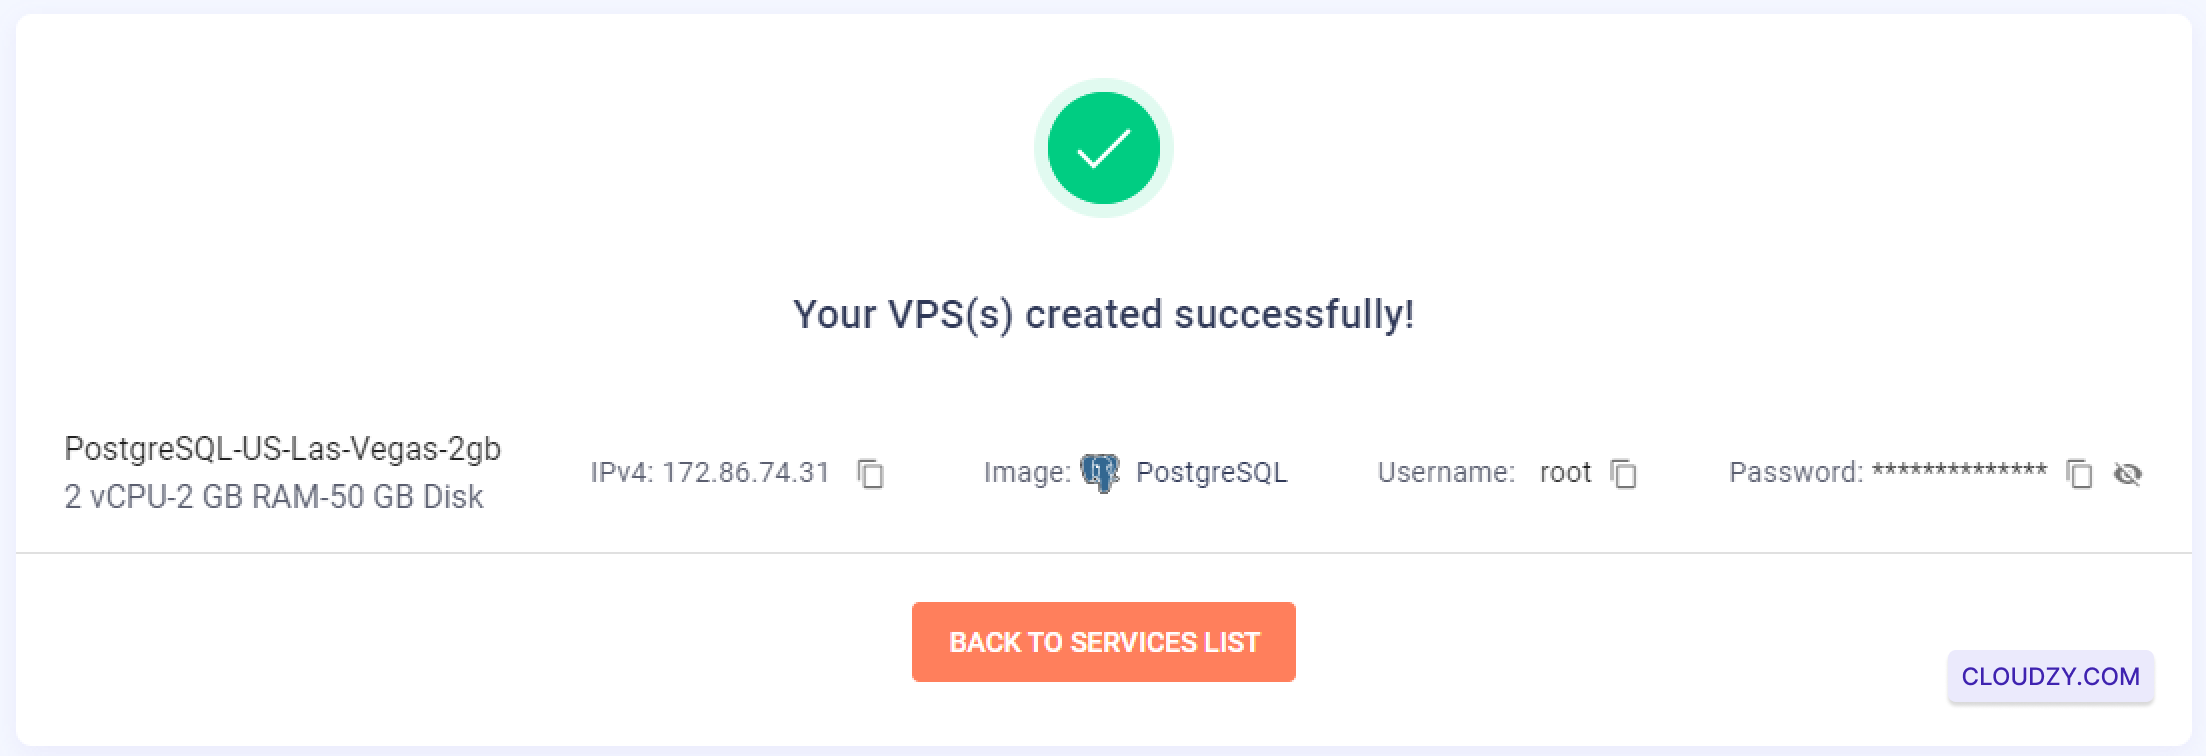
- ログイン情報を取得: VPS の作成が完了したら
完了すると、確認画面にリダイレクトされ、以下の情報が表示されます。
サーバーの IP アドレス、ユーザー名、パスワード。この情報は
PostgreSQL にアクセスするために必要となるため、必ず控えておいてください。
サーバー
-
SSH経由で接続: あなたは今、あなたのVPSに接続できます
SSHを使用して提供されたクレデンシャルでアクセスします。SSHに不慣れな場合や
接続方法のガイダンスが必要な場合は、 https://cloudzy.com/kb/linux/connection/. -
PostgreSQL のデフォルトサーバーを選択
インストール: VPS に SSH 経由で接続すると、
PostgreSQL サーバーのホストを入力するよう求められます。デフォルト
サーバー IP を使用する場合は Enter キーを押すだけです。この手順により
VPS 上で PostgreSQL の最終設定と構成が開始されます。
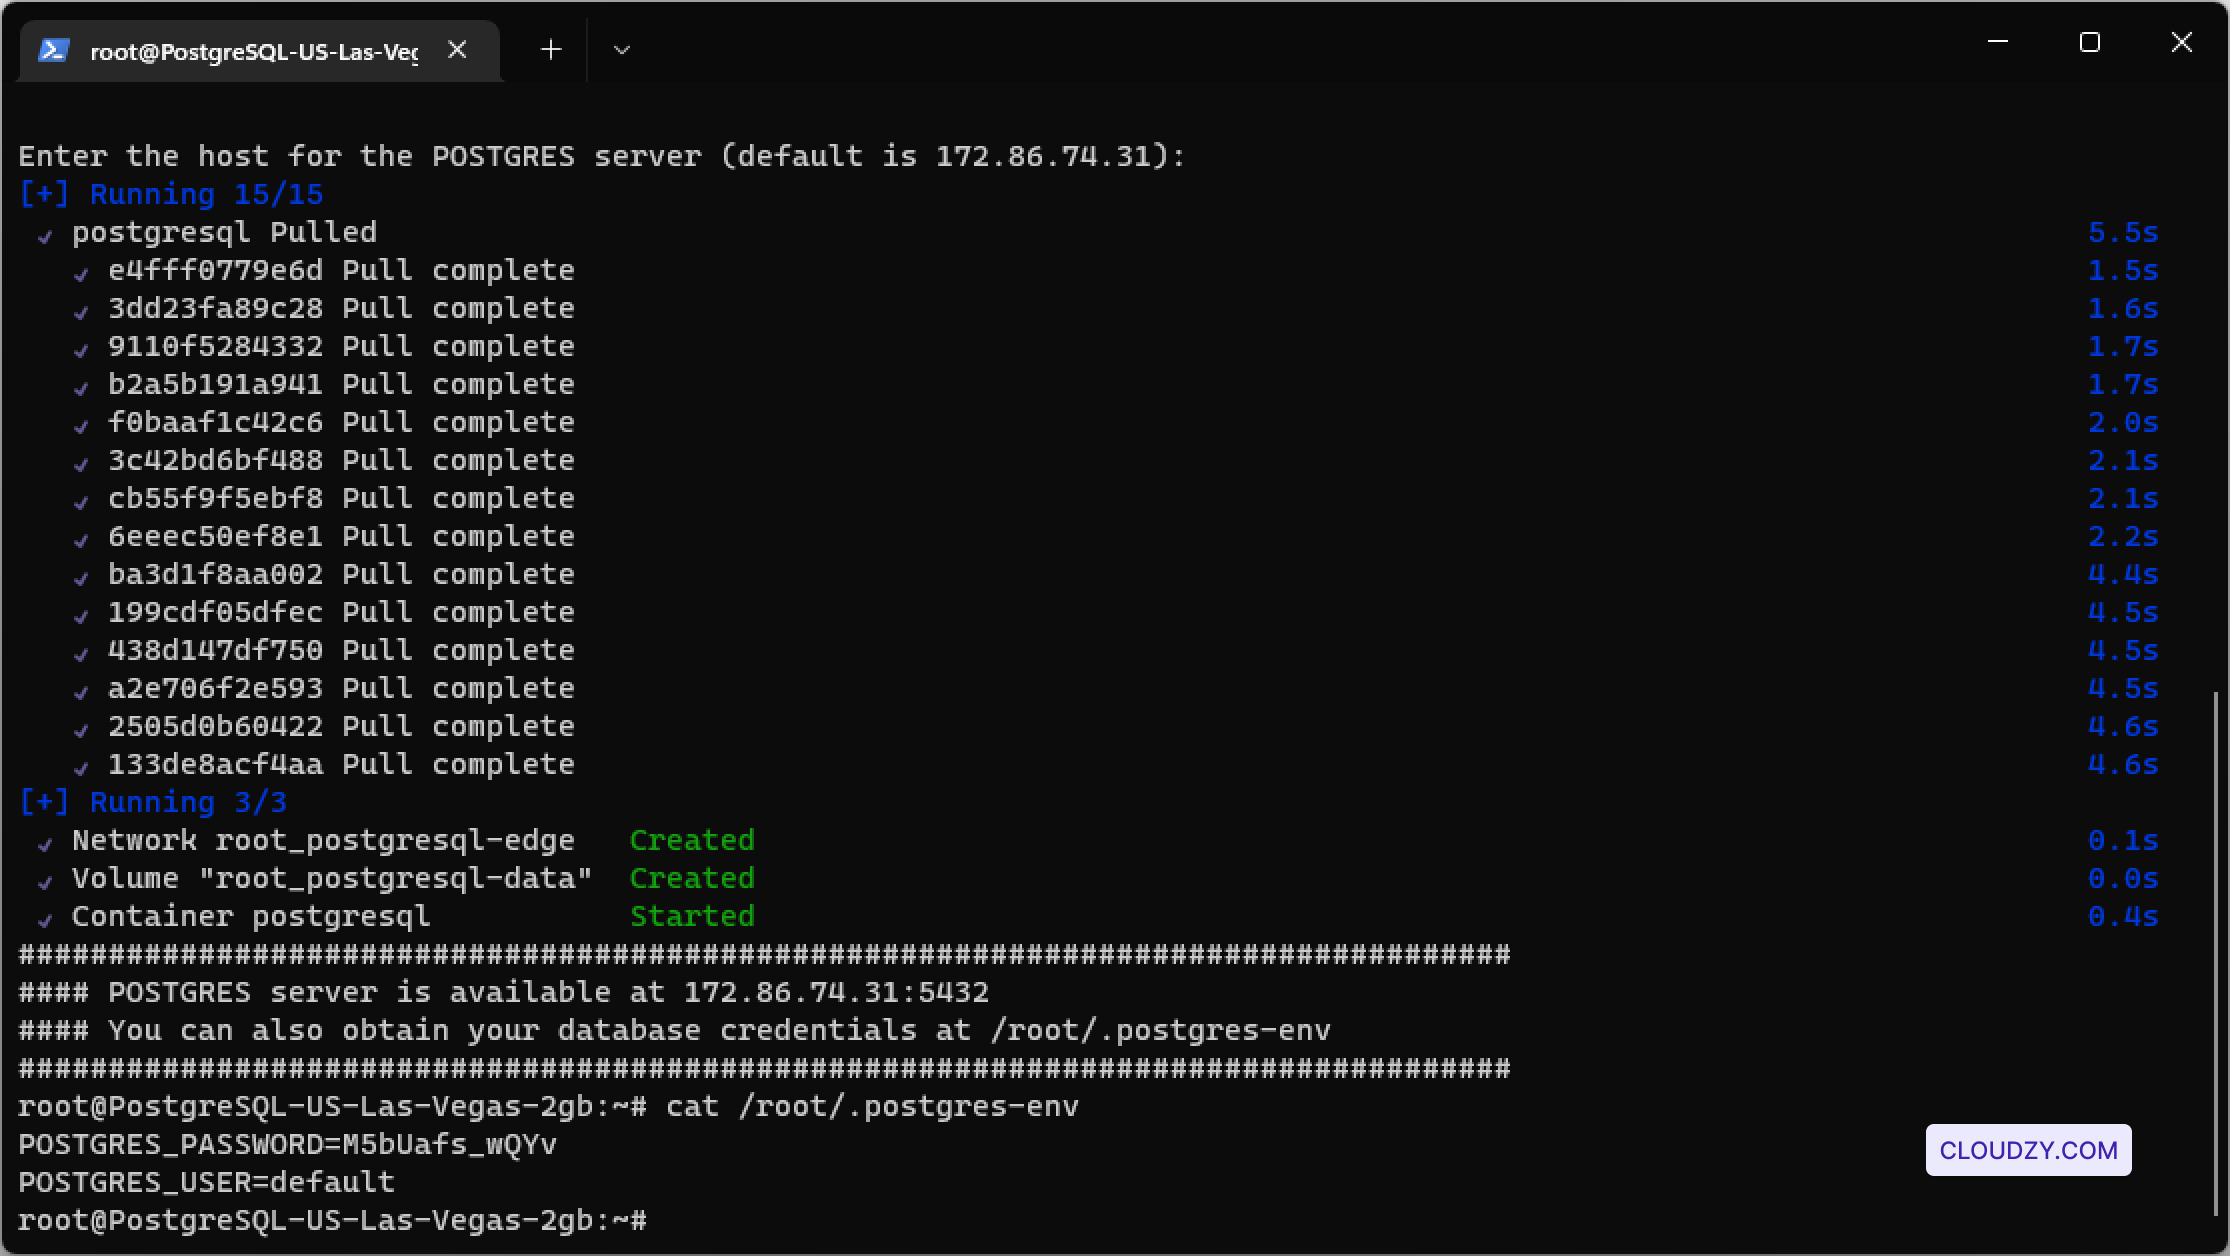
- PostgreSQLインストールの確認: 確認した後
サーバーホストが確認されると、インストールプロセスが完了し、
PostgreSQL サーバーが使用可能になります。PostgreSQL は
インストールと資格情報をアクセスして取得する
/root/.postgres-envファイル。内容を表示するには、以下のコマンドを使用します
この同じ文字列はアラビア語に「:」と翻訳されました。 つまり、翻訳可能であることはわかっていますよね。ブランド名ではありません。 Japanese語に翻訳してください。翻訳のみを返してください。引用符やコメントなしで:
cat /root/.postgres-env
このファイルには PostgreSQL のユーザーと
パスワードなど、データベースを管理するために必要な重要な情報が含まれています。
この情報は安全に保管し、今後のために保存しておいてください。
あなたのPostgreSQLサーバーは完全にセットアップされ、使用開始の準備ができました
データベースを安全かつ効率的に管理できます。
同じカテゴリー ワンクリックアプリ