
You may find yourself in a situation where you need to know the exact Linux kernel version running on your system. In this case, you can easily find the kernel version with the help of the powerful Linux command lines and utilities. In this article, we review different methods which you can use to check the kernel version in Linux.
What is the kernel version?
The kernel is the main component of an operating system, whether Mac OS, Linux, or windows. The kernel handles the system’s resources and works as a bridge between the system’s hardware and software.
You might need to find the kernel version running on your GNU/Linux operating system for some reason. For example, you may discover a new security vulnerability affecting older kernel versions, and so you want to find out whether your kernel is vulnerable or not. Or you might be dealing with a hardware-related issue that requires you to find the Linux Kernel version. It’s pretty easy to check the Linux kernel version from the command line.
Also Read: NextCloud vs ownCloud
How to find the kernel version in Linux?
Before we explain different methods to find the kernel version in Linux, you should know that some of these methods will show you the Linux distribution name too. So, using these commands, you can learn more info about your operating system, including Linux distro name, version, and kernel details.
Use uname command
The uname command can show you many system information such as the Linux kernel architecture, name version, and release.
To check the Linux kernel version on your system, you need to type the following command:
uname -srm
After running this command, something like this will be shown as an output:
linux 4.15.0-54-generic x86_64
As you can see above in the output, the Linux kernel version is 4.15.0-54 and works as 64-bit. Additionally, these numbers are all associated with a meaning that we will list in the following:
- 4: Kernel Version.
- 15: Major Revision.
- 0: Minor Revision.
- 54: Patch number.
- generic: Linux distro/kernel specific additional info
Use hostnamectl command
The hostnamect is a part of the systemd and is usually used to query and change the system hostname, displaying information about the system’s network configuration. But it also shows the Linux kernel version and its distribution:
hostnamectl
Running this command will shows something similar to this as an output:
Static hostname: linux.localdomain
Icon name: computer-laptop
Chassis: laptop
Machine ID: af8ce1d394b844feza8c19ea5c6a9bd09
Boot ID: 15bc3ae7bde842f29ct8d925044f232b9
Operating System: Ubuntu 18.04.2 LTS
Kernel: Linux 4.15.0-54-generic
Architecture: x86-64
You can type the grep command to filter out the Linux kernel version:
hostnamectl | grep -I Kernel
Here is the output:
Kernel: Linux 4.15.0-54-generic
Use /proc/version File
The /proc directory has various virtual files that include information about the system memory, CPU cores, mounted filesystems, and many other data. If you want to access information about the running kernel and check the Linux kernel version, pay attention that they are stored in the /proc/version virtual file. You can type cat or less commands to show the contents of the file:
cat /proc/version
After running them, you will see an output similar to this:
Linux version 4.15.0-54-generic (buildd@lgw01-amd64-014) (GCC version 7.4.0 (Ubuntu 7.4.0-1ubuntu1~18.04.1)) #58-Ubuntu SMP Mon Jun 24 10:55:24 UTC 2019
Use dmesg Command
Most of the time, the dmesg command is used for printing the kernel’s buffer message. In simple terms, you can usually use this command to read messages from device drivers; but you can also run it to find the kernel version. The pipe symbol ( | ) is usually near the enter key on most keyboards.

Here we will explain how this commands actually works:
- Dmesg: Enables you to read the contents of the kernel buffer
- | (pipe symbol): Passing the command into the next command
- grep: particularly searching for a particular string of characters and showing lines that contain them
- Linux: the exact string of characters that the grep should look for (Note that capitalization is important)
As shown in the picture above, the Linux kernel version is mentioned in the first line of the output.
When should you update your Linux kernel version?
Linux kernel functions as a mediator between software applications and computer hardware. In other words, The Linux kernel is somehow the foundation on which different Linux distros operate. Moreover, any person can decompile, examine, and modify the code of this open-source software. The technology is dramatically progressing, so developers find various patches and updates to the Linux kernel. You can use these patches to improve security, increase functionality, and even affect the operating system’s speed. So, if you are using Linux operating systems, like Ubuntu, it is best to check the kernel version and update it regularly.
The question is how to update the Linux kernel version? To do so, first, you should check whether you have the requirements or not.
Also Read: How to Find OS version with Command Line
Requirements for updating the Kernel version
Here are the prerequisites for updating your kernel version:
- a server running Linux operating system (Ubuntu)
- Having access to the Linux terminal (you can use CTRL-ALT-T or Applications menu > Accessories > Terminal)
- Using a user account with sudo privileges
- The apt tool, built into Ubuntu
- The Update Manager, built into Ubuntu (note that this is optional)
Update Ubuntu Kernel
To update your Linux Kernel version, you can use two methods regarding what you are comfortable with.
First Method: Using the system update process
Step 1: Check the current Linux kernel version
Before you start updating your Linux version, you need to know what version you are currently running. In the previous section, we thoroughly explained how to find the Linux kernel version. You can review commands to find the kernel version again if you want.
Step 2: Updating the repositories
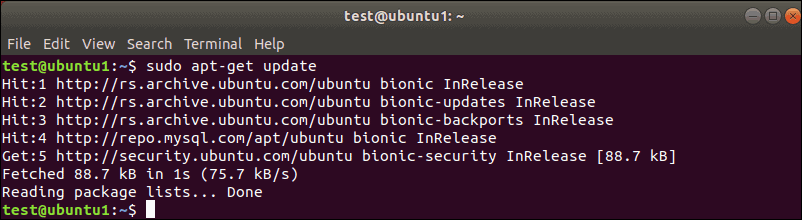
You need to open the terminal and type the following command:
sudo apt-get update
After running the apt command, all your local softwares will be refreshed, giving you a
notice about newer revisions and updates. If a newer kernel version is available for you, this command will show it in the terminal, ready for download and installation.
Step 3: Running the upgrade
At this point, you have to run the following command in the terminal:
sudo apt-get dist-upgrade
The dist-upgrade in this command is for asking Ubuntu to handle different dependencies wisely. Meaning that if a particular software package is dependent on running another software package, this command ensures that the second package (dependency) is upgraded before upgrading the first one. You can use this approach as a safe way to upgrade your Ubuntu Linux kernel. Additionally, kernel updates used through this utility have been tested and verified to work with your version of Ubuntu without any issues.
Launch an Ubuntu VPS instantly with root access and NVMe storage.
Deploy Ubuntu VPSSecond method: Forcing a kernel upgrade
Sometimes, a newer kernel version has been released, but it has not been thoroughly tested for your version of Ubuntu. For example, you may be using Ubuntu 17.10 (Artful Aardvark), and you see that Ubuntu 18.04 (Bionic Beaver) is available for you. In these types of situations, updating the Kernel would require a more complicated process.
Step 1: Getting back up from your important files and data
You probably have already done this many times, but since it is an important step of the process, we can not stress this enough.
Step 2: Running the Software Updater
To run the Software Updater, you need to click on the super key (the one with the “windows” picture on the keyboard) and search for Software Updater. If there are any updates that you need to get, the Software Updater will notify you. After going through the previous steps, you will see a message telling you that the computer is updated.
Now you have to click on the Settings button, seeing a new window with several tabs.
Step 3: Configuring the Software Updater
First, click on the Security tab, then check the three checkboxes under “install updates from”. Those checkboxes are called Important security updates, Recommended updates, and Unsupported updates.
At the end of this tab, there is a drop-down labeled “Notify me of a new Ubuntu version:”. Click on the dropdown and choose:
For long-term support versions (If you want to stick with tested and reliable versions with full support)
For any new version (If you like playing with the latest-and-greatest and don’t mind if things are a bit buggy)
After going through these steps, close and reopen it, it should give you the option to upgrade if there’s a new version released. Pay attention that the upgrade usually becomes available a few days later.
Step 4: Forcing the upgrade
If, for some reason, you don’t see an upgrade offer, you can still use another method to force it. To force the upgrade you should write the following command in the terminal:
update-manager –d
After running them, you will see an output similar to this:
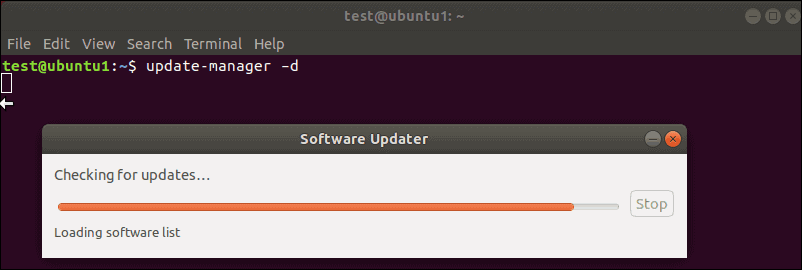
The system will show you release notes for the new kernel and its version of Ubuntu. After making sure that everything is alright, you should click upgrade, and the process will be started.
Also Read : KVM vs. OpenVZ
Third Method: Manually updating the kernel with advanced procedures
If you want to upgrade to the latest (untested) kernel and know all its risks, there’s a third technique for choosing and installing a new kernel. But before going over this step, it’s wise to check your system configuration. Are you running any custom drivers, especially video drivers? Do you have any custom configurations or packages on your system? Those may not be compatible with the new kernel. Even though a recovery option is available, it is better to take precautions and prevent complications in advance.
It’s also good to search and know more about the release notes for the kernel you want to install. Just pay attention to the revision number and any features you plan to work with. In This method, we will use Ukuu as the graphical utility for updating the kernel. Note that there are other ways, like manually downloading and installing the kernel or even getting a copy of the source code and compiling it. But, Those techniques are more challenging.
Step 1: Installing Ukuu
Type the following command in the terminal. (Notice that after typing each line, you should click enter):
sudo apt-add-repository ppa:teejee2008/ppa
sudo apt-get update
sudo apt-get install ukuu
You add the TeeJeeTech repositories of open-source software for Linux to your primary repositories via the first command. The second command refreshes the database, showing you a list of the latest revisions. At last, the third command installs the Ukuu software for you.
Step 2: Launching Ukuu
To launch Ukuu, you have to type this in the terminal:
sudo ukuu-gtk
After running this, you will see that The Ukuu utility is launched on your system, showing you the available Linux kernel version list.
Step 3: Installing the Kernel
Pick the kernel you want to install, and then click the Install button on the right-hand side.
Step 4: Reboot your System
When the kernel finishes installing, you have to reboot your system. After doing so, you can relaunch Ukuu to verify whether the installation is done correctly or not.
Step 5: In Case of Failure in installation
In an emergency, you can use GRUB as the boot utility that keeps a copy of the old kernel. You can select and boot into older kernel versions. First, select Advanced options for Ubuntu on the boot screen, then select the previous kernel (specified by the revision number). Moreover, you don’t need to use the “upstart” or “recovery mode” options.
We offer a guide on customizing GRUB to a user-friendly graphical interface. I highly recommend reading it if you occasionally use GRUB.
Step 6: Uninstalling the Kernel
The Ukuu utility also enables you to remove old kernels on Ubuntu. to do so, click the same kernel you installed earlier and click Remove on the right-hand side.
Recap: Checking the Kernel version
We introduced various ways to find the kernel version in Linux. Aside from a powerful and straightforward command line, Linux provides you with many facilities. So to make the most out of this operating system, we are proud to offer you our KVM-powered Linux VPS, giving you access to use not only all significant distros but even some lesser-known ones. Cloudzy’s Linux VPS solutions are more secure and deliver reliable performance, so they are a good fit for your personal uses and business.
FAQ
What does the kernel version mean in Linux?
The Linux kernel is the main component of a Linux OS that functions as the core interface between a system’s hardware and its processes. You can check its version using the command line and other utilities.
What are the KVM-powered Virtual Private Servers?
KVM-powered VPS don’t have to compete over server resources. Each VPS is given its own dedicated virtualized infrastructure, including storage, memory, and CPU.