We offer two different ways to create your own Cloud VPS. The first
is by selecting one of the Cloud VPS plans on the Cloudzy website and
placing an order. The second is within the Cloudzy panel to deploy a
Cloud VPS with your desired specifications. In both ways, you can get
your desired VPS with flexible pricing. In the following sections, we
will guide you step-by-step through each method so that you can choose
the best plan for your requirements and preferences.
1. Browse Cloud
VPS Plans from the Pricing Page
Step 1: Choose Your Preferred
Plan
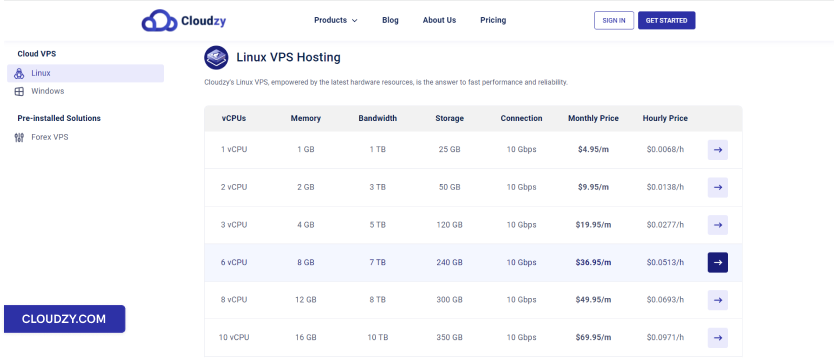
Discover the plans from Cloudzy pricing page and choose
a plan that suits your needs. In this example, we’re choosing 8 GB RAM
Linux VPS.
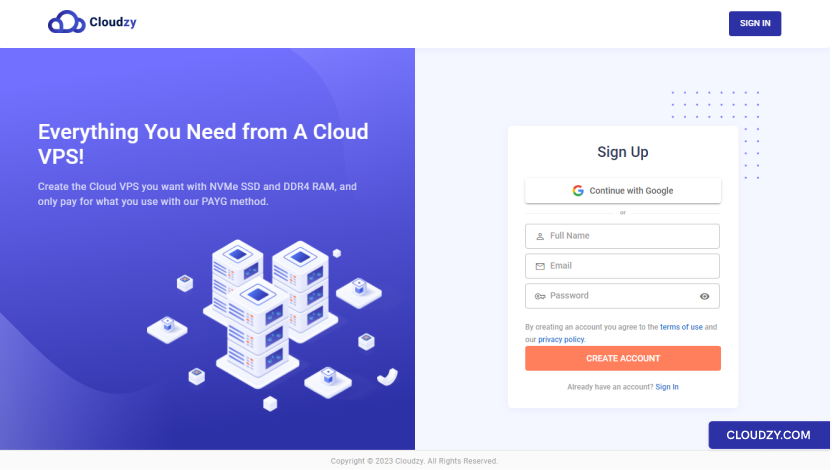
Step 2: Create an Account
Before completing your order, you must create an account. To do this,
fill out the registration form with your name, email address, and a
strong password. You can also sign up with your Google account by
selecting the Continue with Google option.

Step 3:
Choose Server location, OS, and Advanced Options
After logging in to your account, you can:
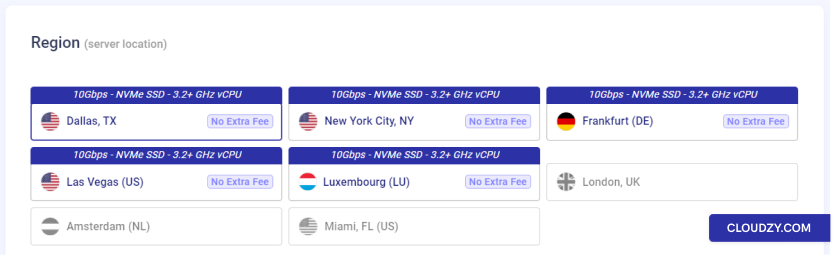
a. Select Server Location
In the Region (server location) section, select the
region where you want to create your Cloud VPS.
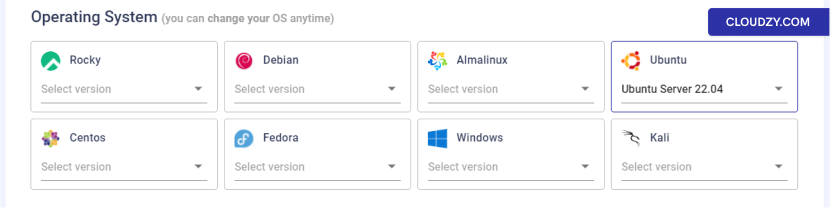
b. Choose the Operating System of Your Cloud VPS
Next, you can choose the operating system version you want to
use.
Note: You can change your OS anytime you want.
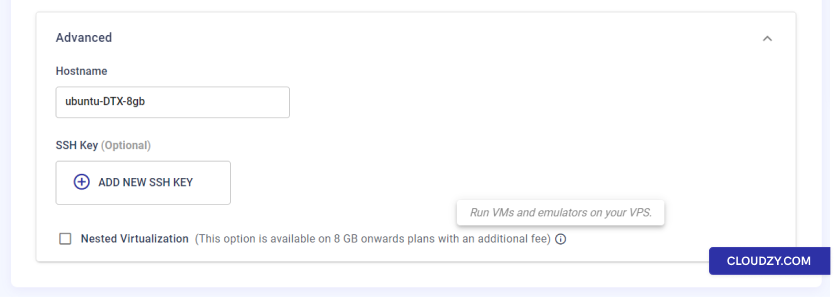
c. Advanced Options (Optional)
You can choose the hostname that will be assigned to your Cloud VPS.
By default, the creation process assigns a strong password to your VPS
that will not be saved in our databases. However, we recommend using SSH
key pairs instead of password-based logins for managing your VPS. If you
also prefer using an SSH key, you can add SSH Keys in this section.
You can check the Nested Virtualization checkbox
(only for 8GB plan and above), if you want to run VMs and emulators on
your Cloud VPS.
d. Deploy Now
After all of these configurations, you can click on the
DEPLOY NOW button.
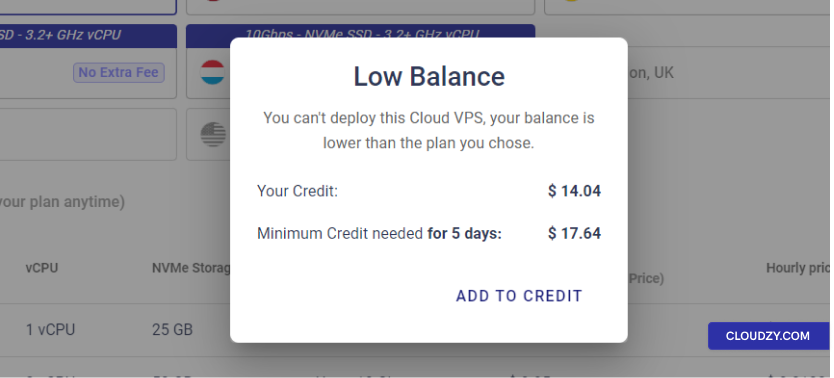
Step 4: Add Credit
If you don’t have enough credit, a Low Balance
pop-up will show up, and you can click on Add to
Credit.
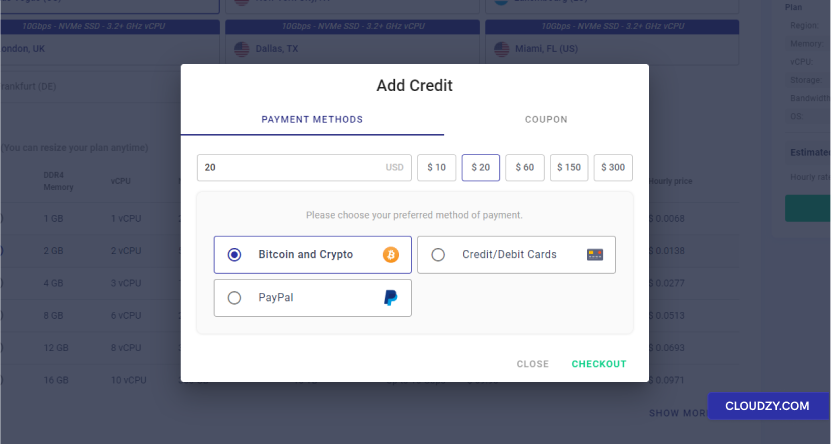
Step 5: Payment Methods and
Coupons
Now, you’ll need to charge your account balance to deploy your Cloud
VPS. As mentioned in the Low Balance pop-up in the
previous step, the minimum credit that you can add is the minimum credit
required for 5 days of usage. You can enter the desired amount to charge
your account or choose from preset choices. If you have any coupons,
please add them from the Coupon section. Finally, you
can choose your preferred payment method and click on the
CHECKOUT button to proceed to the payment gateway
page.
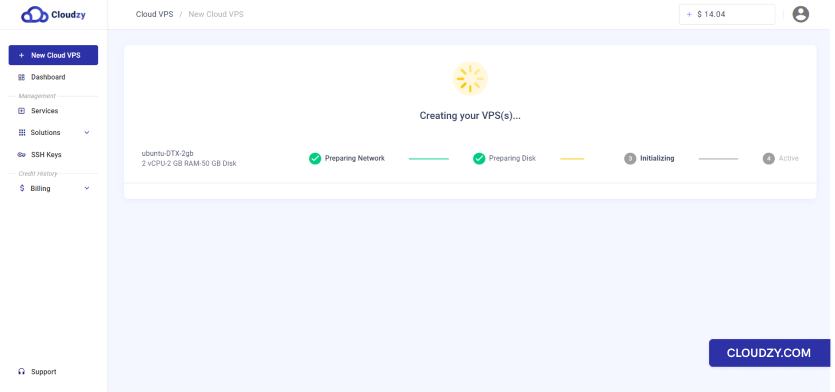
Step 6: Deploy Your Cloud VPS
Once your payment is processed, your Cloud VPS will be deployed
automatically. Depending on your chosen operating system, the deployment
process may take up to 5 minutes.
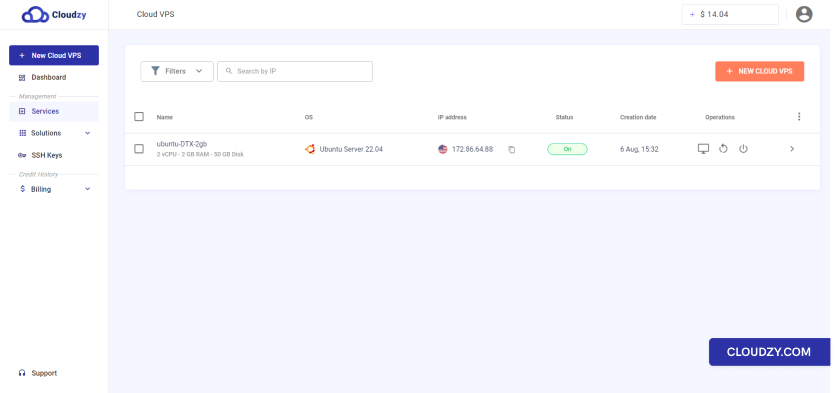
Step 7: Access Your Cloud VPS
You can access your Cloud VPS once the deployment process is complete
(from Services in the sidebar). The information about
the Cloud VPS you created will be sent to you by email.
Note: To protect your Cloud VPS, please keep the
password provided to you in a secure and private place.
2. Deploy a Cloud VPS
Within the Panel
Cloud virtual private servers are easy to manage and maintain in the
Cloudzy panel. In order to create your own Cloud VPS, you’ll need to
follow these steps:
Step 1: Create an Account
If you don’t have an account, you can create one at Cloudzy. Once you’ve created
your account, you’ll need to increase your account credit balance in
order to create your desired Cloud VPS (We will discuss this
further).
Step 2: Navigate to
the New Cloud VPS Tab
After you’ve logged in to your account, navigate to the New
Cloud VPS tab.
Step 3: Choose the
Cloud VPS Specifications
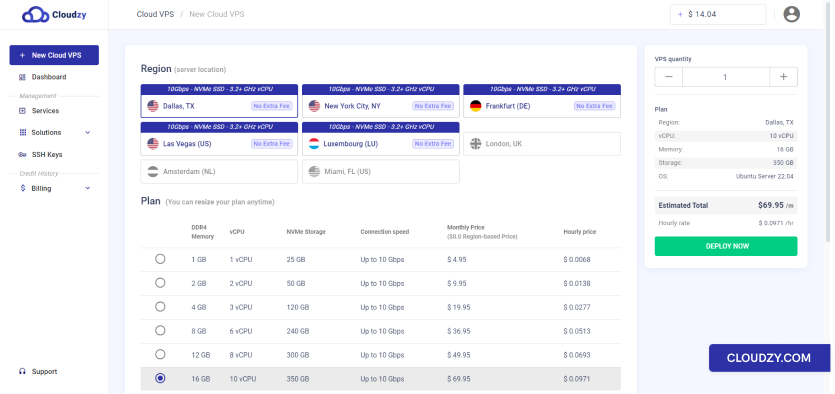
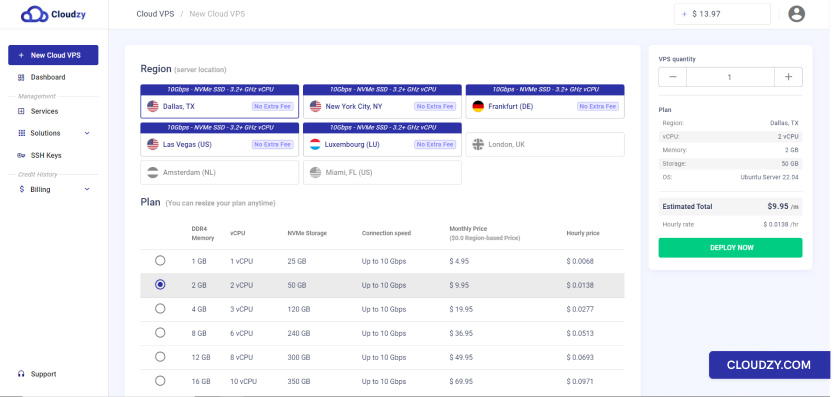
a. Select Server Location
In the Region (server location) section, select the
region where you want to create your Cloud VPS.
b. Choose Your Plan with Preferred
Specifications
Now you can choose a plan with the specific amount of memory (RAM),
storage, and CPU cores your Cloud VPS will have.
Note: You can resize your selected plan anytime you
want.
c. Choose an Operating System
Next, you can choose an operating system that you want to use.
Note: You can change your OS anytime you want.
d. Advanced Options (Optional)
You can choose the hostname that will be assigned to your Cloud VPS.
By default, the creation process assigns a strong password to your VPS
that will not be saved in our databases. However, we recommend using SSH
key pairs instead of password-based logins for managing your VPS. If you
also prefer using an SSH key, you can add SSH Keys in this section.
You can check the Nested Virtualization checkbox
(only for 8GB plan and above), if you want to run VMs and emulators on
your Cloud VPS.
e. Deploy Now
After all of these configurations, you can click on the
DEPLOY NOW button from the right sidebar.
Step 4: Add Credit
If you don’t have enough credit, Low Balance pop-up
will show up and you can click on Add to Credit.

Step 5: Payment Methods
and Coupons
Now, you’ll need to charge your account balance to deploy your Cloud
VPS. As mentioned in the Low Balance pop-up in the
previous step, the minimum credit that you can add is the minimum credit
required for 5 days of usage. You can enter the desired amount to charge
your account or choose from preset choices. If you have any coupons,
please add them from the Coupon section. Finally, you
can choose your preferred payment method and click on the
CHECKOUT button to proceed to the payment gateway
page.

Step 6: Deploy Your Cloud
VPS
Once your payment is processed, your Cloud VPS will be deployed
automatically. Depending on your chosen operating system, the deployment
process may take up to 5 minutes.

Step 7: Access Your Cloud
VPS
You can access your Cloud VPS once the deployment process is
complete. The information about the Cloud VPS you created will be sent
to you by email.
Note: To protect your Cloud VPS, please keep the
password provided to you in a secure and private place.

We hope this guide helps you easily purchase the Cloud VPS service
you need. If you have any questions or encounter any issues during the
ordering process, feel free to create a ticket
and contact our customer support team for assistance.
Also in Deploy & Setup
Related guides.
Need help with something else?
Median response time under 1 hour. Real humans, not bots.