When it comes to website processing and web management, WordPress is the wisest choice a user can take. Because of the great benefits of WordPress, it gained great popularity among web designers. As stats show, about %35 of the top 1000 most visited websites are WordPress websites (websites that are powered by WordPress). Virtual Private Servers play a crucial role in WordPress. Actually, it is usually suggested to install WordPress on VPS to get the utmost advantages for web development. If you are looking for a quick installation guide, we suggest watching the video below as it provides a concise overview. However, for more comprehensive instructions, we recommend reading the full article.
In general, the WordPress installation procedure is straightforward and trouble-free. However, when installing it on a VPS, users may face some difficulties as they need to install WordPress on VPS manually. That is why we decided to prepare the below instructive article to show how you can install WordPress on VPS, quickly and hassle-free. There are various ways to do so, but we believe that the easiest one is to employ cPanel for the installation. Different steps for this procedure are included in the following.

Launch a faster WordPress VPS with instant deployment.
Get WordPress VPSInstall WordPress on VPS (Step by Step Guide)
Here is the comprehensive step-by-step guide to help you through installing WordPress on a VPS.
Step 1: Download the WordPress
First of all, you need to download the latest version of WordPress. You can find it on wordpress.org/download/
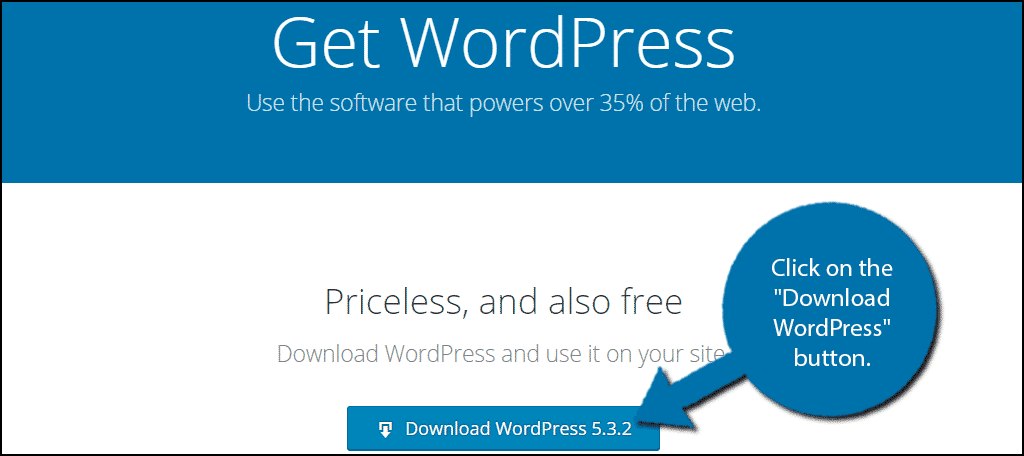
Click on the “Download WordPress” button.
Step 2: Upload WordPress to your VPS
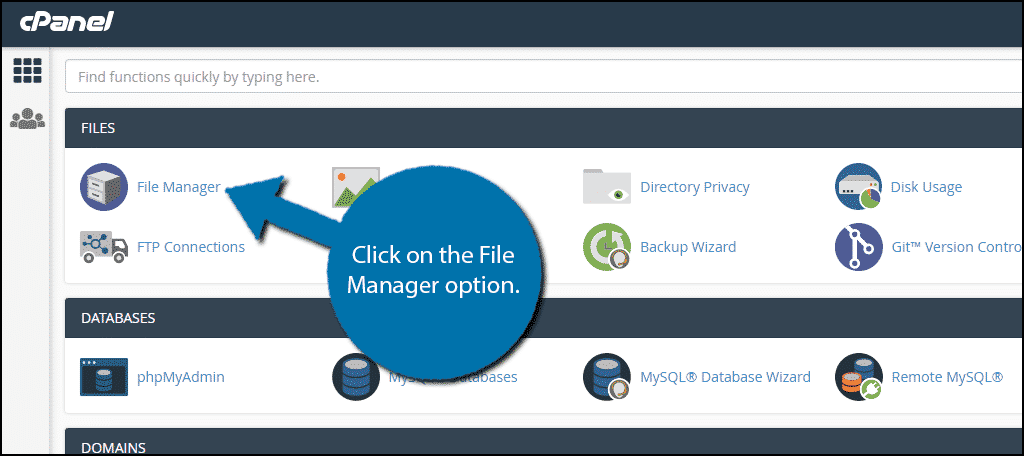
After you downloaded the zip file, you need to upload it on your VPS. To do so, you need a cPanel account. Some FTP programs such as FileZilla and Cyberduck can also be used, but as we said cPanel is the most convenient means here. Hence, we will continue this tutorial with cPanel.
Log in to your account and open the cPanel File Manager Option.
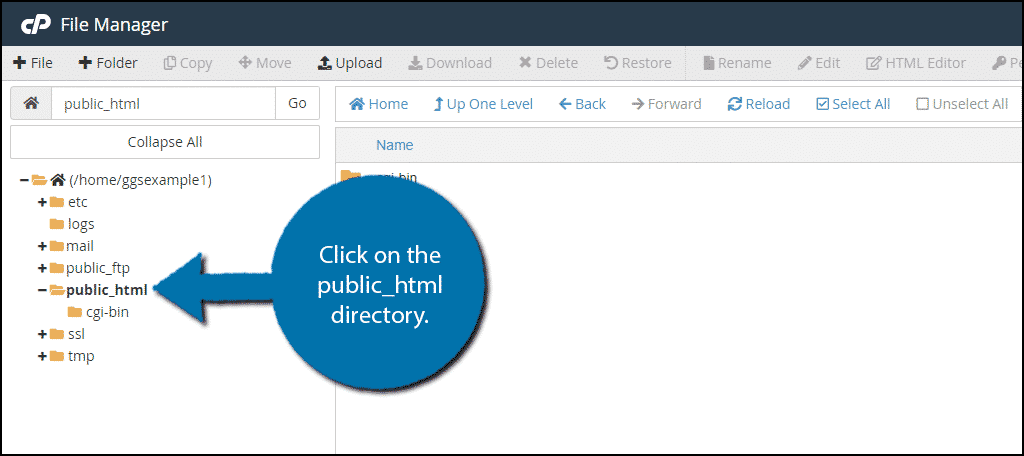
In the File Manager, find the public_html directory and click on it.
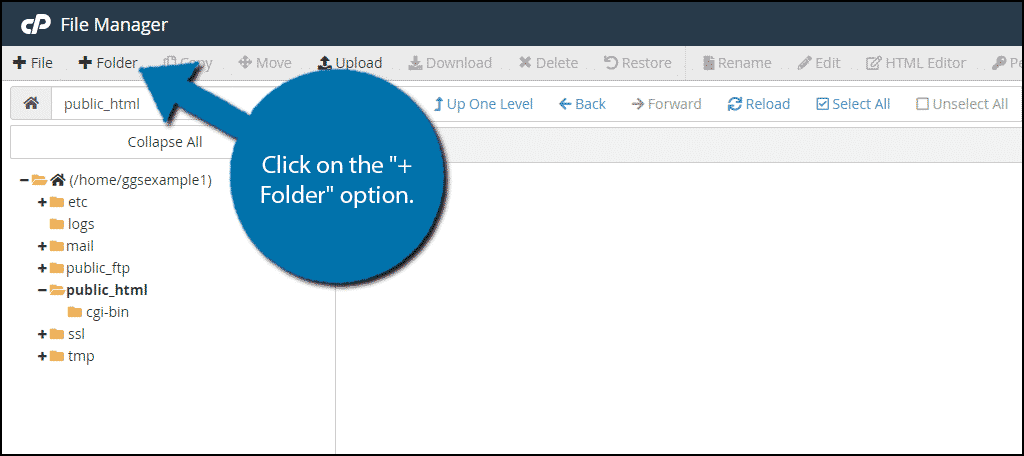
If it’s your first use of cPanel File Manager, you have to create a new folder for your website. If you already have one, simply skip this step.
Click on the “+ Folder” button.
Name the folder whatever you want (we recommend using your domain name for it). Open the folder you have just created, and then click on the “Upload” button above.

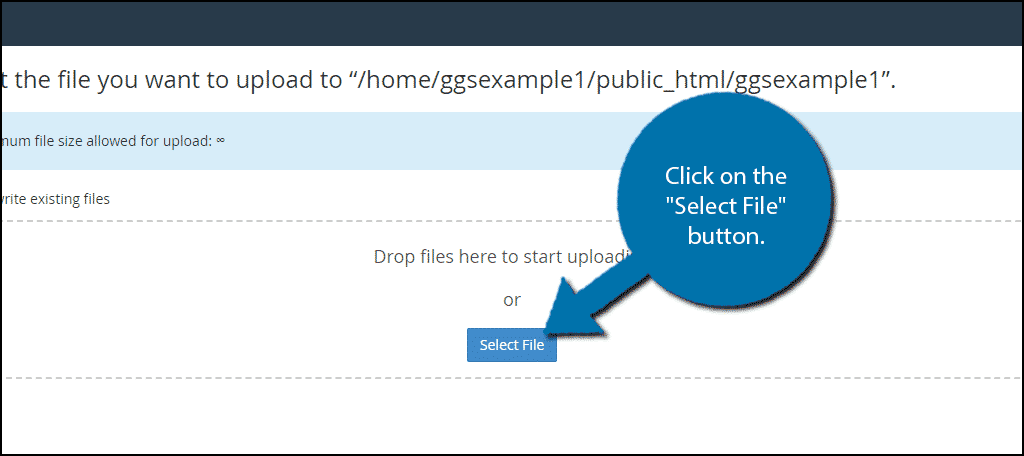
In the opened window, click on the “Select File” and select the WordPress zip file you downloaded earlier.
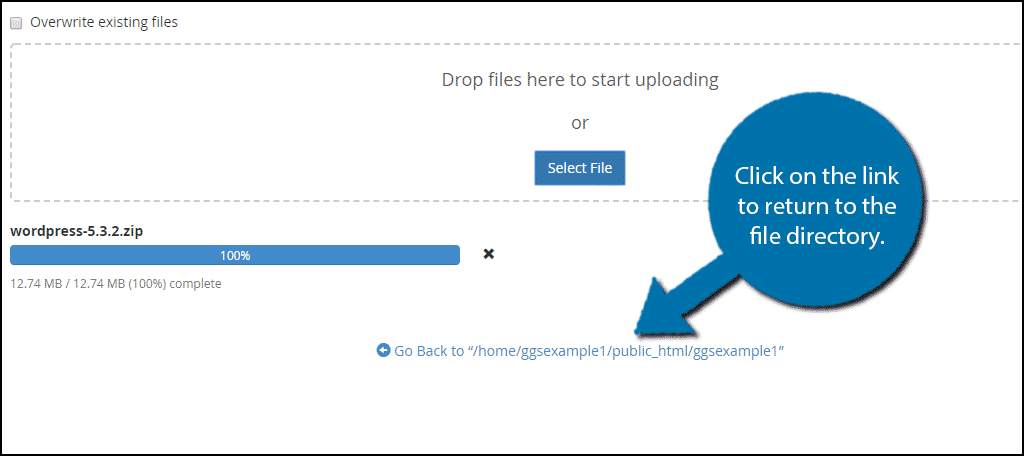
Wait for the upload process to get finished. Then, click on the below link to go to the file directory once again.
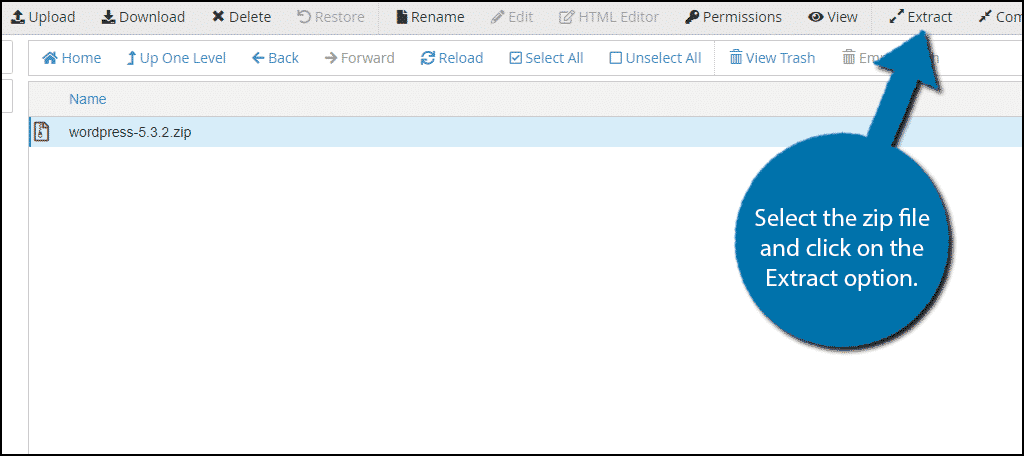
Reload the page, once you are back. You will see the zip file you have just uploaded. Select it and click on the “Extract” button.
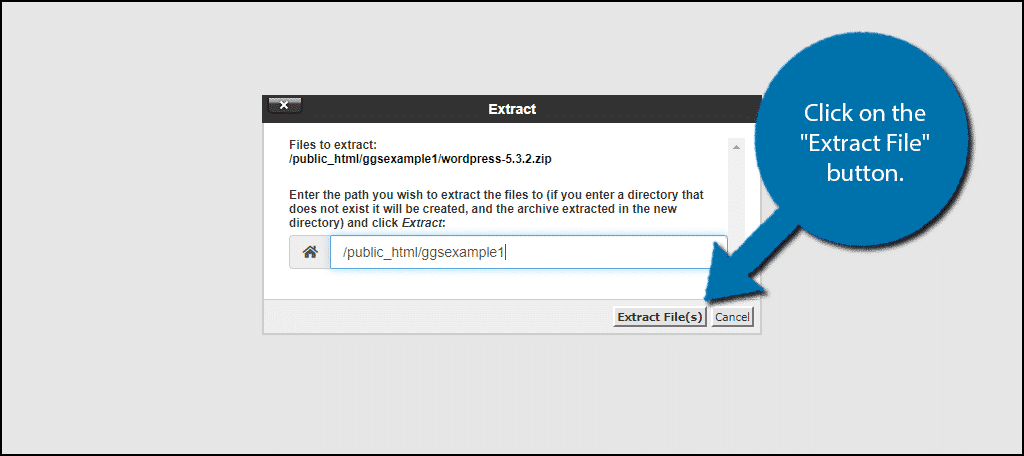
Now, you need to confirm the location to extract the files. Make sure it is a correct location, then, click on the “Extract File(s)”.
WordPress is in your file directory now. You can safely remove its zip file from the file directory if you want.
Step 3: Move the WordPress files to the Root
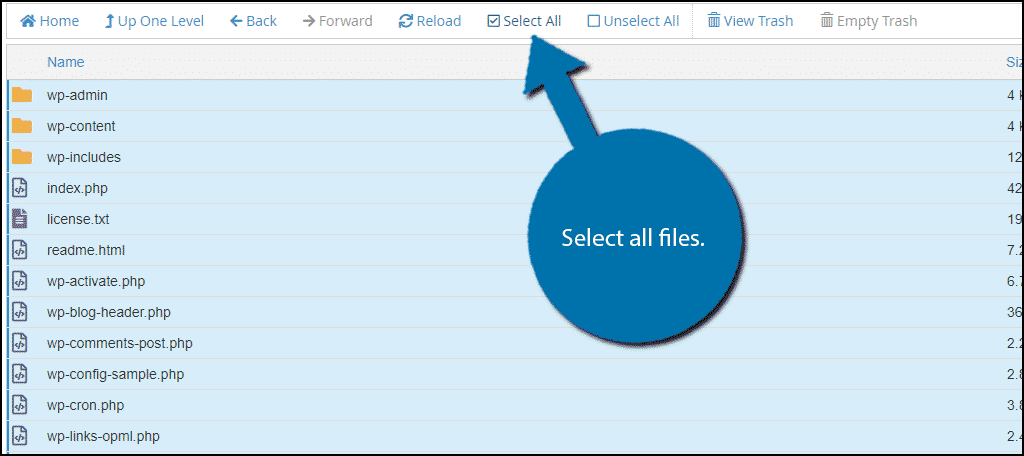
We now have all the WordPress files. We just have to move them to the right location. Open the WordPress folder and select all the files within.
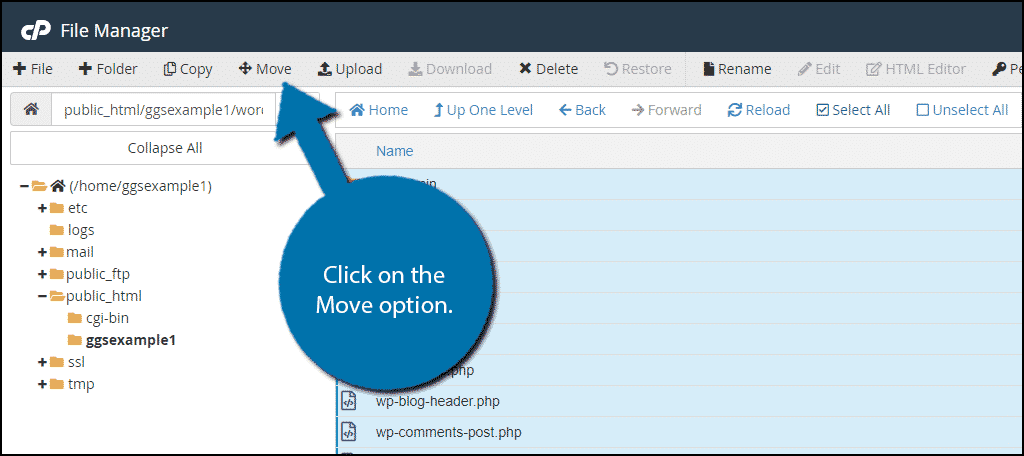
Click on the “Move” button to move the selected files to the public_html directory.
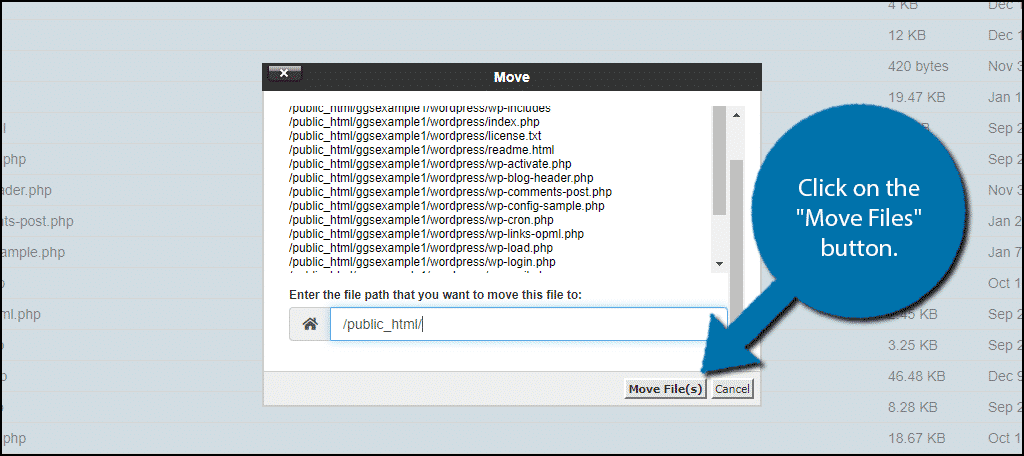
Once the location is selected, click on the “Move File(s)”.
Step 4: Create a New Database
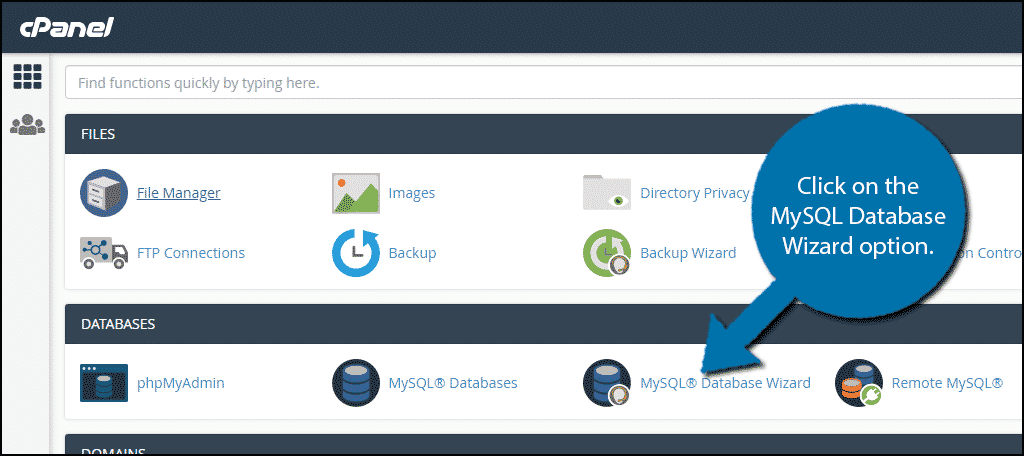
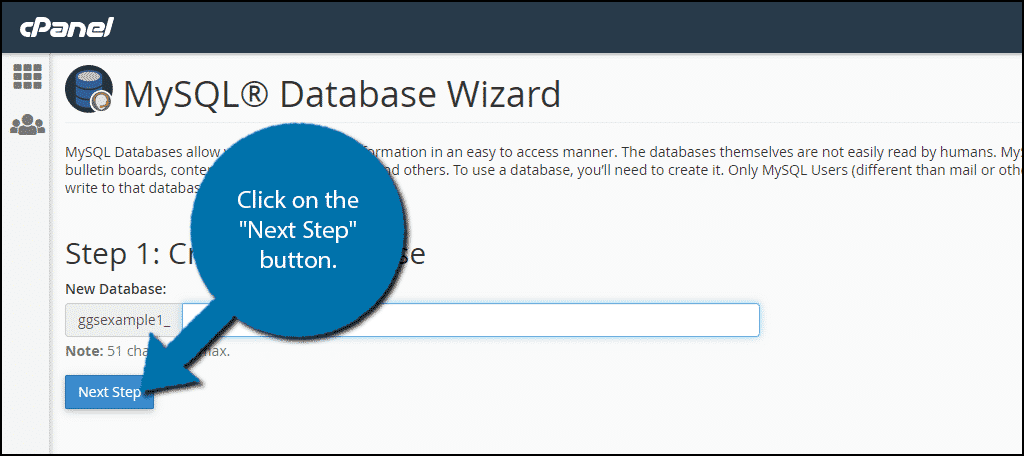
We are nearly done! For now, you need to create a new database. Return to your cPanel. Find the “MySQL Database Wizard” below and click on it.
Now, you need to add a name to the database. We recommend something simple to remember because you need it in the next steps. Once you are finished, click on the “Next Step”.
Now you should provide a username and password for the created database. When you are done, click on the “Create User”.
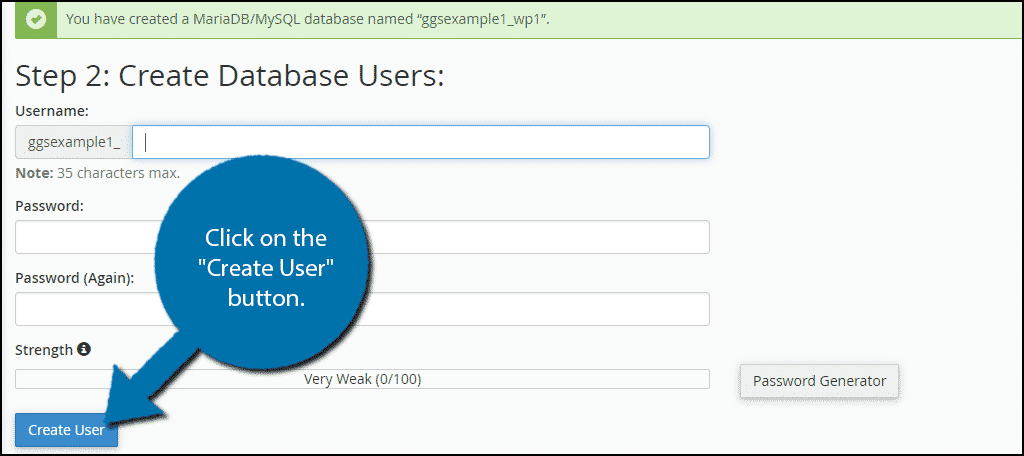
In the opened window, you need to confirm the privileges of your account. Simply check the “All Privileges” option.

Your database has been created now.
Note: Write down the name, username, and password of the database. They are required for connecting WordPress to the database.
Step 5: Edit the wp-config-sample.php File
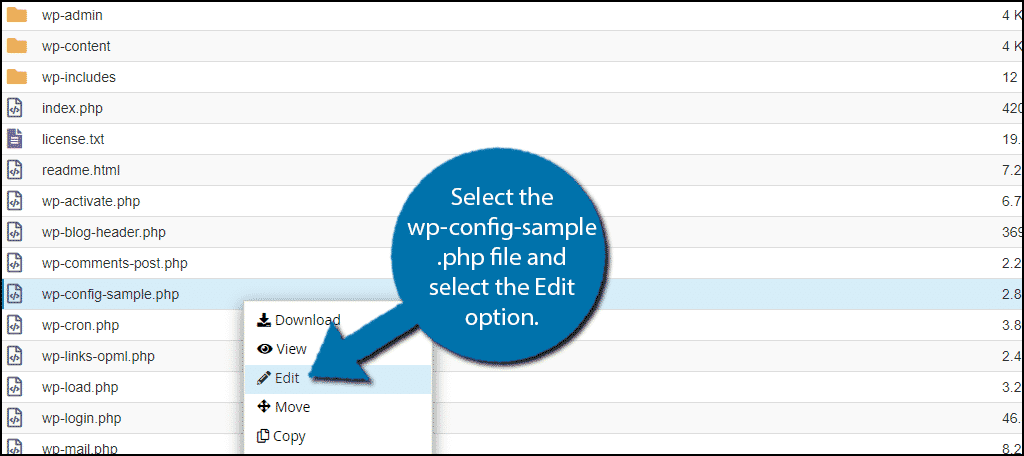
After you successfully create the database, you have to ensure that WordPress will use it. All you need is to edit the wp-config-sample.php file.
Go to the public_html directory, find the wp-config-sample.php file, and select it. Then click on the “Edit” option.
In this sample file, you have to locate and replace 3 specific lines to ensure that the file can connect to the database you created earlier.
First, locate:
[ht_message mstyle=”info” title=”” show_icon=”” id=”” class=”” style=”” ]define( ‘DB_NAME’, ‘database_name_here’ );[/ht_message]
Then, replace database_name_here with the name of your database.
After that, locate:
[ht_message mstyle=”info” title=”” show_icon=”” id=”” class=”” style=”” ]define( ‘DB_USER’, ‘username_here’ );[/ht_message]
Now, replace database_name_here with your database name.
And locate:
[ht_message mstyle=”info” title=”” show_icon=”” id=”” class=”” style=”” ]define( ‘DB_USER’, ‘username_here’ );[/ht_message]
Then, replace username_here with the username you defined earlier.
And finally, locate:
[ht_message mstyle=”info” title=”” show_icon=”” id=”” class=”” style=”” ]define( ‘DB_PASSWORD’, ‘password_here’ );[/ht_message]
And replace password_here with the password you defined earlier.
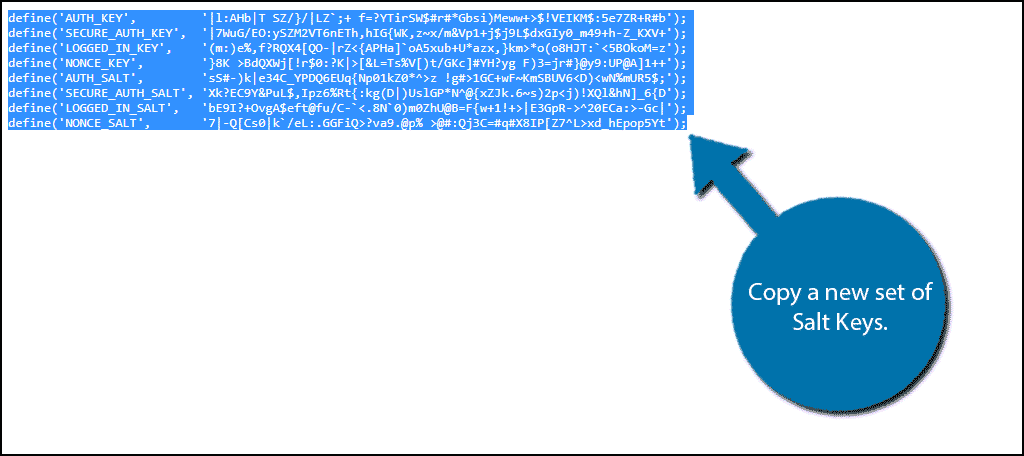
Now, you have to copy and paste a new set of Salt Keys from the WordPress API. Just go to the Salt Key generator and simply copy everything there.
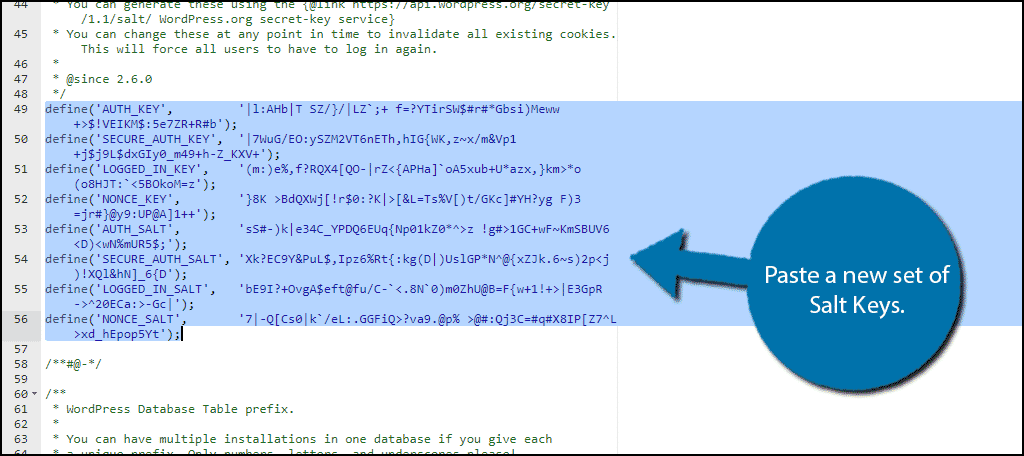
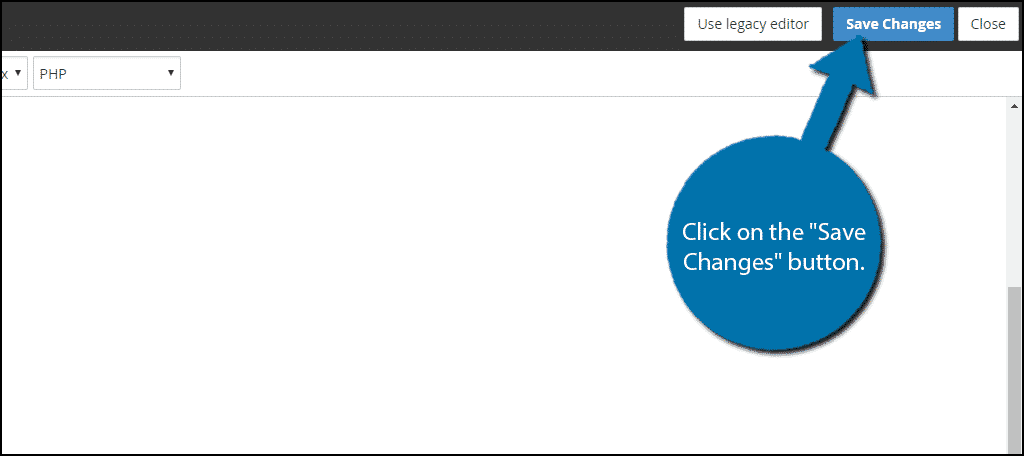
Then, replace the salt key line of the wp-config-sample.php file with the salt keys you have just copied. Once you are done copying, click on the “Save Changes”.
The PHP file is no longer a sample. Close it and rename it to wp-config.php.
Step 6: Install WordPress
Good job! You took all the preliminary steps for installing WordPress on your VPS. Now, you only need to visit your website and start the regular installation process. To do this, visit yourwebsite.com/wp-admin/install.php.
If you locate the WordPress files somewhere else, WordPress for example, you have to go to yourwebsite.com/WordPress/wp-admin/install.php.
Congratulations, now, you have successfully installed WordPress on your virtual private server. We know that manually installing WordPress on a VPS is not an easy task, but it really is worth the effort. Using WordPress on a virtual private server offers you numerous advantages for both your web mastering experience and the ranking of your site.
Launch a faster WordPress VPS with instant deployment.
Get WordPress VPSWord of advice – Cloudzy cPanel VPS services
We said that the best and easiest way to install WordPress on VPS is through cPanel. This means that, in the very first place, users should have cPanel on their VPS to begin the WordPress installation procedures. Normally, VPS brokers don’t provide their services with an already installed cPanel on them.
But, this is not the case for Cloudzy’s top-tier VPS plans. We are offering the best-in-the-world cPanel VPS plans (VPSs that have an already installed cPanel) to worldwide users. Our cPanel VPS can be really beneficial for the users who are looking to have the ultimate and trouble-free WordPress hosting experience. So, we highly recommend you read more about the amazing features of Cloudzy cPanel VPS (such as its NVMe storage and 1 Gbps speed).
Also Read: Shared hosting VS VPS
Conclusion
We have just seen how you can install WordPress on VPS by using the cPanel. As you can see, it’s a bit challenging to manually install WordPress. But, believe me, the route that we took in this tutorial is the easiest one. We also introduced you to Cloudzy cPanel VPS which can simplify the WordPress installation for you (along with its other useful advantages). If you are not sure which VPS hosting meets WordPress needs, read this article before making decision.
Certainly, by reading this tutorial you’ll be able to install WordPress on VPS all by yourself. However, if any complications appear while installing, do not hesitate to seek assistance from us, either in the comment section below or contact our experts HERE.
FAQ
Can I use WordPress on a VPS?
Yes, why not! You can manually install WordPress on your virtual private server and enjoy its benefits.
What is the best way for installing WordPress on a VPS?
We believe that employing cPanel is the best and most convenient way you can take to install WordPress on VPS.
Can I install WordPress on my VPS by myself?
Yes, you can install WordPress on your VPS through cPanel (see above).
Do I need a cPanel VPS for installing WordPress?
cPanel VPS is not necessary. However, we suggest it because it already has an installed cPanel that can facilitate the WordPress installation for you.