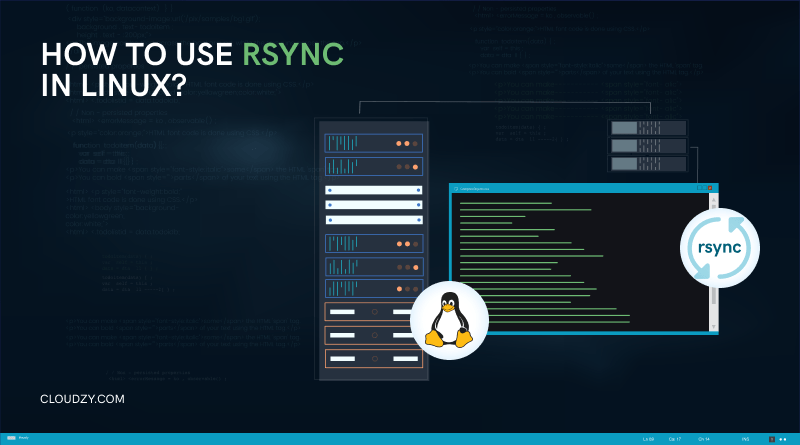
Whether an admin or a regular user, you most likely need to create regular backups of your files or sync them between several systems. If this task requires overwriting all files each time, it will be time-consuming and tiresome for you; This is where Linux Rsync to remote server tool comes to your rescue. This guide will familiarize you with the most useful Rsync commands, enabling you to use its fast and secure features.
What Is Rsync Utility?
Remote Sync (Rsync) is a well-known Linux/Unix command that you can use for copying and synchronizing files and directories through remote access or locally. Using Rsync command lets you perform various data-related tasks, such as synchronization, copying, and getting backups. Additionally, you can mirror your Linux system to another one.
The main idea behind using Rsync to remote server is to take advantage of its fast file transfer; to transform data between two sources, it only considers the differences between them. In other words, using the Rsync command will help you avoid losing time for blind data transfer as it just considers the differences between the two Linux systems.
Why Use Rsync?
As you may already know, various backup tools are available to employ. The question is, what makes Rsync tool unique when compared to other utilities or commands?
For instance, you can use File Transfer Protocol (FTP) to have a local copy of your website or SCP (Secure Copy Protocol) for this task. However, these two both come with drawbacks. FTP does not include data encryption which is not what we hope for, and even though SCP doesn’t have an unencrypted transfer problem like FTP, it still takes more time for transferring as it makes a tunnel to do so.
Therefore, as an alternative solution to these issues, we can use Rsync to remote server with key based encryption(simply called Rsync SSH or Rsync over SSH) which prevents sending duplicated data and utilizes an SSH key. You should also note that Rsync employs compression and decompression for receiving and sending data, leading to less bandwidth usage.
How to install Rsync?
You probably already have Rsync installed on your system; nonetheless, let’s get into detail. Before doing so, Please pay attention that SSH must already be installed in both source and destination systems as we want to use Rsync over SSH.
Step 1: Checking SSH Version
You can check the version of SSH using the following command:
ssh -V
To Rsync to a remote server, you will need to have a local server, aka the source, and the remote server. You should also ensure that the local server has administrative privileges (sudo).
Step 2: Installing Rsync Linux
The following command will enable you to install Rsync on Ubuntu, Linux Mint, and Debian:
sudo apt install rsync -y
If you are using other Linux distributions, like Fedora, CentOS, AlmaLinux, and Red Hat, type the following command to install Rsync to remote server service on your system:
sudo dnf install rsync
Note: apt is a helpful package installation tool used in Debian-based distributions.
Step 3: Starting Rsync
You now need to start and then enable Rsync to begin using it via the following commands:
sudo systemctl start rsync
sudo systemctl enable rsync
Step 4: Verifying Rsync Installation
Enter the following command to ensure whether you have installed Rsync correctly and to check which version you are using on your Linux system:
rsync --version
In the following section, we will discuss how to use this tool’s capability to make backups via key-based authentication.
How to Create Backups Using Rsync over SSH?
Making incremental backups is one of Rsync over SSH use cases. Please pay attention to the following command to understand how it works:
rsync -av -e ssh /sourceDir/ user@remote:/path/to/destinationDir
Running the above command will help you sync sourceDir and destinationDir. This command includes other options you should be familiar with, like -a (archive) and -v (verbose). Note that -e ssh option demands Rsync connection to be over SSH protocol.
If you want the SSH connection to be accepted over a port other than the default (port 22), you need to mention the port number after -e ssh. Look at the following command to understand how it works.
rsync -av -e ssh 1998 sourceDir/ user@remote:/path/to/destinationDir
In the above command, we assume we want to use 1998 as our SSH port rather than 22.
Rsync to remote server over SSH has other options that can be pretty helpful. For instance, using the –partial option enables you to continue the previous partial transfer in case of issues like Rsync interruption. You can also know the current file transfer progress through the –progress option. Plus, Linux Rsync to remote server utility enables you to use these two features simultaneously. To do so, you can use the -p flag in the command line.
rsync -avP -e ssh /sourceDir/ user@remote:/path/to/destinationDir
Rsync to remote server with key command allows you to compress the data before transferring it to the destination. Even though it will use your CPU to complete the compression, it is still pretty helpful as it makes file transfer faster and requires less bandwidth usage.
You can use the Rsync command to copy files and directories, remote or local. The main advantage of Rsync is that it is based on the delta transfer algorithm, which prevents copying duplicated data from source to destination. As referred before, this feature of Rsync to remote server utility helps you if you want to handle daily backups and system mirroring. With this in mind, let’s use the Rsync command for local use cases.
How to Use Rsync for Local Sync?
Before we dive into local sync and how to use the Rsync command for it, you should know the general structure of local Rsync, which is shown below:
rsync [options] [Source] [Destination]
Copying Files Locally
Suppose we want to sync or copy a file from the desktop directory (called Cloudzy) to /home/Public folder; here is what you require to enter:
rsync -zvh /desktop/Cloudzy/myfile.pdf /home/Public
The above Rsync command includes three options as -zvh; by using -z, you will have your file compressed during the transfer. v option stands for verbose output, and the h option is what helps us to be able to read outputs as humans, aka displaying human-readable output.
Copying Directories Locally
If we want to copy the desktop directory (called Cloudzy) to /home/Public folder; you need to type the below command:
rsync -zavh /desktop/Cloudzy/myfile.pdf /home/Public
The -a option in this command archives directories and files while synchronizing.
You can quickly check the list of directories for the destination folder to verify whether the directory has been copied or not. To do so, use the following command:
ls -ld /home/Public
Syncing Files and Directories Recursively and Locally (Recursive Rsync)
What if there were several directories and files in the /desktop/Cloudzy, and you wanted to copy them recursively through Linux Rsync command?
In this case, you use the -r option to recursively sync your local files and directories. You can also use the archive option (-a) as it has other use cases like recursive copying. Please look at the following command to be familiar with Rsync recursive commands.
rsync -zrvh /desktop/Cloudzy /home/Public
Or
rsync -zrvh /desktop/Cloudzy /home/Public
Copying Directories and Files from Local System to Remote
Aside from Linux Rsync to remote server characteristics, which we referred in previous sections, this well-known command also allows syncing files and directories from the local machine to the remote system.
Assume we want to copy a folder (/desktop/Cloudzy/newfolder) from the local machine to the remote system (with 192.168.1.79) under /mycpt; here is an example showing how this works:
rsync -zarvh /desktop/Cloudzy/newfolder [email protected]:/mycpt
How to Copy Directories without Their Files Using Rsync?
In some cases, we may want to use Linux Rsync to remote server capabilities for copying directories without files; this syncing could be from the remote machine to the local system or the other way around.
In this article, we have been using the remote system at 192.168.1.79. Suppose we have it under /mycpt folder and want to copy the /desktop/Cloudzy directory from the local system without including its files. Please enter the below command to do so:
rsync -av -f"+ */" -f"- *" /desktop/Cloudzy [email protected]:/mycpt/
Other Useful Rsync Commands
Here we will discuss some additional Linux Rsync commands that can be practical for you.
Determine Maximum Size for File Transfer in Rsync
You can determine a limit size for file transfer using the Rsync command, which is helpful when you regularly run Rsync to a remote server and the local machine where bandwidth and time are essential factors to consider. Pay attention to the following command to get familiar with setting size limitations on Rsync file transfer:
rsync -avzhe ssh --max-size='100k' /desktop/Cloudzy [email protected]:/home/Public
Determine Minimum Size for File Transfer in Rsync
Just like setting a max size for file transfer, you can determine the minimum size of the file you want to transfer by Rsync to the remote server tool. In the below command, we will set the minimum file size to 10k:
rsync -avzhe ssh --min-size='10k' /desktop/Cloudzy [email protected]:/home/Public
Remove Files from The Source After Synchronization Completed
Once you are done using the Rsync command, you may not need to have the file on the source system anymore. In this case, you can use the Linux Rsync command like below to remove the files from the source:
rsync --remove-source-files -zvh /desktop/Cloudzy [email protected]:/home/Public
Dry Run Sync
If you are new to Linux Rsync utility and are unfamiliar with its options, a dry run is a proper way to go. When you use dry run with Rsync, it will not alter files, but it shows the command’s output for you. After you make sure you want to run the command, you can remove the –dry-run option from it and execute it on the terminal. Look at the following command to know more about dry run functionality.
rsync --dry-run --remove-source-files -zvh /desktop/Cloudzy [email protected]:/home/Public
Recap: Utilizing Linux Rsync Commands
This article explained how to use Linux Rsync to remote server(and Rsync to local server) capabilities for various use-cases, including system mirroring, creating a backup of files, and copying files and directories locally and remotely using an efficient approach. This well-known Linux command enables you to benefit from fast file transfer while enabling you to use SSH and data compression.
Build on a Linux VPS with root access, NVMe, and AMD EPYC power.
View Linux PlansYou can make the most out of this operating system by getting a Linux VPS solution from Cloudzy, enabling you to benefit from KVM-based hosting plans. We proudly offer you high-performance VPS services with 99.95% uptime, stability, minimal latency, worldwide data centers (12 locations), ultra-fast SSD storage, and 24/7 tech support. You could start using your Linux VPS at $4.95 and scale it if you want a more advanced solution.
FAQ
Which TCP port does Rsync use?
SSH typically uses port 22 as its default port. Therefore, when utilizing rsync over SSH, it will function on this particular port. On the other hand, when employing the Rsync daemon, port 873 will be utilized.
What is Rsync?
Rsync is a Linux utility that can synchronize files and directories remotely or locally. Using Rsync command lets you perform various data-related tasks, such as synchronization, copying, and getting backups.