
TeamSpeak is a great VoIP (Voice over Internet Protocol) solution used among online gamers. It is an online chatting platform that lets you connect to your friends and team members across multiple gaming platforms.
In order to use the protocol, you have to install a TeamSpeak Server on your operating system. You can install a TeamSpeak server on Linux and also on Windows. In this blog post, I will walk you through the 5 steps on how to set up a TeamSpeak server on Windows. This will help you with going through the process easily and seamlessly.
What is TeamSpeak?
A TeamSpeak server’s main interest is to place a call and communicate with people over the internet. You can use TeamSpeak on both computers and mobiles. TeamSpeak 3, the newest edition of the protocol, provides many new features via using cutting-edge VoIP technology.
One of these features is allowing users to build virtual rooms for sending and receiving files, and chat online as well as making calls. Another beneficial feature for professional gamers is the in-game overlay feature. It allows you to watch critical information in small, semi-transparent windows if you ever needed to see your team members screens. Some other interesting features of TeamSpeak 3 are:
- TeamSpeak exploits end-to-end encryption to increase user security. You can determine who can be joined to a chat room and who operates that.
- As mentioned above, you can transfer and save files between conference members. This ability works on every firewall type.
- To extend the functionality, you can Implement easy customization, plugins, and tools as you wish.
Host a TeamSpeak server with reliable performance and low latency.
Launch Voice ServerReasons to Use TeamSpeak 3
TeamSpeak is a user-friendly protocol. Anyone can install and use it. But what are the reasons you might need a VoIP like TeamSpeak? If any of the criterias bellow matches you and your needs, you can benefit from using TeamSpeak.
- Online gamers: As I mentioned before, TeamSpeak is a great VoIP solution for online gamers to connect with friends and team members cross-platform.
- Business professionals: big companies with a high number of employees can benefit from a high-tech and secure VoIP like TeamSpeak. If you are a business owner you can use a TeamSpeak VPS Server Hosting to improve your teamwork and connection with your team members.
- Students: TeamSpeak is a great solution for remote or online education, especially during the COVID-19 pandemic. It helps have a seamless experience during online courses and taking virtual classes.
Ultimate Guide on How To Setup a Teamspeak Server on Windows
Now that you want to use TeamSpeak, I’m going to show you how to set up a TeamSpeak server on Windows. Setting up a server sounds scary but don’t be intimidated by it. This guide will walk you through the process step-by-step.
1- Check the Windows version
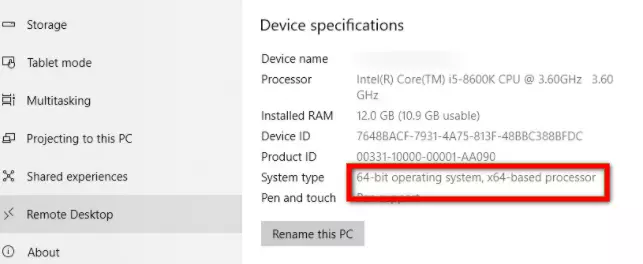
The first thing you need to do is to check which version of Windows OS you have installed. Follow this address to see if you have a Windows 32-bit or 64-bit:
- Select the Start button > Settings > System > About . Open About settings.
- Under Device specifications > System type, see if you’re running a 32-bit or 64-bit version of Windows.
2- Download TeamSpeak
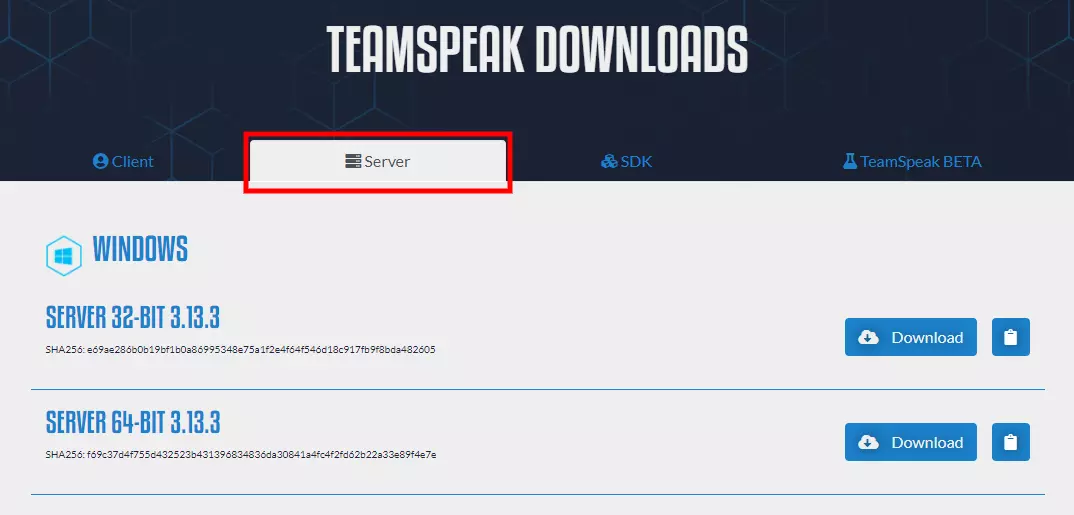
TeamSpeak comes in both 32-bit and 64-bit versions. Go to TeamSpeak and download the Teamspeak 3 server based on your Windows OS version.
3- Extract files and install the app
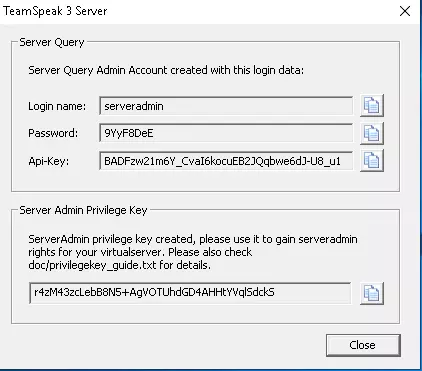
After downloading TeamSpeak, extract the files using WinRAR and run the installer, TeamSpeak3.exe with the administrative mode. After acception terms and conditions, you will be presented with the Server Login Credentials. Keep these credentials in a text file or somewhere safe if you needed to use them in the future.
4- Authorize the TeamSpeak 3 Ports in Windows Firewall
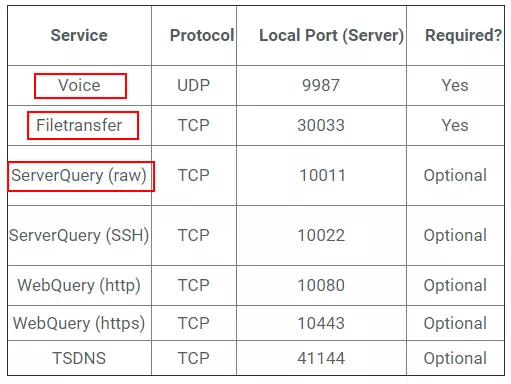
In case input ports are not allowed on Windows for this service (Generally, it is not for new services unless you enable it during installation) you should do it manually and allow the required ports on the Windows firewall.
TeamSpeak uses seven ports for a worthwhile connection between the client and server. Use the image above as a guide.
5- Connect using TeamSpeak 3 Client
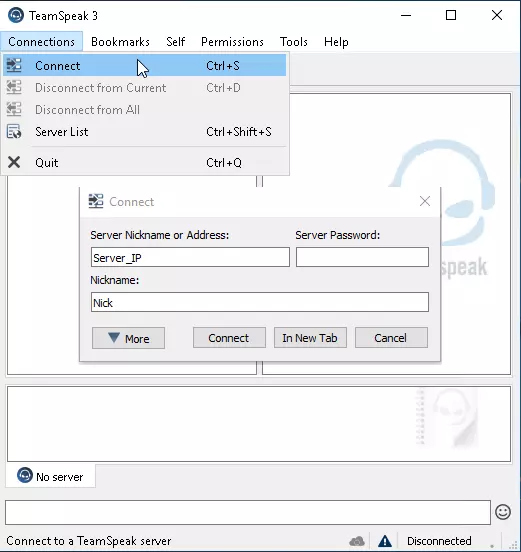
Now that the app is installed you have to connect to the TeamSpeak server. Open the app and on the connections tab, enter your VPS information like username, password, and nickname and then click on Connect. You are now connected to your TeamSpeak 3 server.
Host a TeamSpeak server with reliable performance and low latency.
Launch Voice ServerTo Recap
Setting a TeamSpeak server up on Windows is pretty easy when you follow the right guidance. TeamSpeak has all the features you need to have a seamless, secure, and high quality online connection with your team members, whether you are an online gamer, a business owner, or even using the protocol for online education. If you came across any questions during the installation process, feel free to leave us a comment. We will be more than happy to help!