💡 Note: You’ve just found the perfect VPS to host your Plex Media Server. Check out Cloudzy’s Linux VPS, optimized for high performance and smooth media streaming. Get started today and enjoy an awesome Plex experience.
This tutorial will explain setting up a Plex Server on your Linux VPS, specifically on a server running Ubuntu and Debian. Notice that some of the following steps are related to VPS for Plex and should be applied on your remote server, while some configurations are for the computer (local). We will mention and divide them for you. Moreover, we will introduce the best VPS for Plex and suggests you some ways to optimize your Plex streaming. So, before delaying this any further, let’s talk Plex.
What is Plex?
Plex is a streaming media server that enables you to manage your media, including video, music, and photo collections, streaming them to your personal computer, phone, tablet, or TV at any moment and from anywhere you want. You install the Plex media server on all primary operating systems and devices. The million-dollar question now is how to install Plex Media Server on Ubuntu? Or any other operating systems for that matter.
How to install Plex on VPS: Ubuntu
Plex is proprietary software, so it is not included in the Ubuntu repositories. Of course, you can easily install Plex Server Media as it is pretty straightforward. We’ll need to enable the Plex official repository and install the package using apt. Again, this does not require you to have a specific technical background, and installing and configuring this media server will not take more than 20 minutes of your time.
Step 1: Adding Plex APT repository
The first thing you have to do is to add the Plex APT repository to your system and import the repository’s GPG key; To do so, run the following commands:
curl https://downloads.plex.tv/plex-keys/PlexSign.key | sudo apt-key add -
echo deb https://downloads.plex.tv/repo/deb public main | sudo tee /etc/apt/sources.list.d/plexmediaserver.list
Step 2: Updating and installing the server’s latest version
After you have your repository enabled, you need to update the apt package list and install the latest server version: via the following command:
sudo apt update
sudo apt install plexmediaserver
Step 3: Verifying Plex
You can check the service status to verify if the Plex is running or not via this command:
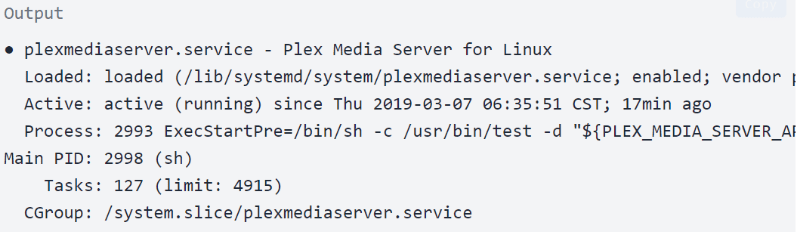
sudo systemctl status plexmediaserver
Once you run the command, you will see an output similar to this:

All done, you have Plex installed on your Ubuntu at this point. Additionally, there is something you need to do to entirely be done with installing Plex on Ubuntu, and that is adjusting your firewall.
Step 4: Adjusting your firewall rules
You already have installed Plex, and it is running on your server, but you have to ensure the server firewall’s configuration allows traffic on the Plex-specific ports. If you do not have a firewall running on your system, you can skip this part of the article.
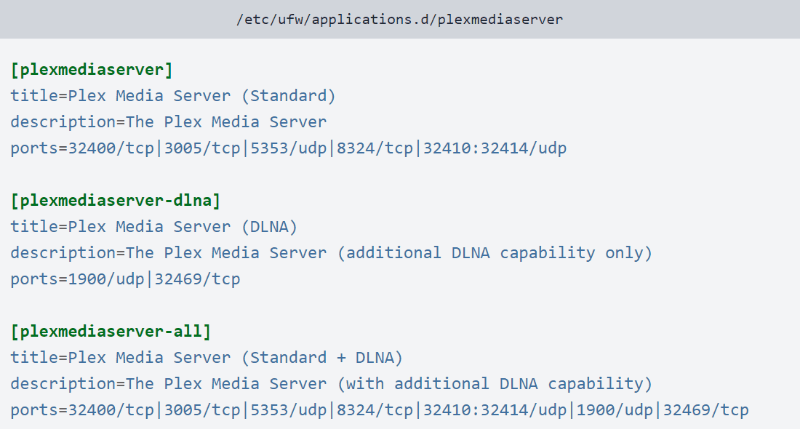
If you are utilizing UFW for managing your firewall, the most straightforward choice is to make a UFW application profile via the below command:
sudo nano /etc/ufw/applications.d/plexmediaserver
You now must save this file and update the profile list with this command:
sudo ufw app update plexmediaserver
Use this command to apply the new firewall rules:
sudo ufw allow plexmediaserver-all
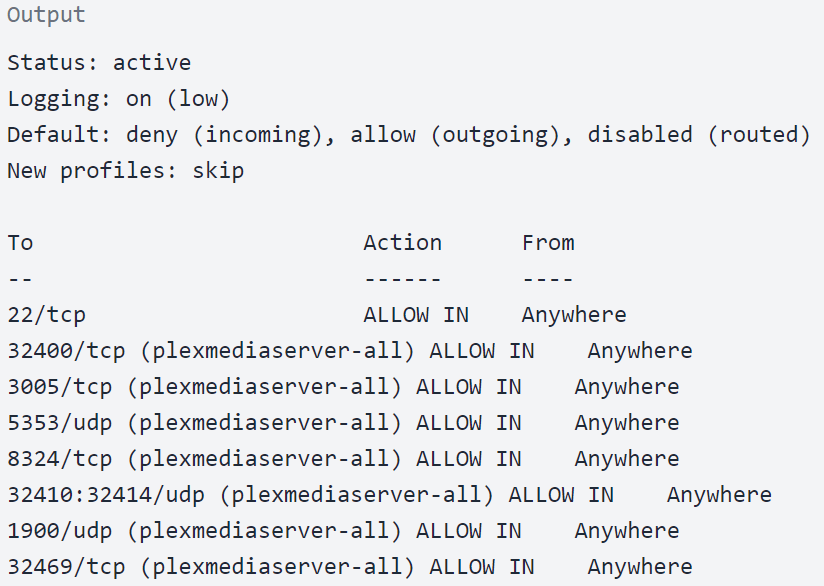
At last, you should check to see whether the firewall rules are successfully applied or not. Run the following command to do so:
sudo ufw status verbose
You should be seeing an output similar to this:
You have gone through some installation steps on your server, utilizing the best VPS for Plex of your choosing. So after installing Plex on your Ubuntu and modifying your firewall, you also need to know how to configure Plex Media Server.
Pay attention that the following steps are related to your system and not your VPS for Plex.
Step 5: Configuring Plex Server
Before going to the Plex setup wizard, you can use the following command to make the directories for storing the Plex media files:
sudo mkdir -p /opt/plexmedia/{movies,series}
The Plex operates as the user plex, and this user needs to have read and execute permissions to the media files and directories. You can use the below command to determine the proper ownership:
sudo chown -R plex: /opt/plexmedia
Note that you can select any location to store media files, ensure that you set the correct permissions.
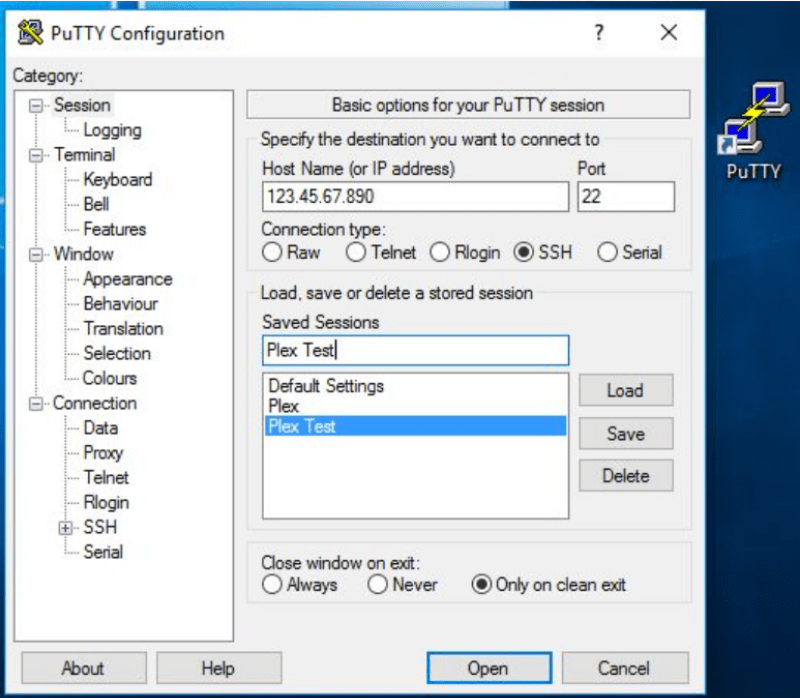
You now have to start start PuTTY in localhost mode to set up the Plex server using your local browser at this step of configuration. Open the terminal, Enter the IP address your VPS provider supplied you with.
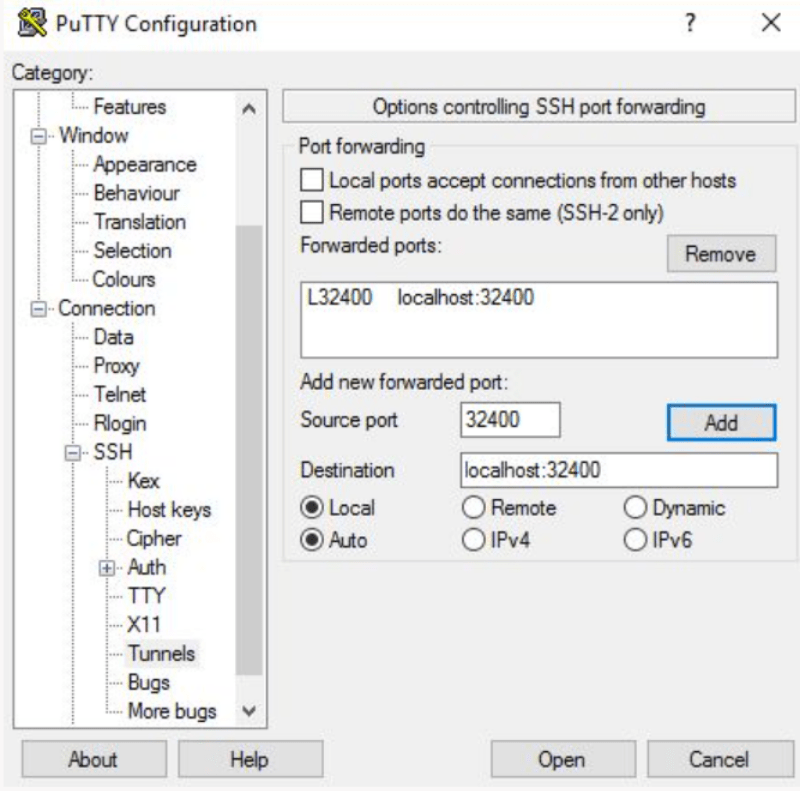
Before clicking on Open, search for Connection on the left-hand side, choose SSH, and click on Tunnels. Type 32400 as a value for Source port and localhost:32400 for Destination fields. Now you can click on Add button.
After you click on Open button, you will be logged in as your new Plexuser.
Now, let’s proceed with the Plex server configuration.
-
Open Plex website
Go to your browser, and type http://YOUR_SERVER_IP:32400/web in your address bar, redirecting you to the plex website.
-
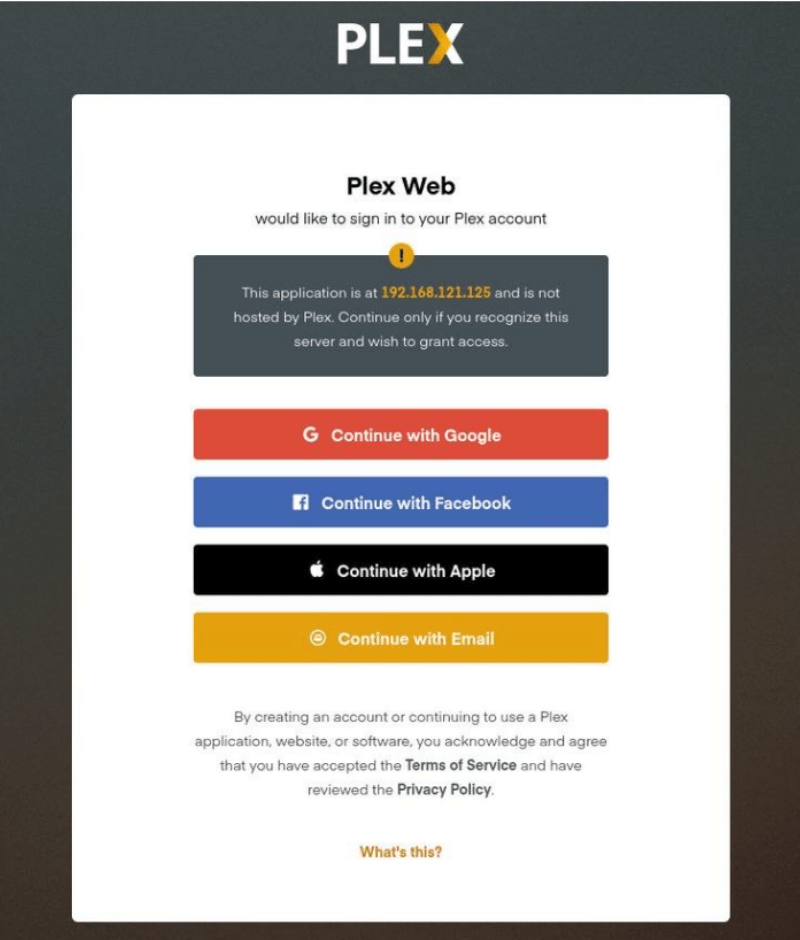
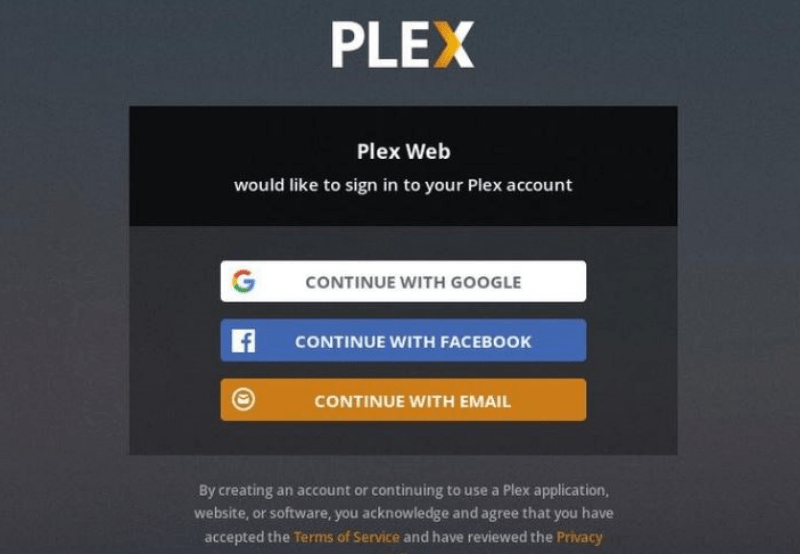
Create a Plex server account
To use Plex properly, you have to create an account. Additionally, you can click on the Google, Facebook, Apple, or Email buttons to make a free Plex account via them. If you prefer to access the premium features of Plex Server, buy a Plex Pass plan.
When you sign up, you will be redirected to the page on which you will see details about how Plex works.
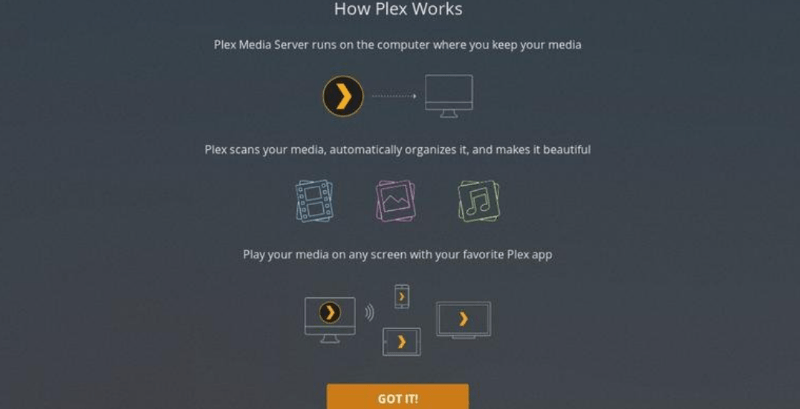
It would be best to go through these brief explanations quickly and click on the got it button.
-
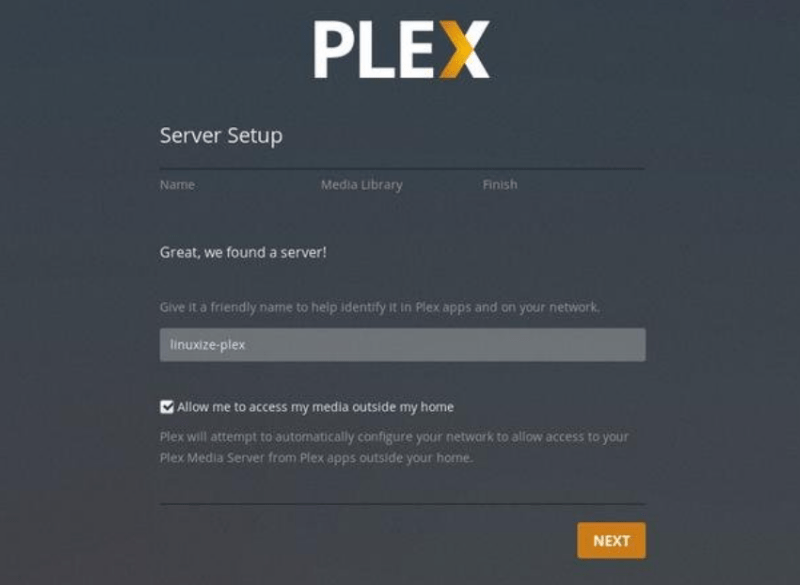
Insert Plex server name
On the next page, you need to type your Plex server name. Do not uncheck the Allow me to access my media outside my home box option, and click on the Next button.
-
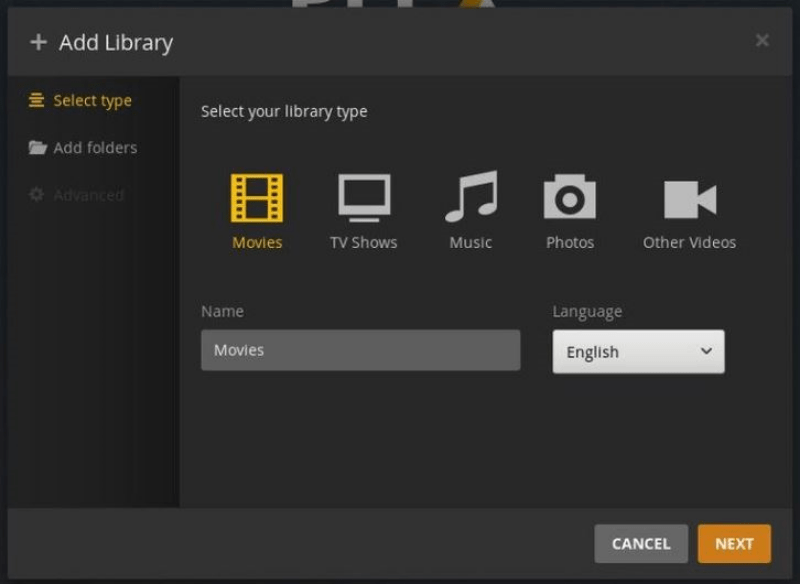
Add a media library to Plex Server
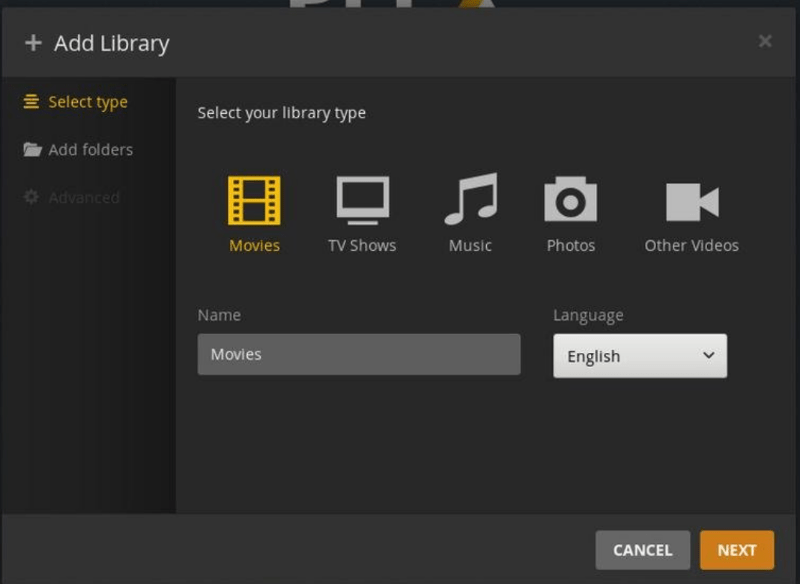
At this point, you need to add a media library; to do so, click on the Add Library button.
Once the popup windows show up o your monitor, you should choose the media type. Pick the movie as the library type and click on next.
-
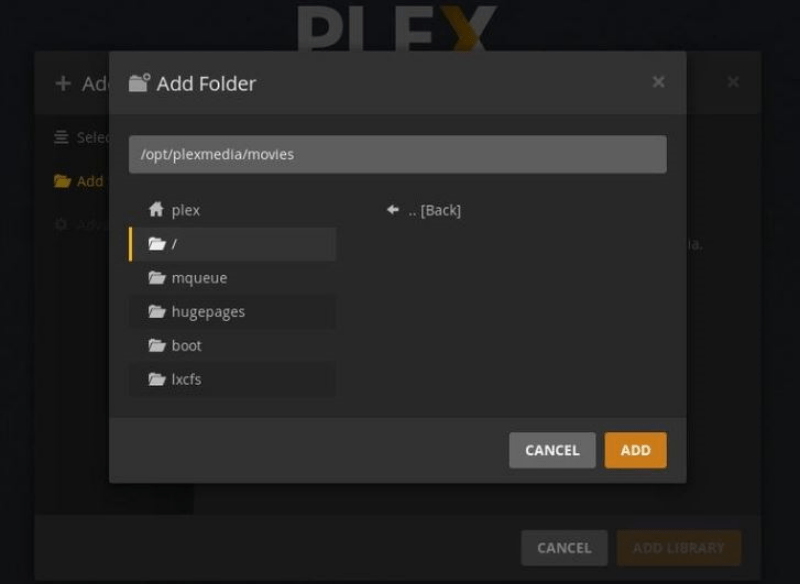
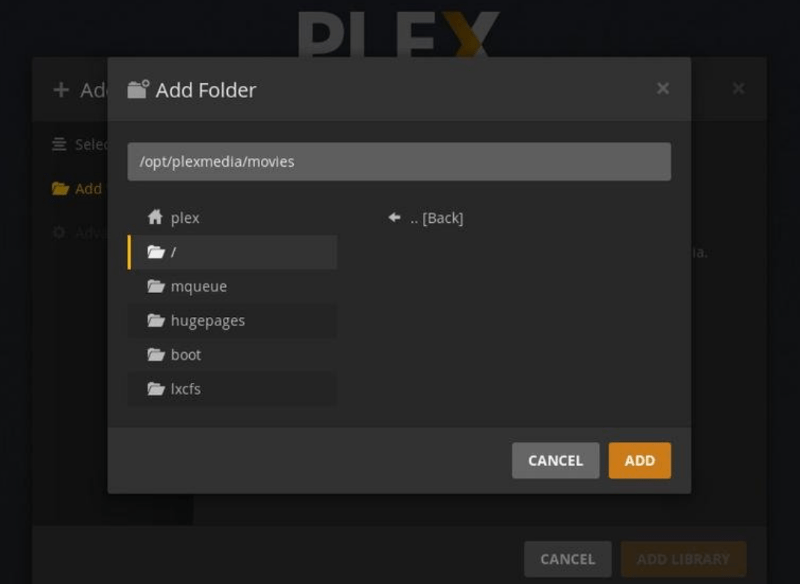
Insert the path
Now click on the browser for the media folder and then add the path to the directory which contains the Movies media files. In this Plex server guideline it is /opt/plexmedia/movies.
-
Add media to your library
Once you select the path, click on the add button and then add library. There is no limit on adding libraries for your plex server, which means you can add as many as you like. You are now all set to add media to your library.
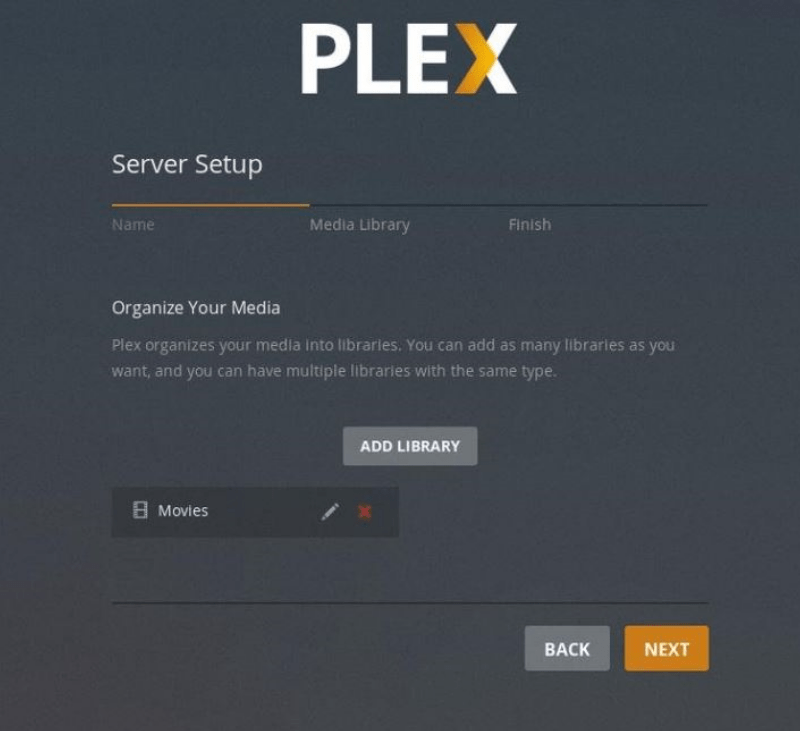
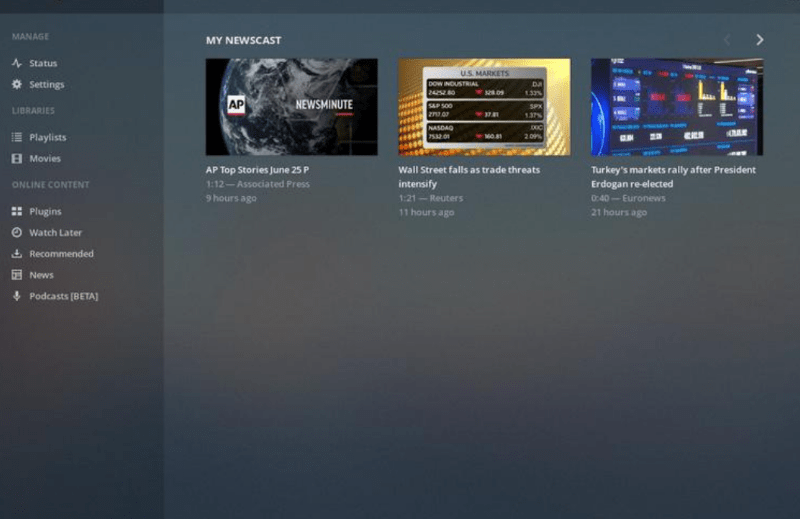
You are almost done configuring your Plex server; click on Next button, then Done. Doing so will redirect you to the Plex web dashboard.
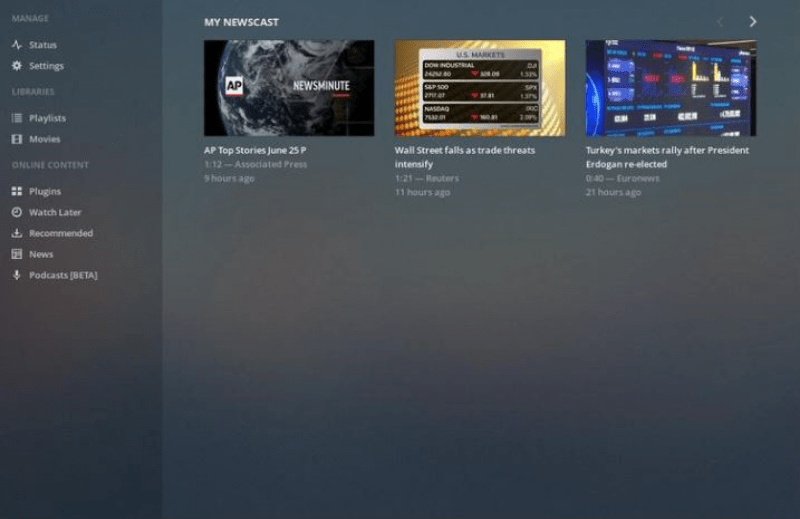
At this point, you have gone through the setup wizard. So you now can start digging Plex options and all its incredible capabilities.
As you probably gathered until now, using VPS for Plex is a convenient alternative. So let’s discuss the required steps for installing Plex on Debian, giving you an additional tutorial on PLEX VPS!
Also Read: Best CPU for Plex Server 2022
How to install Plex Media Server on VPS : Debian
Before diving into the step-by-step guideline, note that you need to log in as a user with Sudo privileges to install Plex Media Server on your Debian system.
Step 1: import the repository’s GPG key
Similar to Ubuntu, Plex Media Server is not provided in the official Debian package repository. So, we should use the Plex official repository. You can import the repository’s GPG key using the curl command like this:
sudo apt install curl
curl https://downloads.plex.tv/plex-keys/PlexSign.key | sudo apt-key add -
you need to add the Plex APT repository to your system’s software repository list via this:
echo deb https://downloads.plex.tv/repo/deb ./public main | sudo tee /etc/apt/sources.list.d/plexmediaserver.list
Step 2: install the latest version of Plex
now that the Plex repository is enabled, you need to update the apt package list and install the most recent version of the Plex Media Server using these commands:
sudo apt install apt-transport-https
sudo apt update
sudo apt install plexmediaserver
Step 3: Verifying the plex installation
Your Plex Server is now automatically running. If you want to check whether Plex is correctly installed or not and SSH service is running, use the below command to receive a print of the Plex server status as an output:
sudo systemctl status plexmediaserver
You will see an output similar to this:
Step 4: Modifying the firewall rules
Like Ubuntu, you also need to adjust your firewall rules for this operating system, meaning that it must be configured to allow traffic on Plex-specific ports. Assuming you are using UFW to manage your firewall, let’s go for the next few steps. Open your preferred text editor and create the UFW application profile:
You can save the file and update the profiles list via this command:
sudo ufw app update plexmediaserver
use the following command to apply new firewall rules:
sudo ufw allow 22sudo ufw allow plexmediaserver-all
now you need to check if the new firewall rules are applied successfully using this command:
sudo ufw status verbose
It is time to configure the Plex server on the system.
Step 5: Setting up Plex Media Server
Before we get into Plex setup, we should make the directories in which you will have will the Plex media files saved; enter the following command to do this:
sudo mkdir -p /opt/plexmedia/{movies,series}Copy
You will be running Plex Media Server runs as the user plex; note that you need to have read and execute permissions to the media files and directories. You can use this command to determine the correct ownership:
sudo chown -R plex: /opt/plexmediaCopy
Of course, just like Ubuntu, You can pick any path to store the media files.
you now need to enter http://YOUR_SERVER_IP:32400/web in your browser, which will show you sth like this:
You must create an account to use the Plex Media Server. So, click on the Google, Email, or Facebook button to make a free Plex account. If you prefer to use the premium features of Plex server, buy a Plex Pass plan. After you sign up for a Plex server account, you will see a page that explains how Plex works. just like the previous Ubuntu guideline sections on VPS for Plex, you should scan through the info and click on the got it button.
You now have to type your Plex server name and click on next button. Note that you do not require to uncheck the Allow me to access my media outside my home box option.
You need to add a media library at this step by clicking on the Add Libary option. Then, choose movies as library type and click on Next button.
Now you must add the path for the directory in which you will have the Movies media files. Click on Add button and then press the Add Library button.
Like what we mentioned about Ubuntu and VPS for Plex before, you can add any number of Libraries you want here.
Finally, when you click on Next and Done, you will see the Plex server dashboard.
Additionally, You can learn more about Debian vs Ubuntu comparison to help choose the right distro for your needs. After knowing everything about configuring the Plex server for Ubuntu and Debian, you may ask yourself an important question: how do I optimize Plex streaming?
Also Read: Install PPTP VPN Server on Your VPS
How to optimize Plex streaming?
You can take some actions to have your media streaming in the best possible way with Plex Media Server. We will describe these to give you the best VPS for Plex tutorial so that it helps you use Plex smoothly and professionally.
-
Managing your Plex agents
Plex Media Server can automatically pull in metadata for your content, but you have to format your Plex media files precisely. Metadata delivers you so much more than what you know. In addition to knowing details about movies, like their posters and Episode names, it can tell you about the actors, directors, and even reviews about the content.
You have to get it right, meaning that you must configure agents correctly. IT is necessary to ensure that Local Media Assets are specified below other metadata sources. If not, Plex will use existing local metadata on the file as its source. To change these orders:
- Click on Settings > Settings > Agents.
- Then head to Movies > The Movie Database.
- Drag Local Media Assets (Movies) below The Movie Database.
- Go to Programmes > TheTVDB and move Local Media Assets (TV) below TheTVDB.
-
Limit the Upload Speed
Using Plex, you can stream content outside of your network, which allows you to watch your Plex videos when you’re not home or give server access to friends and family to use your library. You can Set up remote access by going to Settings > Settings > Remote Access and clicking on Enable Remote Access option.
Additionally, suppose your ISP does not provide you with a fast upload speed, or you have several people streaming content simultaneously. In that case, it is a good idea to modify your upload speed. Because limiting the speed will prevent your home network from getting slow during this process. You can change your Upload speed by going to Settings > Settings > Remote Access and looking for an Internet upload speed option, enabling you to optimize your plex streaming and video streaming on your server.
-
Optimizing Plex Videos
Optimizing videos is one of the valuable features of the Plex server, offering you a way to convert them to other formats. For instance, let’s say you like to watch Titanic, Batman, and WaLL-E on your iPad while you are traveling. Before this trip, you can easily optimize these videos, making them ready to be played on your selected device.
Optimizing video is known as a pre-transcoder step; of course, doing so makes transcoding unnecessary. If you are not familiar with transcoding video and its concepts, don’t worry; we will get into it in the following section.
Moreover, as far as people who are watching a video remotely at the same time are concerned, Media optimization is helpful since it will reduce the pressure on the CPU.
This feature enables you to optimize a particular show, a series, or even your whole library. To do this, click on the three horizontal dots for the content you want to modify and select Optimize option. You can choose to optimize particular videos or just the unwatched ones. In addition, it enables you to specify the quality of the video optimization providing you with different alternatives, including optimization for Mobile, TV, Original Quality, or Custom optimization.
It is worth mentioning that the custom setting allows you to determine a particular device, resolution, and bitrate. Note that you can manage the optimization queue list by going to Settings > Status > Conversion.
-
Handling Plex Transcoding
You can use Plex Server to transcode your videos, making them playable for other devices like mobiles and set-top streaming devices. The only problem is that transcoding is quite CPU-intensive, so your CPU’s power may reach its limits during transcoding multiple items.
- To address this issue, you have to tweak the transcoder’s setting by going to Settings > Settings > Transcoder. After clicking on show advanced, you will see three values, named Transcoder Quality, Background Transcoding x264 Preset, and the Maximum number of simultaneous transcode sessions.
Since they are essential in optimizing your Plex streaming, Plex you should get familiar with them:
- Transcoder Quality: Using this option enables you to set the quality of the transcodes.
- Background Transcoding x264 Preset: you can indicate the speed of background transcoding.
- Maximum number of simultaneous transcode sessions: This is the most critical setting for most users as it directly affects putting strain on your CPU. So after Considering your CPU’s capabilities and the number of people streaming simultaneously, set a number accordingly. Note that this value may require you to run trial and error to get it right.
-
Defining the Plex Streaming Quality
Plex server has various streaming quality settings, including setups for computers, mobiles, and streaming boxes, among other things. The setting you choose to go with can determine your videos’ quality and resolution. If you use a lower setting, the video quality will reduce too. But, it results in faster loading, and it needs lesser bandwidth. So, modifying these settings on Plex is another way for you to optimize your Plex streaming. You can alter three settings, called Local Quality, Remote Quality, and Online Quality.
-
Optimizing Plex Database
Plex delivers two pathways for optimizing your Plex streaming, which means you can also optimize the whole Plex database in addition to the earlier approach. Optimizing the Plex database enables you to force Plex to get rid of unused and fragmented data. It is essential to run the tool each time you make various edits or modify entire libraries, helping the Plex server work without getting slow. To optimize the Plex database, you need to go to Settings > Manage > Troubleshooting > Optimize Database and press the button to begin.
-
Removing old artwork
Downloading artwork is an integral element of bettering your Plex experience. Having all the proper movie posters and series covers eases finding what you’re searching for. Plex enables you to download artwork automatically, but it stores the old artwork even if you decide to change it later. It would help optimize Plex streaming if you got rid of the unused artwork, freeing the spaces it takes. To remove the previous artwork, go to Settings > Manage > Troubleshooting > Clean Bundles.
We have given you a complete guideline on using VPS for Plex on Ubuntu and Debian and various ways to optimize your Plex streaming. Having these tutorials as the best VPS for Plex background, Let’s now discuss running Plex on a VPS in more detail.
Also read: How to Secure Linux VPS | 20 ways to secure VPS Server
What to consider when running Plex on a VPS?
Earlier, we briefly referred that using the Plex server and doing various streaming tasks may require a powerful CPU, among other robust resources. Running Plex on a VPS is a wise idea to address these issues as it offers you multiple advantages over other methods. When using VPS for Plex, you only need to be mindful of some aspects, including CPU, RAM, and network usage. To use the most of the Plex server’s potential, the best VPS for Plex needs to provide you with what we list here:
- high-performance VPS plans at affordable prices
- worldwide data center locations to remove the latency
- Utilizing kernel-based virtualization, delivering entirely isolated resources from others
- giving you optimized server solutions with zero resource contention
- providing guaranteed uptime and connection stability
- Caring about clients and offering 24/7 technical support
We are proud to say that Cloudzy provides you with these valuable advantages. Furthermore, unlike many other VPS providers, we enable you to choose any Windows edition or Linux distro you want for your VPS plans, hoping to give the best solution for your PLEX VPS needs. We care so much about you as our clients that we offer a 14-day money-back guarantee so that you feel more comfortable and experience a risk-free purchase.

Build on a Linux VPS with root access, NVMe, and AMD EPYC power.
View Linux PlansRecap: Selecting the Best VPS for Plex
This article mainly guided you on how to use VPS for Plex in Ubuntu and Debian and in what way you can optimize your Plex streaming. The solution to all issues mentioned in this tutorial is running Plex on a VPS. We offer various VPS hosting solutions which you can use to stream your content on Plex server. Of course, our VPS plans have widely further use-cases, as we deliver ultrafast NVMe/SSD Storage, incredible bandwidth, and 99.95% guaranteed uptime with the state-of-the-art infrastructure. Do not hesitate to Get a VPS solution for as low as $7.95/month!
FAQ
How install Plex on VPS?
Here are general steps to install Plex on VPS:
- Download Plex Media Server and install it.
- Open Plex web interface and create a Plex account
- Add path directories to the server
- Add media libraries
How much RAM is required for Plex?
Running Plex on a VPS will need a minimum of 2GB of RAM. Of course, if you want higher performance and a better Plex experience, you should get VPS plans with more RAM allocations.
How do I get better streaming on Plex?
Here are some Plex settings that can optimize Plex streaming:
- Manage Plex Agents
- Limit the Upload Speed
- Optimize Plex Videos
- Handle Plex Transcoding
- Determine Streaming Quality
- Optimize Plex Database
- Remove old and unused Artwork
Is using Plex server a good idea?
Yes, it does not matter if you want to store many movies on a powerful media server or streamer searching for a convenient way, Plex Server and running it on VPS is suitable for your requirements.