你的邮编对账单和快递很重要,但你可能从不记得它。MAC地址也是如此。它本质上是一长串数字和字母,用作设备的唯一标识符。虽然不一定能一眼看出它在哪里,但查找MAC地址其实很简单。本教程将告诉你如何在Windows 10上找到MAC地址,以及如何在笔记本电脑或台式电脑上的Windows 11上找到MAC地址。 获取 MAC 地址命令 (命令行)和通过 Windows 设置两种方式来完成。页面末尾还有一个跳过整个流程的快捷方法。"概述"部分介绍了 MAC 地址是什么以及为什么需要它,如果你时间紧迫,可以直接跳到操作步骤。
概览
媒体访问控制地址(MAC 地址)用于在 WiFi、以太网和蓝牙网络上唯一标识设备。它通常由设备的网络接口控制器分配,该控制器是连接设备到互联网的硬件。MAC 地址类似于 IP 地址:两者都是用于识别网络上特定设备的唯一标识符。但与 IP 地址不同,你的 MAC 地址由硬件制造商提供,无论使用哪个 WiFi 都保持不变。此外,使用 MAC 地址安全性更高,因为其他人无法轻易看到你的 MAC 地址。
通常,日常网络连接不需要用到 MAC 地址。但在某些情况下,比如连接使用 MAC 过滤来增强安全性的 WiFi 时,你可能就需要它。为此,我们提供了两份教程:一份说明如何在 Windows 10 上查找 MAC 地址,另一份说明如何在笔记本电脑或台式机上的 Windows 11 上查找 MAC 地址。
在 Windows 10 上使用 Get Mac Address CMD 查找 MAC 地址
使用 get MAC address 命令是在 Windows 10 上查找 MAC 地址最快的方法。如果你不习惯使用命令行,这看起来可能有点复杂,但实际上非常简单。首先,我们需要打开命令提示符,即 Windows 内置的命令行界面 (CLI)。
第一步:打开命令提示符
启动命令提示符,你可以使用「运行」对话框或开始菜单。
使用 Run 框的方法:
按下 WIN-键 + R (或从"开始"菜单中搜索"run"打开它)
应用启动器窗口弹出后,输入 cmd 然后按 <Enter>
使用「开始」菜单:
使用「开始」菜单或搜索栏
搜索命令提示符,然后点击最上面的结果
步骤 2:使用 IPConfig 获取 MAC 地址
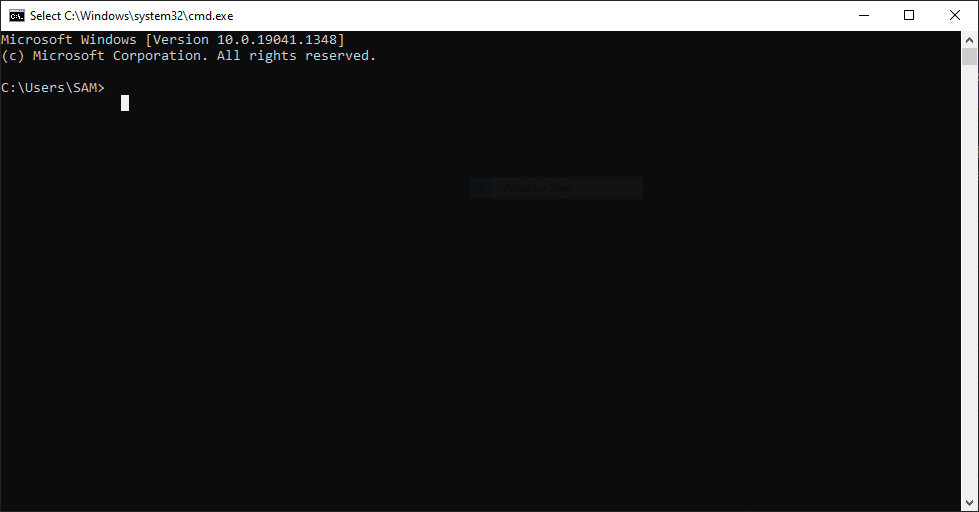
使用上述任一方式都应该打开 Windows 命令提示符,一个小窗口,看起来应该像这样:
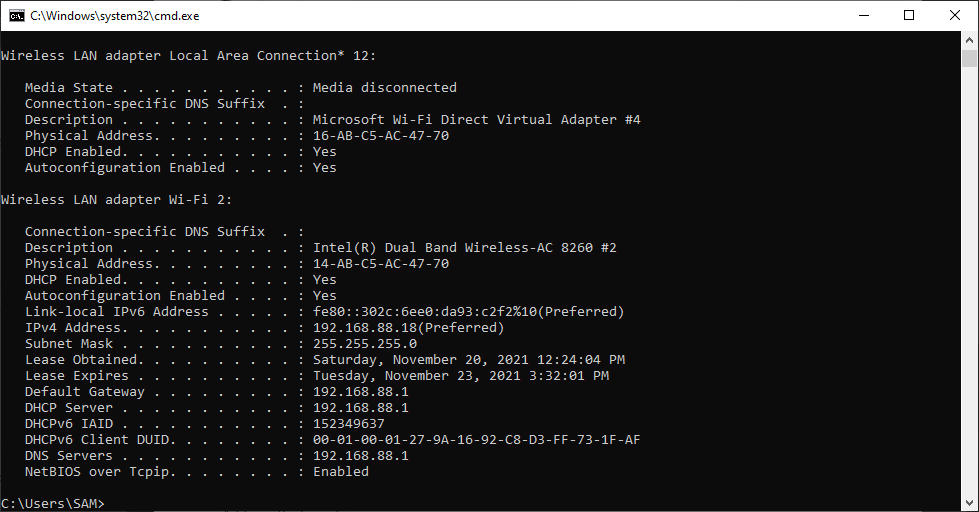
现在,我们来获取你的 MAC 地址,使用 ipconfig,这是一个命令,让你可以控制网络的一些基本方面。为此,你需要在命令提示符中仔细输入以下命令:
ipconfig /all
你也可以直接复制粘贴到命令提示符中。这样可以确保没有输入错误。
如果一切顺利,你将看到一大段文字,显示关于网络配置的详细信息。你的 MAC 地址会列在"Physical Address"(物理地址)一栏下,重点找到该项即可,其他信息可以忽略。在"Physical Address"前面会有一串由数字和字母组成的长字符串,格式如下(当然,你的 MAC 地址会与此处显示的不同):
你可以将它记下来,或者更简单的方法是复制粘贴到任何需要的地方。这就是命令提示符方法的全部内容。现在,让我们看看如何通过网络设置检查 MAC 地址。
在 Windows 10 上通过网络设置查找 MAC 地址
如果你熟悉 Windows 的图形界面,不想在命令行里折腾,网络设置会更容易。步骤会多几个,但对你来说可能更顺手。
- 首先,右键点击任务栏右下角的 WiFi 图标。
- 选择"打开网络和互联网设置"。
- 在打开的新窗口中,你会看到两个大的灰色按钮;一个是数据使用量,另一个是属性;点击属性。
- 滚动到刚才打开的"属性"页面的最底部,在最下方可以看到"物理地址 (MAC)"。
- 按住鼠标左键拖动选中"物理地址(MAC)"前面的数字和字母组合,然后按 Ctrl+C 快捷键进行复制。也可以点击灰色的"复制"按钮。请注意,该"复制"按钮会复制"属性"下的所有信息,而不仅仅是 MAC 地址,因此需要先将内容粘贴到某处,再单独复制 MAC 地址。
在 Windows 11 上查找您的 MAC 地址
虽然 Windows 10 和 Windows 11 在外观上有所不同,但查找 Windows 11 的 MAC 地址与 Windows 10 基本相同。首先,让我们来看看如何在你的笔记本电脑或 PC 上使用 get MAC address 命令找到 Windows 11 的 MAC 地址。
在 Windows 11 上使用 getmac 命令查找你的 MAC 地址
由于在 Windows 11 中查找 MAC 地址的过程与 Windows 10 中类似,我将使用 getmac 命令而不是 ipconfig。
- 首先,按 Windows 和 R 键打开命令提示符。
- 输入 cmd 然后按 Enter 键打开命令提示符。
- 命令提示符窗口打开后,输入以下命令:
getmac
你将在「Physical Address」下看到电脑的 MAC 地址。
在 Windows 11 上通过设置查找您的 MAC 地址
如果你不想麻烦地复制和运行获取 MAC 地址的命令,我理解。下面介绍怎样从设置中直接查找你的 MAC 地址,不用敲命令。
- 首先,同时按下 Windows 和 I 键打开「设置」。
- 在新打开的"设置"窗口中,点击左侧菜单中的"网络和Internet设置"。
- 根据您当前使用的是无线网络还是有线网络,在"网络和Internet"部分中选择"Wi-Fi"或"以太网"。
- 向下滚动,直到看到硬件属性选项,然后点击它。
- 在新打开的硬件属性窗口中,从网络详情中找到物理地址(MAC)选项。将光标悬停在该地址上,按住左键点击,然后同时按下 Ctrl 和 C 键即可复制该地址。
下一步是什么?
搞定!现在你已经学会了如何在 Windows 10 和 Windows 11 上使用 getmac 命令、ipconfig 命令以及图形界面查找 MAC 地址。接下来呢?是时候探索一下 提升连接安全性的方法。有 多种方式保护您的连接安全 使用 MAC 地址,有时间的话可以试试其中的一些。
随时随地以完整管理员权限访问 Windows 10 VPS。
Windows 桌面 VPS在教程开始时,我们承诺会提供一个快速方案来跳过复杂流程,现在是兑现承诺的时候了。与其纠缠于繁琐的配置和耗时的安全设置,不如交给我们来处理?获取 VPS,让你的工作和重要文件始终保持私密、安全可靠。 VPS 是一款价格实惠又安全可靠的托管服务 非常适合个人用户和小型企业。你可以 使用您的 VPS 用 Cloudzy 可靠的高可用性服务托管网站,或随时访问最重要的文件 VPS 托管方案.
常见问题
如何获取 Windows 的 MAC 地址?
在 Windows 10 和 11 中,只需打开命令提示符并输入 getmac 命令,即可在"物理地址"一栏中看到您计算机的 MAC 地址。此外,您也可以按照我们博客文章中介绍的步骤,通过图形界面来查找。