No matter which version of Windows you’re using, this article gives you a complete and step-by-step guideline on how to install IIS on Windows 10 and other platforms such as Windows server 2019, 2012, and 2012.
- What is IIS?
- How To Install IIS on Windows 10?
- How To Install IIS on Windows Server 2012
- Step 1: open the launch section
- Step 2: open the launch section
- Step 3: Add roles and features
- Step 4: Installation Wizard
- Step 5: Select role-based
- Step 6: Select a server from the server pool
- Step 7: Check the Web Server (IIS) section
- Step 8: Click on Add Features
- Step 9: Click on the Next
- Step 10: Click on the Next
- Step 11: Select web Server roles and Click Next
- Step 12: Install selections
- Conclusion
Microsoft has hit the tech market with its excellent IIS service, which has topped all the rivals and been the most popular web server for Windows. You can make sure of your web application and website’s high performance after installing IIS on your Windows server. As the name gives us a hint, IIS works best on Windows OS. However, you could use it on other platforms like Linux, but it won’t give you reliable performance.
What is IIS?
Internet Information Services (IIS) is a flexible and standard web server from Microsoft that runs on Windows systems to serve the requested pages or HTML files. The IIS server runs on the Microsoft .NET platform on Windows OS.
The IIS server receives requests from remote computers and, in return, responds with the correct response. That allows web servers to share and transmit data to all local and online networks.
Information sent to users is displayed in many ways, such as static web pages, through file exchanges such as downloads and uploads, and text, images, and more.
 Windows 10 VPS Hosting
Get yourself an efficient Windows 10 VPS for remote desktop, at the cheapest price out there. FREE Windows 10 running on NVMe SSD storage and high-speed internet.
Check Out Windows 10 VPS PlansHow Does IIS Work?
IIS operates with the help of standard protocols and programming languages. For things like text, buttons, image insertion, direct link/character, and hyperlinks, IIS uses HTML. HTTP is used to exchange information between a web server and a user.
HTTPS – HTTP over Secure Sockets Layer (SSL) uses Transport Layer Security or SSL to encrypt additional data security communications. File Transfer Protocol (FTP), or its secure alternative, FTPS, can transfer files. Additional supported agreements include Simple Mail Transfer Protocol (SMTP), sending and receiving email. The processes mentioned above and other languages and conventions together form an appropriate IIS package.
Also Read: Best Windows 10 VPS
How To Install IIS on Windows 10?
If you are using virtual machines such as Windows VPS, you must connect to Windows via Remote Desktop. The following steps are also helpful if you’re looking for how to install IIS on Windows 8, or Windows 8.1.
Step 1: open the launch section
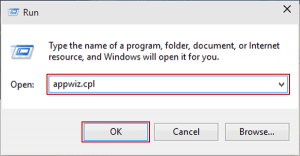
Press the Windows + R key to open the launch section.

Step 2: Type appwiz.cpl
Now type appwiz.cpl in that section and hit Enter. That opens Programs and Features in Windows 10.
Step 3: Turn off Windows features
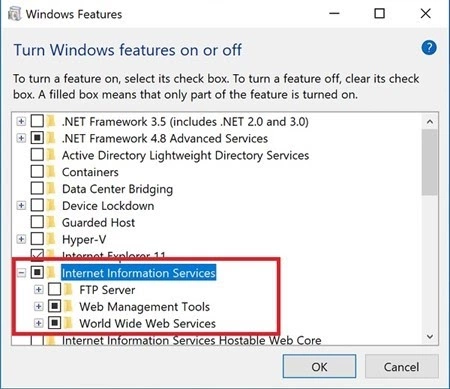
On the Apps and Features page, click Close or turn off Windows features.

Step 4: Check the IIS services
In the list of features, search the Internet Information Service (IIS), check the IIS services according to your needs, and press OK.
Step 5: Restart the computer
After the installation, restart your computer to complete the installation.
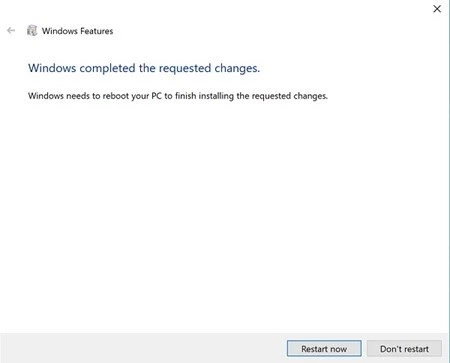
You can now access IIS in your browser by entering the 127.0.01 address on the local network. Moreover, you can have access to your IIS web server remotely by entering your server’s IP address in your browser. It looks like this: 185.156.x.x
Please note: Your IIS directory on your device is: C: \ inetpub \ wwwroot. You can copy this directory and have access to your website files or other files via an IIS web server using your browser.
Note: These steps are almost the same if you’re looking for how to install IIS on Windows 7.
 Unquestionable Stability
Get a free Windows 7 operating system on a Windows 7 VPS plan from Cloudzy — equipped with the latest hardware, including NVMe storage.
Get a Windows 7 VPSHow To Install IIS on Windows Server 2012
The process is almost the same for other versions of the Windows server. The following steps are also helpful if you’re looking for how to install iis on Windows Server 2016.
Also Read: How to install Linux Bash on Windows 10?
Step 1: open the launch section
To install IIS on Windows Server, press the Windows + R keys to open Run.

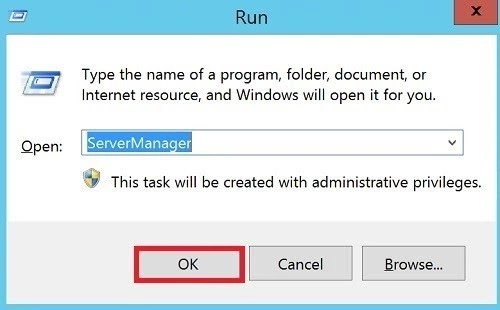
Step 2: open the launch section
Type ServerManager in the launch box and click OK. That opens the Programs and Features box on Windows Server 2012. [ or any other version you’re using.]
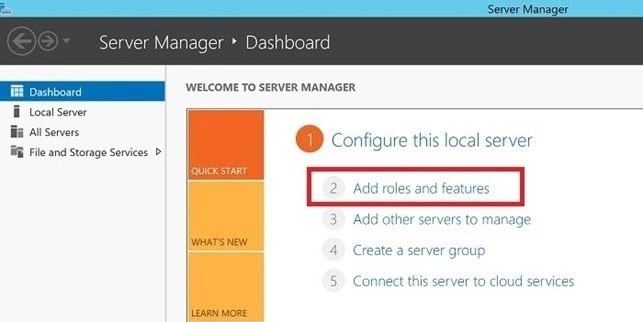
Step 3: Add roles and features
Click on the “Add roles and features” in the newly opened window.
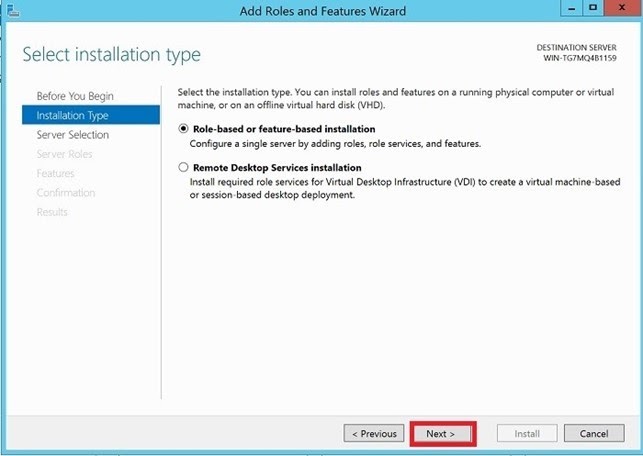
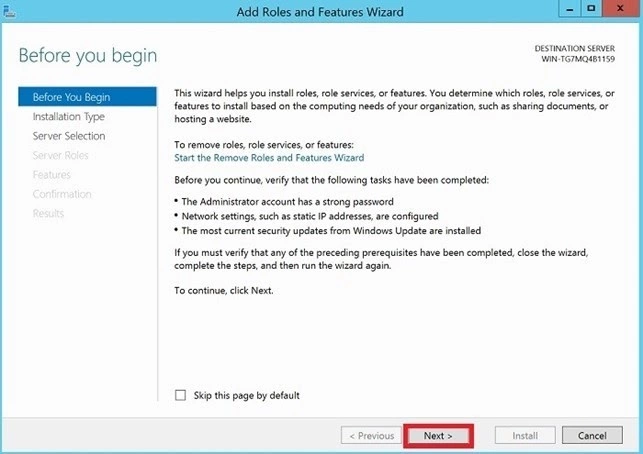
Step 4: Installation Wizard
Now, the Installation Wizard will appear Click Next.
Step 5: Select role-based
Look for roles based on a role or based on a feature and click Next.
Step 6: Select a server from the server pool
Now, click on the “Select a server from the server pool” from the window, then select Server and click Next.
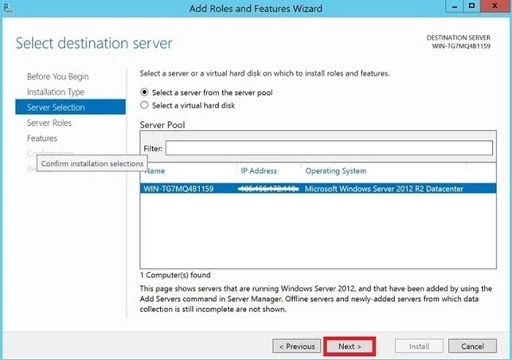
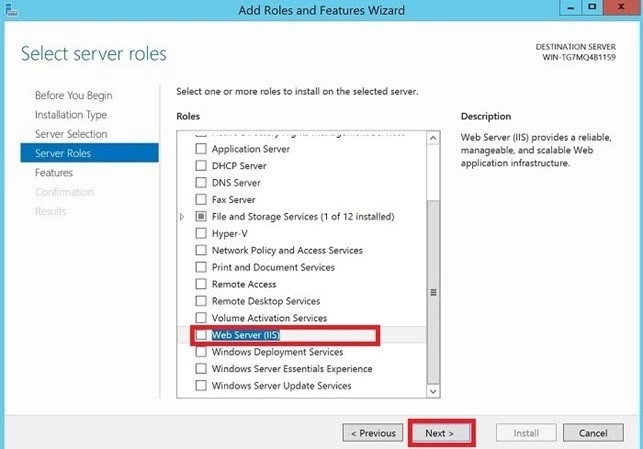
Step 7: Check the Web Server (IIS) section
When you get to the Series Roles section, scroll down to the list, then check the Web Server (IIS) section and hit Next.
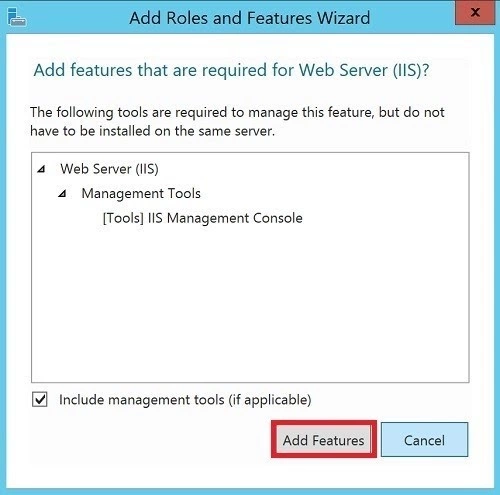
Step 8: Click on Add Features
Click on Add Features, do not forget that the checkbox click “Install management tool (if available)”
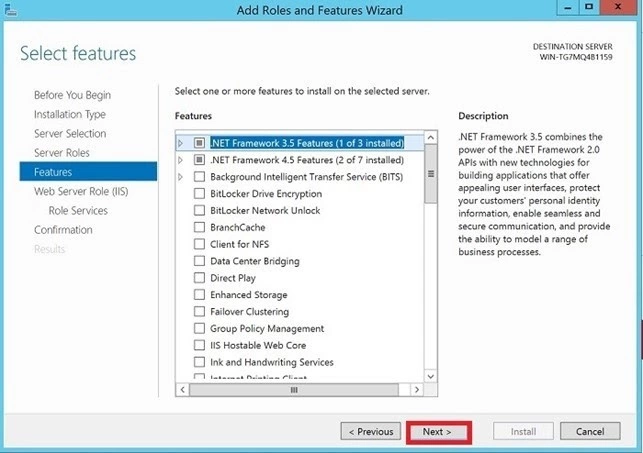
Step 9: Click on the Next
Keep the default features as they already are, then click on the Next.
Step 10: Click on the Next
Click on the “Next” when you’re done with the Web Server Roles (IIS) text.
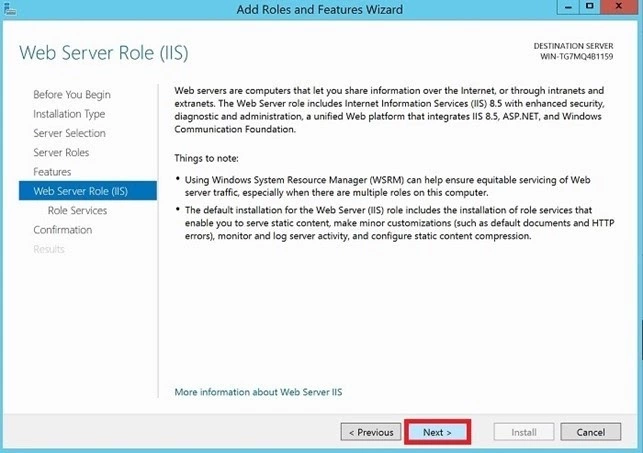
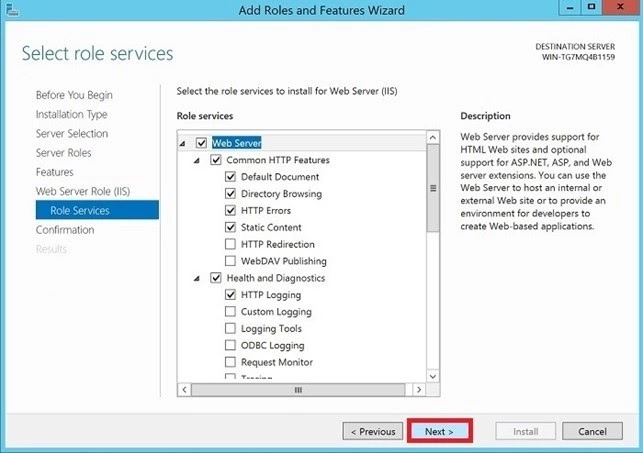
Step 11: Select web Server roles and Click Next
Click on the “Next” after selecting the Web Server roles as shown in the following image.
Step 12: Install selections
Click on the “Install.”
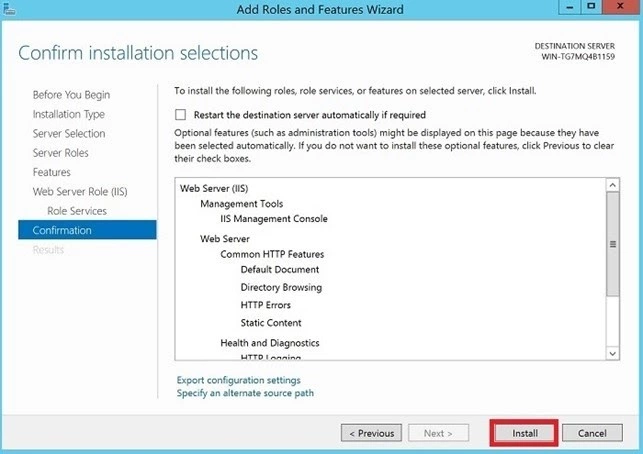
When the installation is finished, close the installation wizard. You will see the main Internet Information Services (IIS) interface similar to the one shown below.
Please note: Your IIS directory on your device is C: \ inetpub \ wwwroot. Now you can copy and access your website files or other files via an IIS web server using your browser.
Note: All the procedures mentioned above will also help you on how to install IIS on Windows Server 2019.
 Windows 10 VPS Hosting
Get yourself an efficient Windows 10 VPS for remote desktop, at the cheapest price out there. FREE Windows 10 running on NVMe SSD storage and high-speed internet.
Check Out Windows 10 VPS PlansConclusion
You just did it! Now that article has helped you on how to install IIS on Windows 10 and it’s running nice and smooth on your server; it’s time to ensure that your website is 100% functioning correctly, you’ll need a secure and cost-effective server.
Cloudzy proudly offers you its top-performing and budget-friendly cheap Windows Virtual Private Server and Remote desktop VPS services to help you have a 100% safe, smooth and reliable online presence.
If you start working with Cloudzy today, you’ll join a big club of happy customers who enjoyed having budget-friendly VPS servers with cutting-edge technology, worldwide locations, and 24/7 committed customer support. If you need more info on our service or no-obligation quotes, we’re just one simple call away!
