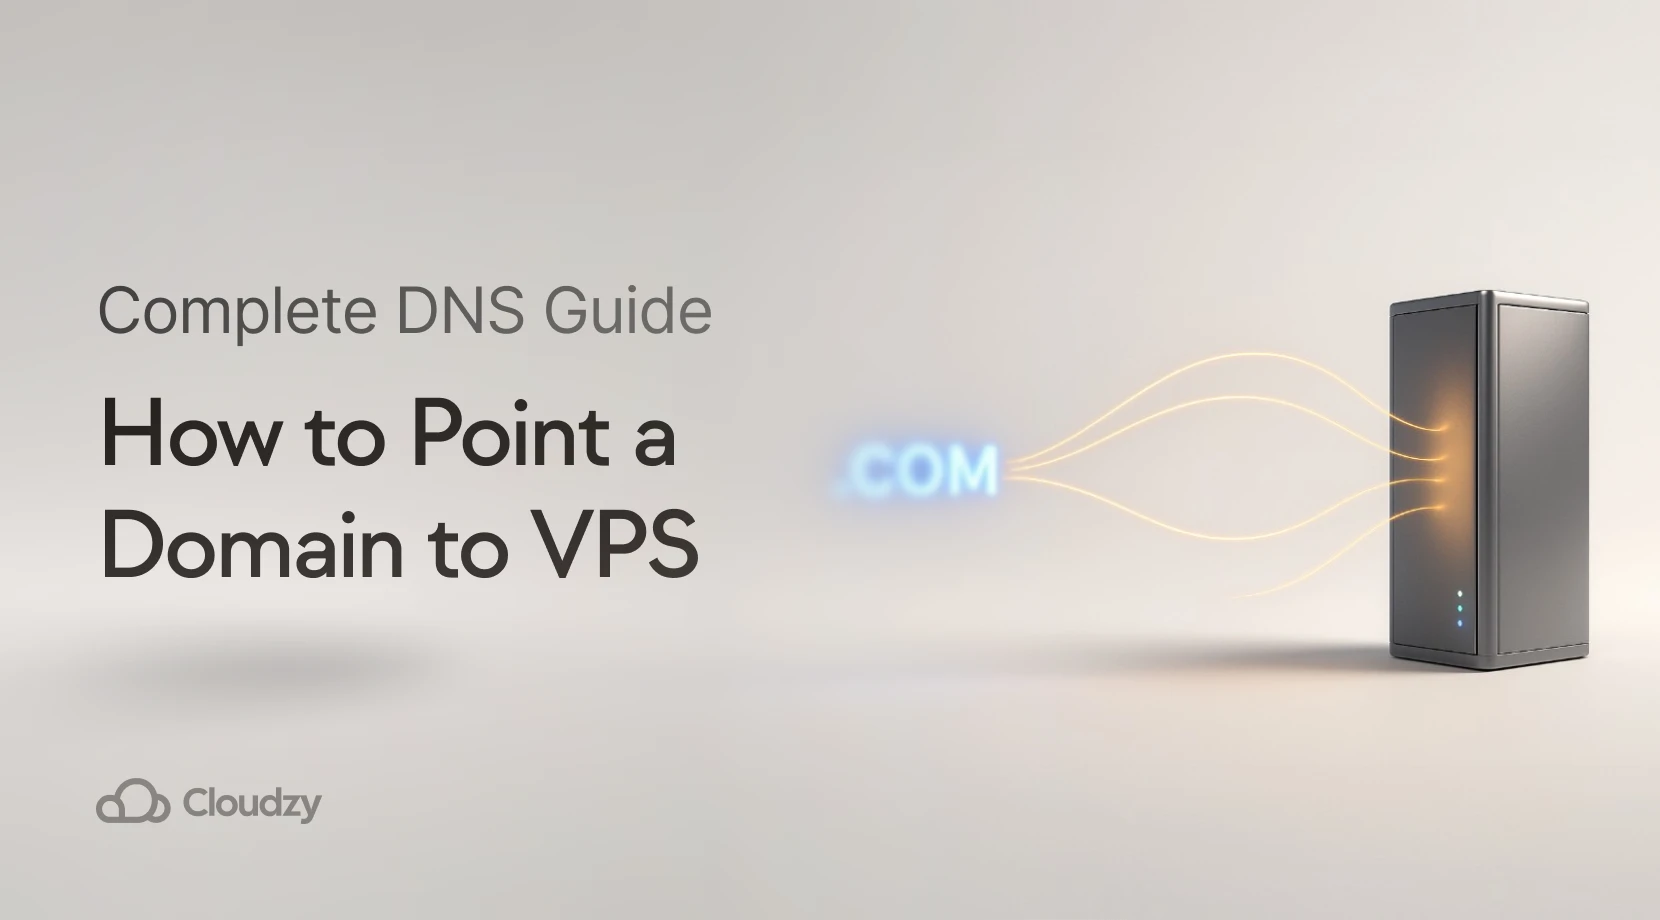
Pointing a domain to a Virtual Private Server is necessary for hosting websites and applications. This guide covers everything you need to know about connecting your domain to your VPS server, including DNS configuration methods, propagation timelines, and troubleshooting common issues.
Whether you choose the simpler A record method or the more advanced custom nameserver approach, you’ll learn exactly how to get your domain working with your VPS.
What Does Domain Pointing Mean?
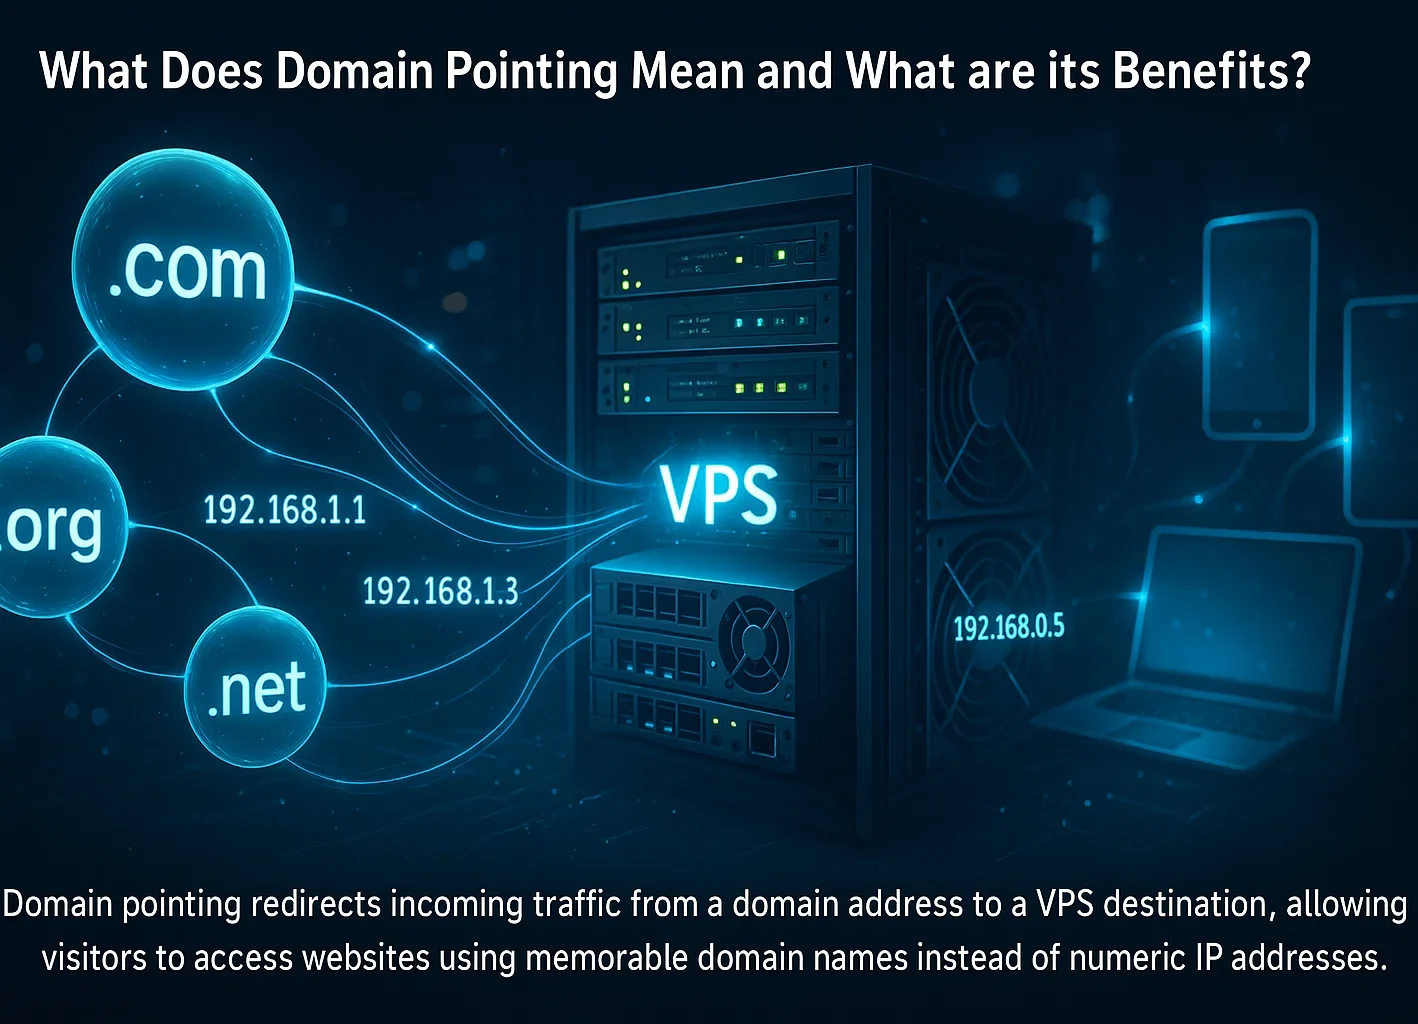
Domain pointing is the process of configuring DNS records to direct your domain name to your server’s IP address. When you point a domain name to a VPS, you create DNS entries (like A records or nameservers) that connect your domain to the IP address of your virtual private server.
This DNS-level connection allows visitors to access your website using a memorable domain name instead of typing a numeric IP address. With over 371.7 million domain registrations recorded globally in 2025, managing domain configurations has become a key skill for website owners and developers.
Domain pointing differs from domain forwarding. Pointing uses DNS records to resolve your domain to a server, while forwarding uses HTTP redirects (301/302) to send visitors from one URL to another. Learning how to connect a domain to a VPS is essential for anyone hosting websites on virtual private servers.
Prerequisites Before Pointing the Domain to the VPS
Before adding a domain to a virtual private server (VPS), gather the following items: Having these prerequisites in place will make the configuration process smoother and help avoid common errors.
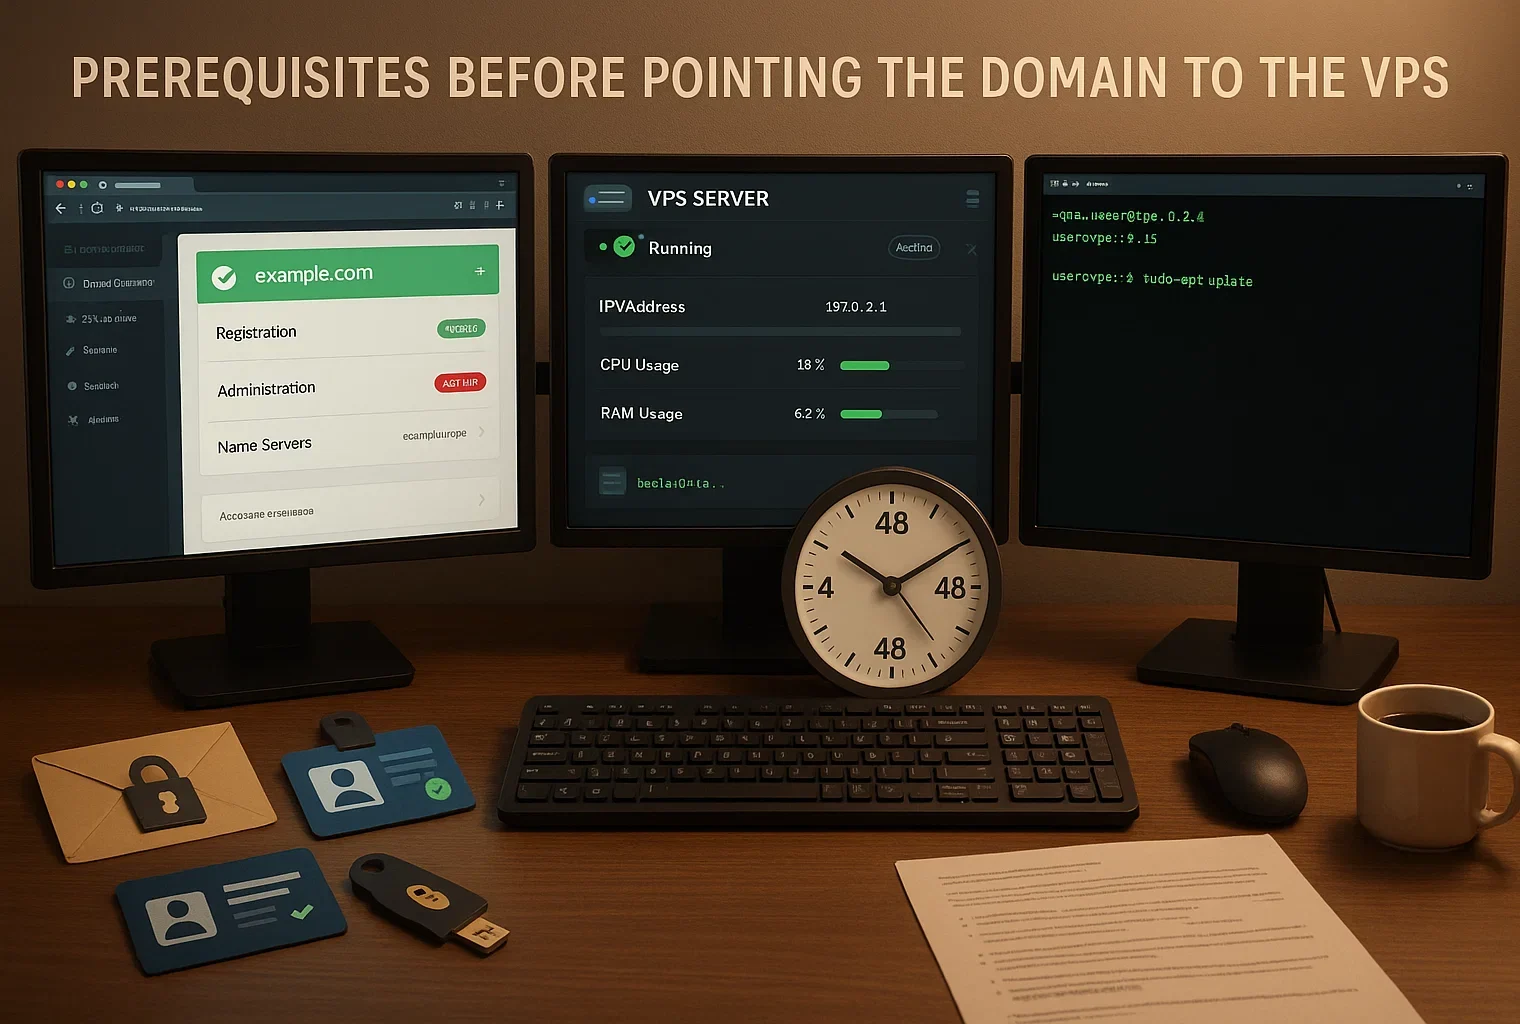
Domain Name Registration: You need a registered domain name with full administrative access. Make sure you can log into your domain registrar’s control panel and have permission to modify DNS settings or nameservers.
Active VPS Account: Your virtual private server should be set up and running. Research about “what is a VPS provider” helps you choose the right hosting service. You’ll need the dedicated IP address of your VPS, which your VPS hosting provider includes in your account dashboard or welcome email.
SSH Access: For the custom nameserver method, you’ll need SSH access to your VPS with root or sudo privileges. Make sure you have your login credentials ready.
Basic Command Line Knowledge: If you plan to use custom nameservers, familiarity with basic Linux command line operations will be helpful. You’ll be running commands to install and configure DNS software.
Time for DNS Propagation: DNS changes take 24-48 hours to propagate. See the DNS Propagation Timeline section for full details.
Best VPS OS for Pointing Domain
Choosing the right operating system for your VPS affects both performance and ease of management when learning how to point a domain to a VPS.
Domain Pointing: Windows vs. Linux
Linux distributions remain the preferred choice for domain hosting and server operations. Linux powers 58.1% of websites whose operating system is known, demonstrating its dominance in the web hosting space.
The main advantages of Linux include lower resource overhead, no licensing costs, and better performance for web server tasks. Linux runs efficiently without a graphical interface, which means more system resources are available for serving your website and handling DNS operations.
The command line interface, while requiring practice, provides powerful automation capabilities and precise control over server configurations. Windows VPS can be a suitable choice if you need to run Microsoft-specific technologies like ASP.NET or MSSQL databases.
The graphical interface makes Windows more approachable for users who prefer visual management tools over command-line operations. However, Windows requires licensing fees and consumes more system resources than Linux.
For domain pointing specifically, Linux offers superior performance and reliability. Popular Linux distributions for VPS hosting include Ubuntu 24.04 LTS, Debian 12, Rocky Linux 9, and AlmaLinux 9. Ubuntu remains particularly popular due to its extensive documentation and regular updates.

At Cloudzy, our Linux VPS plans come with dedicated IP addresses and your choice of distributions, including Ubuntu, Debian, CentOS, and AlmaLinux. You get full root access to configure DNS software like BIND9 and point your domain using either method covered in this guide.
We offer VPS hosting in over 12 global locations with 99.95% uptime and 24/7 support. Our team can help with domain configuration questions whenever you need assistance. Our VPS server plans include dedicated IPs, full root access, and 24/7 support for your domain hosting needs.
Comparing Two Methods: A Records vs Custom Nameservers
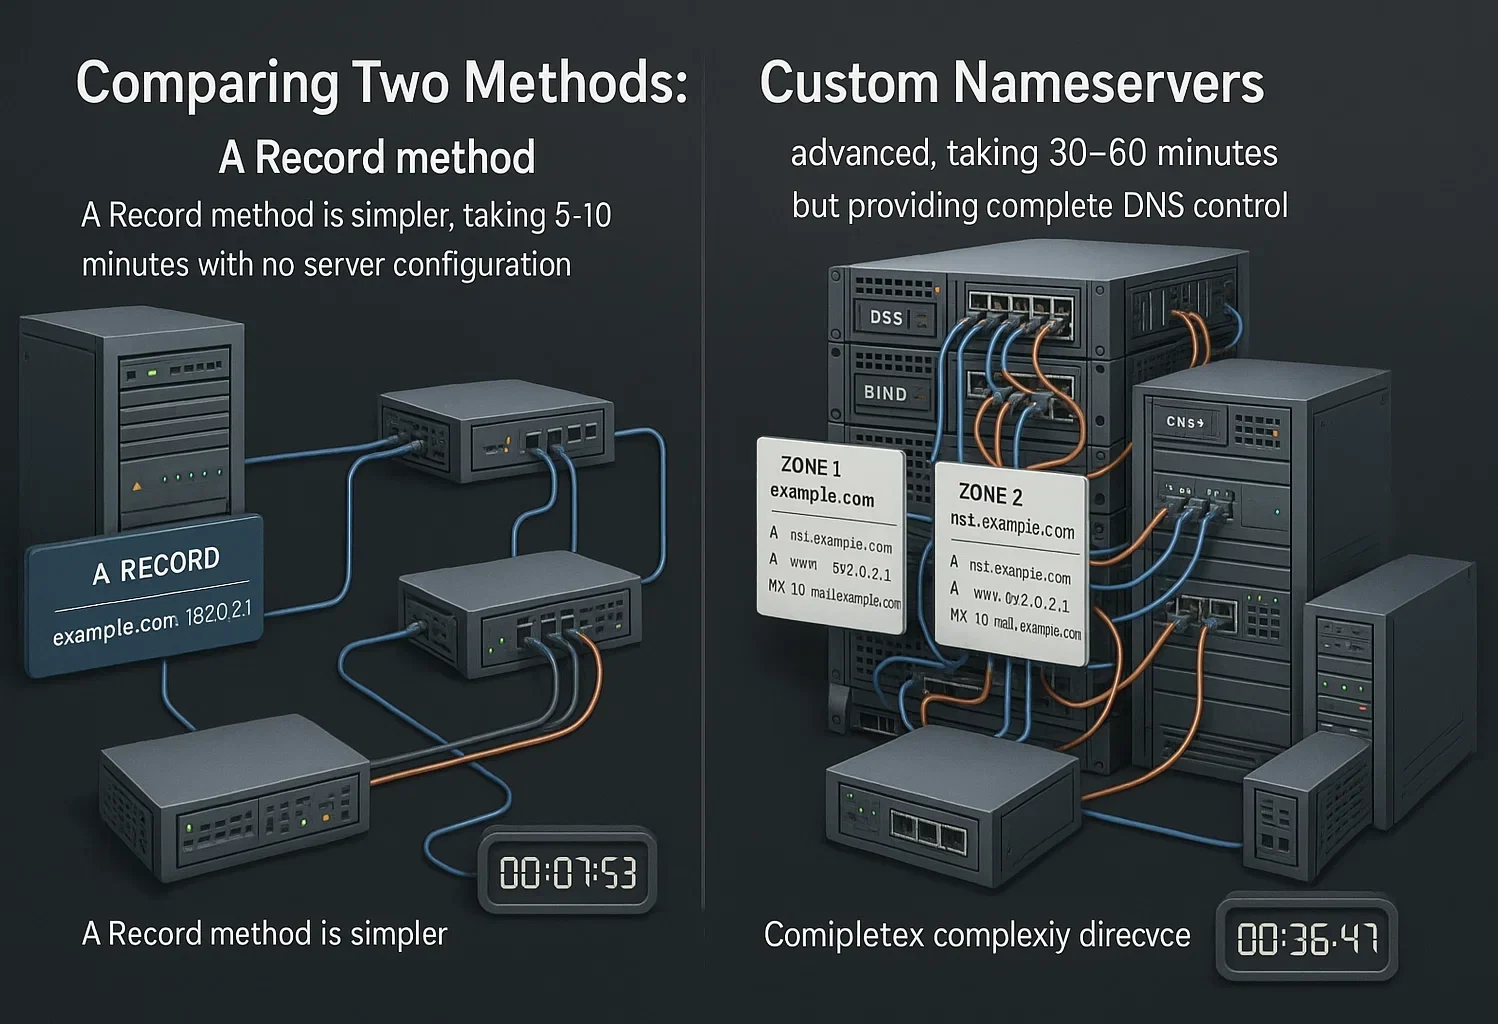
When learning how to connect a domain to a VPS, there are two primary methods available: A records or custom nameservers. Each method has distinct advantages and complexity levels. Understanding both approaches helps you choose the right one for your needs.
A Record Method: This is the simpler approach, where you modify the A record in your existing DNS zone to point to your VPS IP address. You keep using your domain registrar’s nameservers and only change the destination IP address.
This method is faster to implement and requires no server-side configuration. This straightforward approach shows how to point a domain name to a VPS IP address using your registrar’s DNS management panel.
Custom Nameservers Method: This advanced approach involves setting up DNS software on your VPS and changing your domain’s nameservers to point to your VPS. The custom nameserver method provides complete control when you add a domain to a vserver environment, giving you authority over all DNS records and settings directly from your server.
| Feature | A Record Method | Custom Nameservers Method |
| Difficulty Level | Easy | Advanced |
| Setup Time | 5-10 minutes | 30-60 minutes |
| Server Configuration | Not required | Requires BIND installation |
| DNS Control Location | Domain registrar | Your VPS |
| Best For | Quick setup, simple hosting | Advanced users, multiple domains |
| Flexibility | Limited to basic records | Complete DNS control |
For most users, the A record method provides an easy-to-use method while still being powerful. The custom nameservers method offers more control but requires ongoing server maintenance and DNS knowledge.
Both Linux and Windows work well for domain hosting. The right choice depends on your specific needs. When selecting VPS plans, look for providers that let you switch operating systems without starting over.
How to Point a Domain to a VPS: A Step-by-Step Guide
The VPS market continues to grow, with projections reaching $8.3 billion by 2026, reflecting increased demand for reliable hosting solutions. For our guide on how to point a domain to a VPS, we focus on the custom nameservers method, which provides the most control over your domain’s DNS configuration.
Before starting, note that the custom nameservers method requires installing BIND9, the most widely used DNS server software. While this method is more complex than simply updating an A record, it enables full DNS zone management directly from your VPS.
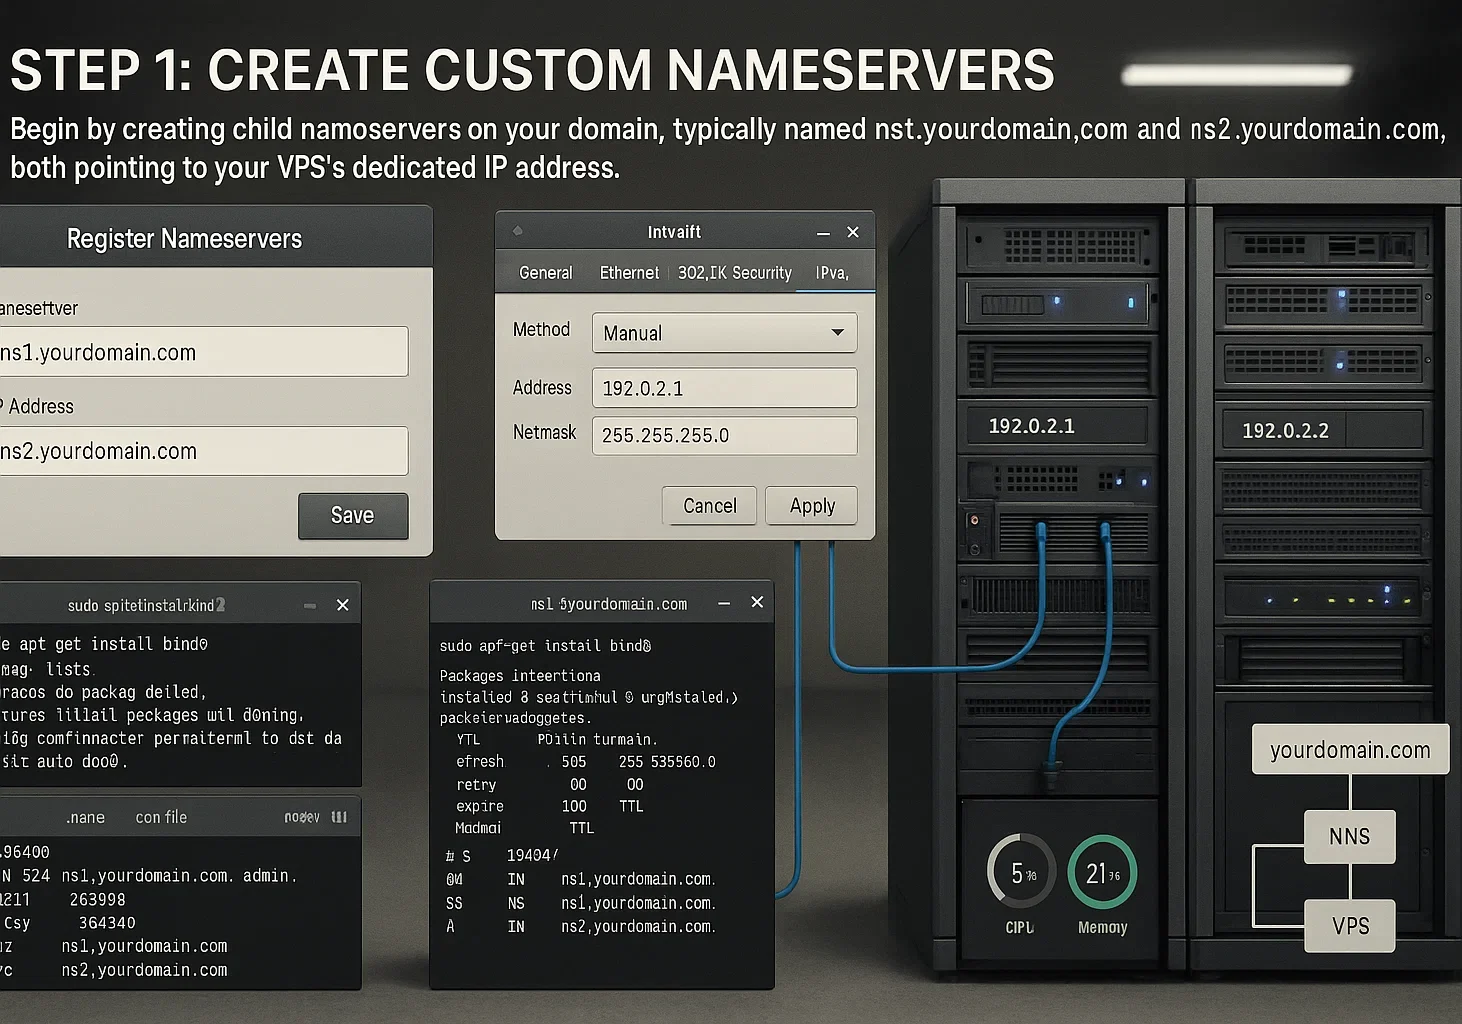
Step 1: Create Custom Nameservers
Once your domain and virtual private server are ready, begin by creating child nameservers on your domain. Learning how to point a domain name to a VPS IP address starts with this foundational step.
The exact process varies depending on your domain registrar, but the concept remains the same across providers. You’ll need to create at least two nameserver entries, typically named ns1.yourdomain.com and ns2.yourdomain.com.
Both should point to your VPS’s dedicated IP address. Some registrars allow you to create these nameservers directly through their control panel, while others may require contacting support.
After creating the child nameservers at your registrar, connect to your VPS via SSH and install BIND9 along with its utilities using this command:
sudo apt install bind9 bind9utils bind9-doc -yThis command works for Ubuntu and Debian-based systems. The installation includes bind9 (the DNS server), bind9utils (management tools), and bind9-doc (documentation). Once installed, you can proceed to configure DNS zones.
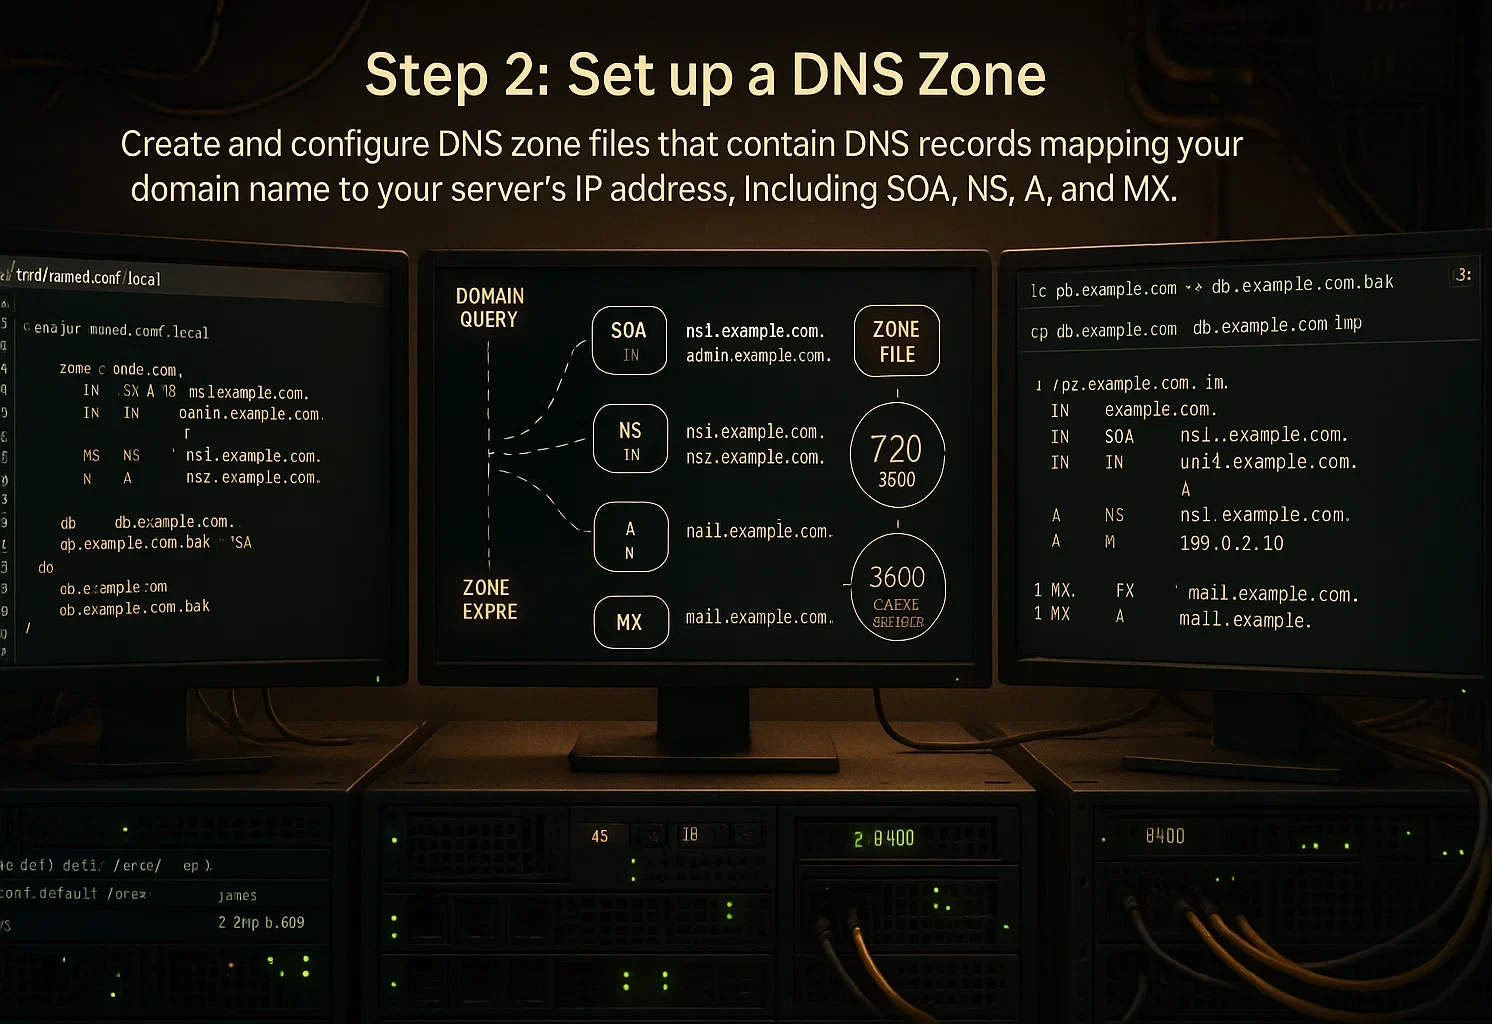
Step 2: Set up a DNS Zone
With BIND9 installed, you’ll now create and configure DNS zone files. These files contain the DNS records that map your domain name to your server’s IP address.
First, navigate to the BIND configuration directory:
cd /etc/bindCreate a new directory to organize your zone files:
mkdir -p /etc/bind/zones/You can name this directory anything you prefer instead of “zones”. Now copy the template files and adapt them for your domain. Replace “yourdomain.com” with your actual domain name in these commands:
cd zones

sudo cp /etc/bind/db.local /etc/bind/zones/yourdomain.com.forward

sudo cp /etc/bind/db.127 /etc/bind/zones/yourdomain.com.reverse

ls /etc/bind/zones/
Next, edit the forward zone file to define your domain’s DNS records. Open the file with a text editor:
sudo nano /etc/bind/zones/yourdomain.com.forwardIn this file, you’ll configure several important records:
- SOA Record: Defines the primary nameserver and administrative contact
- NS Records: Specifies the authoritative nameservers for your domain
- A Records: Maps your domain and subdomains to your VPS IP address
- MX Records: Routes email for your domain (if needed)
Replace all instances of example domain names with your actual domain and replace the IP addresses with your VPS’s dedicated IP address. The TTL (Time To Live) value determines how long DNS resolvers cache your records before checking for updates.
Save your changes after editing the zone file.
Step 3: Configure the Named Configuration
After creating your zone files, you need to tell BIND9 where to find them and how to use them. This is done by editing the BIND configuration file.
Navigate to the BIND directory and open the local configuration file:
cd /etc/bind

sudo nano named.conf.local
Add the zone definitions for your domain. Replace “yourdomain.com” with your actual domain:
zone "yourdomain.com" {

    type master;

    file "/etc/bind/zones/yourdomain.com.forward";

};
This configuration tells BIND9 that your server is the master (primary) authoritative server for your domain and specifies where to find the zone file. Verify the file path matches the location where you created your zone file in Step 2.
If you created a reverse zone file, you can also add its configuration here. Save the file after making your changes.
Step 4: Configure DNS Forwarders
DNS forwarders handle queries for domains that your server isn’t authoritative for. Instead of performing recursive lookups itself, your DNS server can forward these queries to reliable public DNS servers.
Open the options configuration file:
sudo nano /etc/bind/named.conf.optionsFind the forwarders section in the file. It typically looks like this:
// forwarders {
// 0.0.0.0;
// };
Uncomment the lines and replace the placeholder with actual DNS server addresses. You can use public DNS servers like Google DNS (8.8.8.8) or Cloudflare DNS (1.1.1.1):
forwarders {

    8.8.8.8;

    1.1.1.1;

};
These forwarders allow your server to resolve domain names outside of the zones you manage. Save the file after making changes.
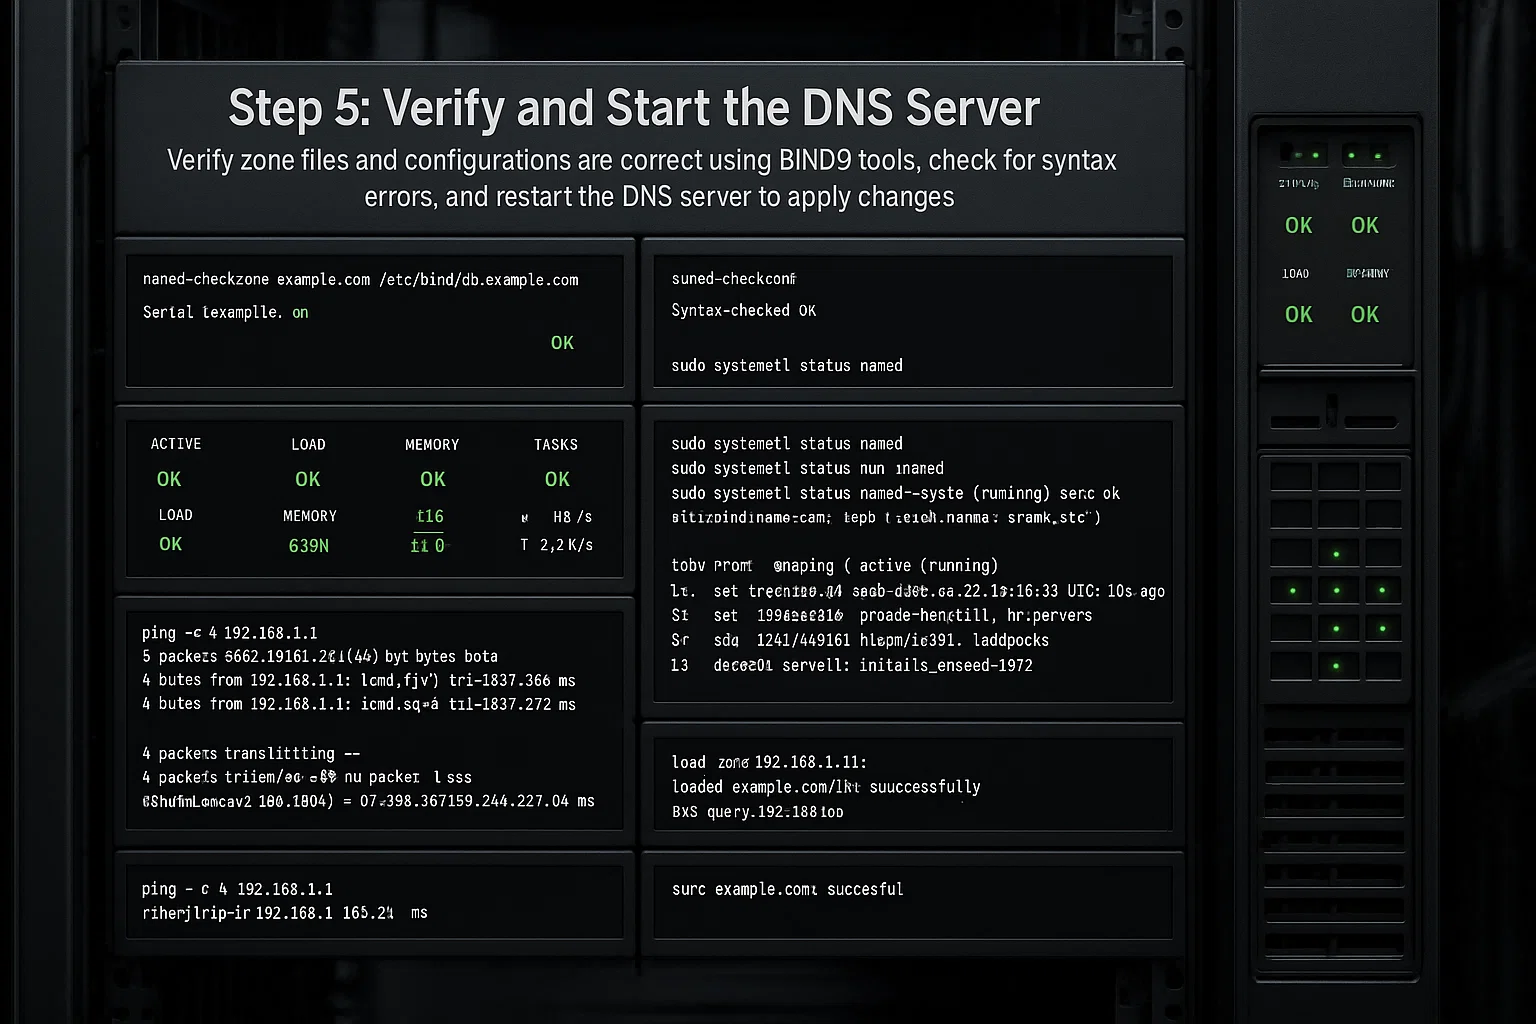
Step 5: Verify and Start the DNS Server
Before making your configuration live, verify that all your zone files and configurations are correct. BIND9 provides tools to check for syntax errors.
Check your zone file for errors:
sudo named-checkzone yourdomain.com /etc/bind/zones/yourdomain.com.forwardReplace “yourdomain.com” with your actual domain. If the configuration is correct, you’ll see output similar to:
zone yourdomain.com/IN: loaded serial 1

OK
Check the overall BIND configuration:
sudo named-checkconfIf this command returns no output, your configuration is valid. Any errors will be displayed with details about what needs to be fixed.
Now restart BIND9 to apply all your changes:
sudo systemctl restart bind9Verify that BIND9 is running correctly:
sudo systemctl status bind9You should see “active (running)” in the output. If there are any errors, check your configuration files for typos or incorrect paths.
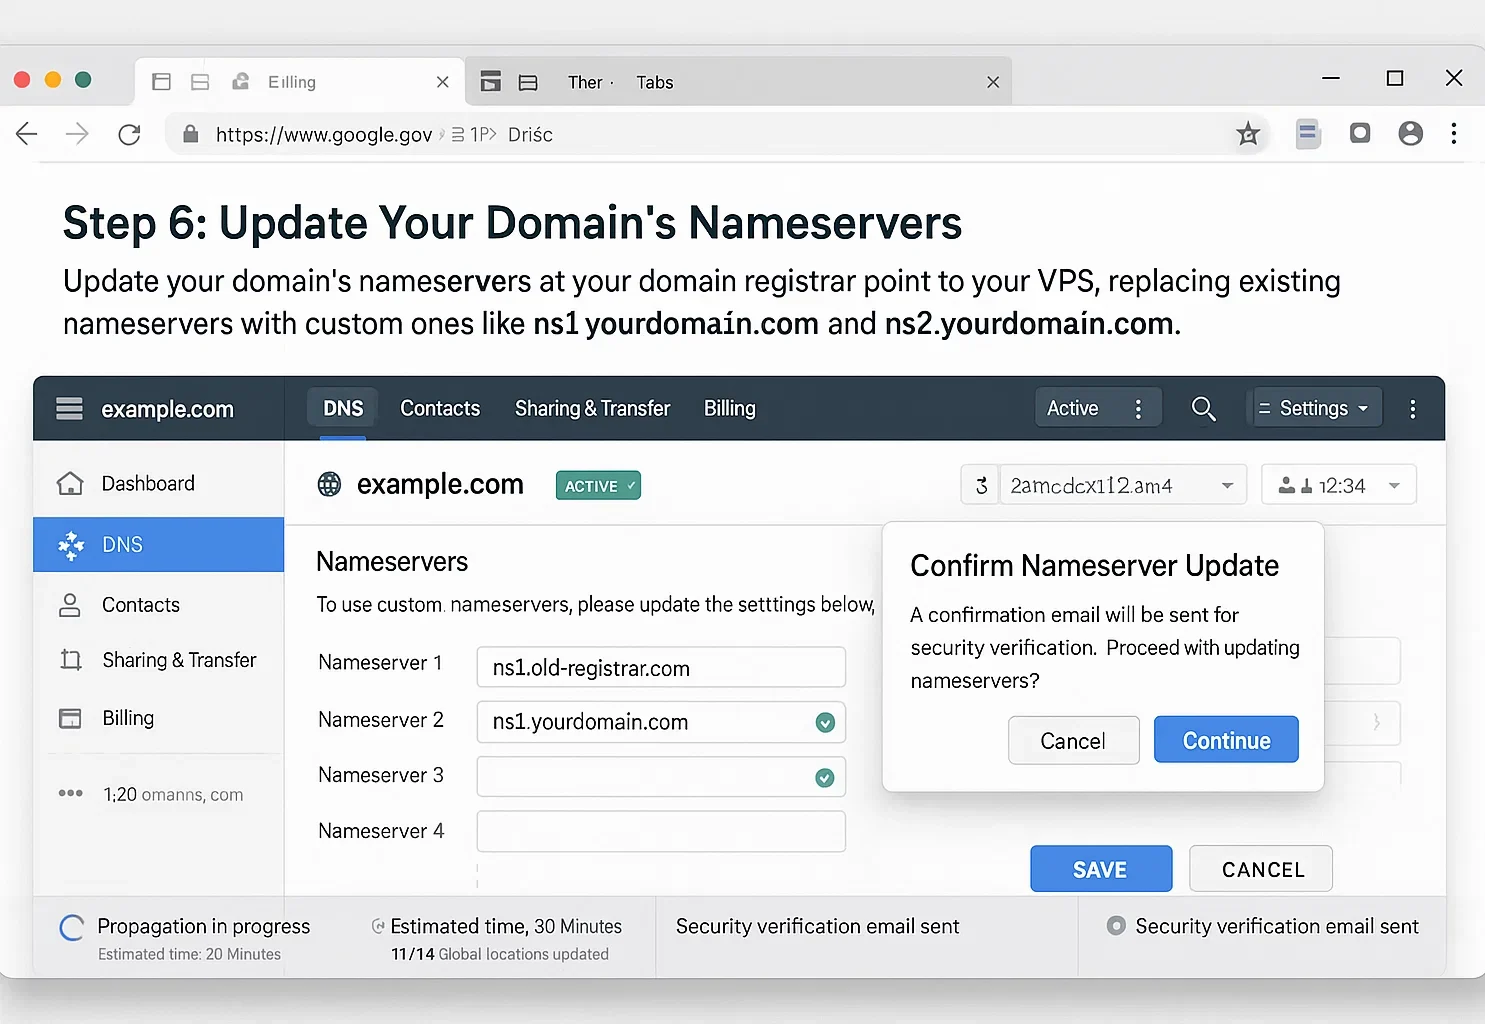
Step 6: Update Your Domain’s Nameservers
The final step is updating your domain’s nameservers at your domain registrar to point to your VPS. This tells the internet where to look for DNS information about your domain.
Log in to your domain registrar’s control panel and locate the nameserver management section. This is often found under “DNS Management,” “Name Servers,” or “Domain Settings.”
Replace the existing nameservers with your custom nameservers:
- ns1.yourdomain.com
- ns2.yourdomain.com
Confirm these match the child nameservers you created in Step 1. Save your changes at the registrar.
DNS propagation takes anywhere from a few minutes to 48 hours. During this period, some DNS resolvers around the world will still use the old nameservers while others begin using the new ones. This is normal and temporary.
You’ve now successfully pointed your domain to your VPS using custom nameservers, giving you full control over your domain’s DNS configuration from your own server.
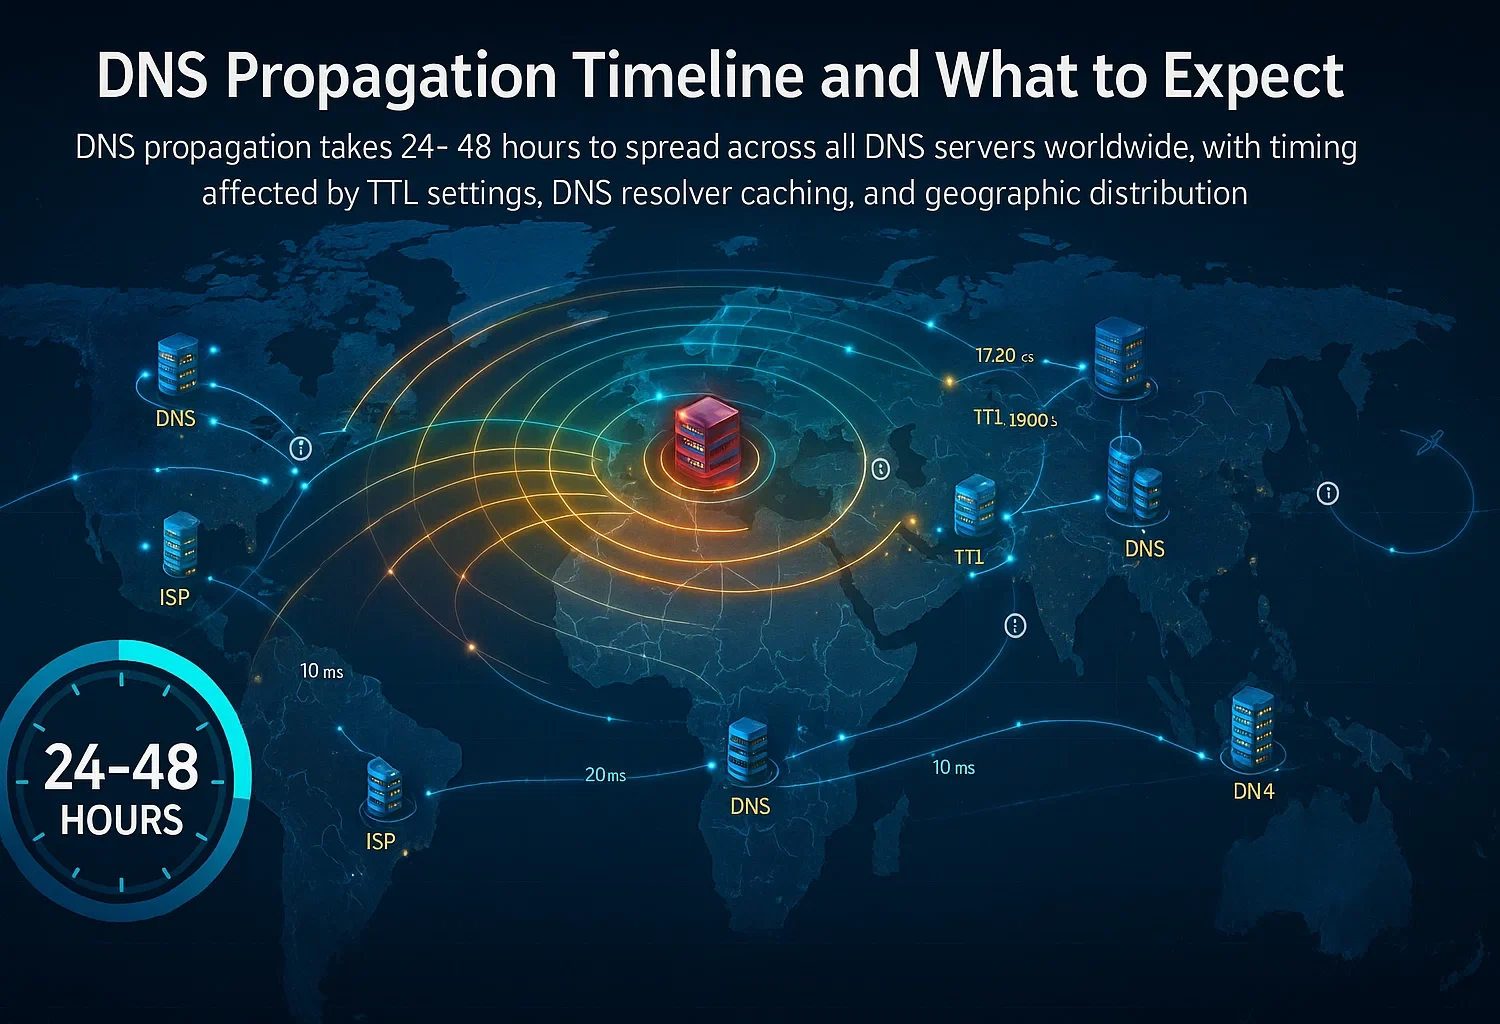
DNS Propagation Timeline and What to Expect
DNS propagation is the time required for your DNS changes to spread across all DNS servers worldwide. After learning how to add a domain to a vserver (VPS), this explains why your domain won’t work immediately after changes.
Typical Timeline: Most DNS changes propagate within 24 to 48 hours. However, some changes may appear in minutes while others might take the full 48 hours or slightly longer. The variation depends on several factors beyond your control.
What affects propagation speed:
- TTL Settings: The Time To Live value on your previous DNS records determines how long DNS resolvers cache the old information. Lower TTL values (like 300 seconds) lead to faster propagation than higher values (like 86400 seconds for 24 hours).
- DNS Resolver Caching: Internet Service Providers and public DNS services cache DNS records at different rates. Some ISPs update their cache frequently, while others may ignore TTL settings and keep cached records longer.
- Geographic Distribution: DNS servers in different regions update at different times. Your domain might resolve correctly in one location while still showing old information in another location.
During Propagation: Some visitors to your website may see the new server, while others still connect to the old location. This is normal and temporary. Plan important migrations during low-traffic periods when possible.
Speeding Up Propagation: If you plan to make DNS changes, lower your TTL values 48-72 hours in advance. This tells DNS resolvers to check for updates more frequently. After the changes are complete and stable, you can increase the TTL again to reduce server load.
 Verifying Your Domain Configuration
After completing your domain setup and waiting for initial propagation, you need to verify that everything works correctly. These verification steps confirm that you’ve successfully completed how to point a domain to a VPS and that your domain properly resolves to your server.
Using Command Line Tools: The dig command provides detailed DNS information. Open your terminal and run:
dig yourdomain.comLook for the ANSWER SECTION in the output. It should show your VPS IP address in the A record. If you see your correct IP address, the DNS configuration is working properly.
You can also use nslookup for a simpler check:
nslookup yourdomain.comThis command should return your VPS IP address as the result.
Online DNS Checkers: Websites like whatsmydns.net and dnschecker.org show how your domain resolves from different locations worldwide. These tools help you monitor propagation progress and identify regions where the old DNS information persists.
Browser Testing: Open a web browser and navigate to your domain. If you have a website running on your VPS, it should load. If you see a default server page or your website content, the connection is successful.
Remember that your browser caches DNS results, so you may need to clear your browser cache or use incognito mode for accurate testing.
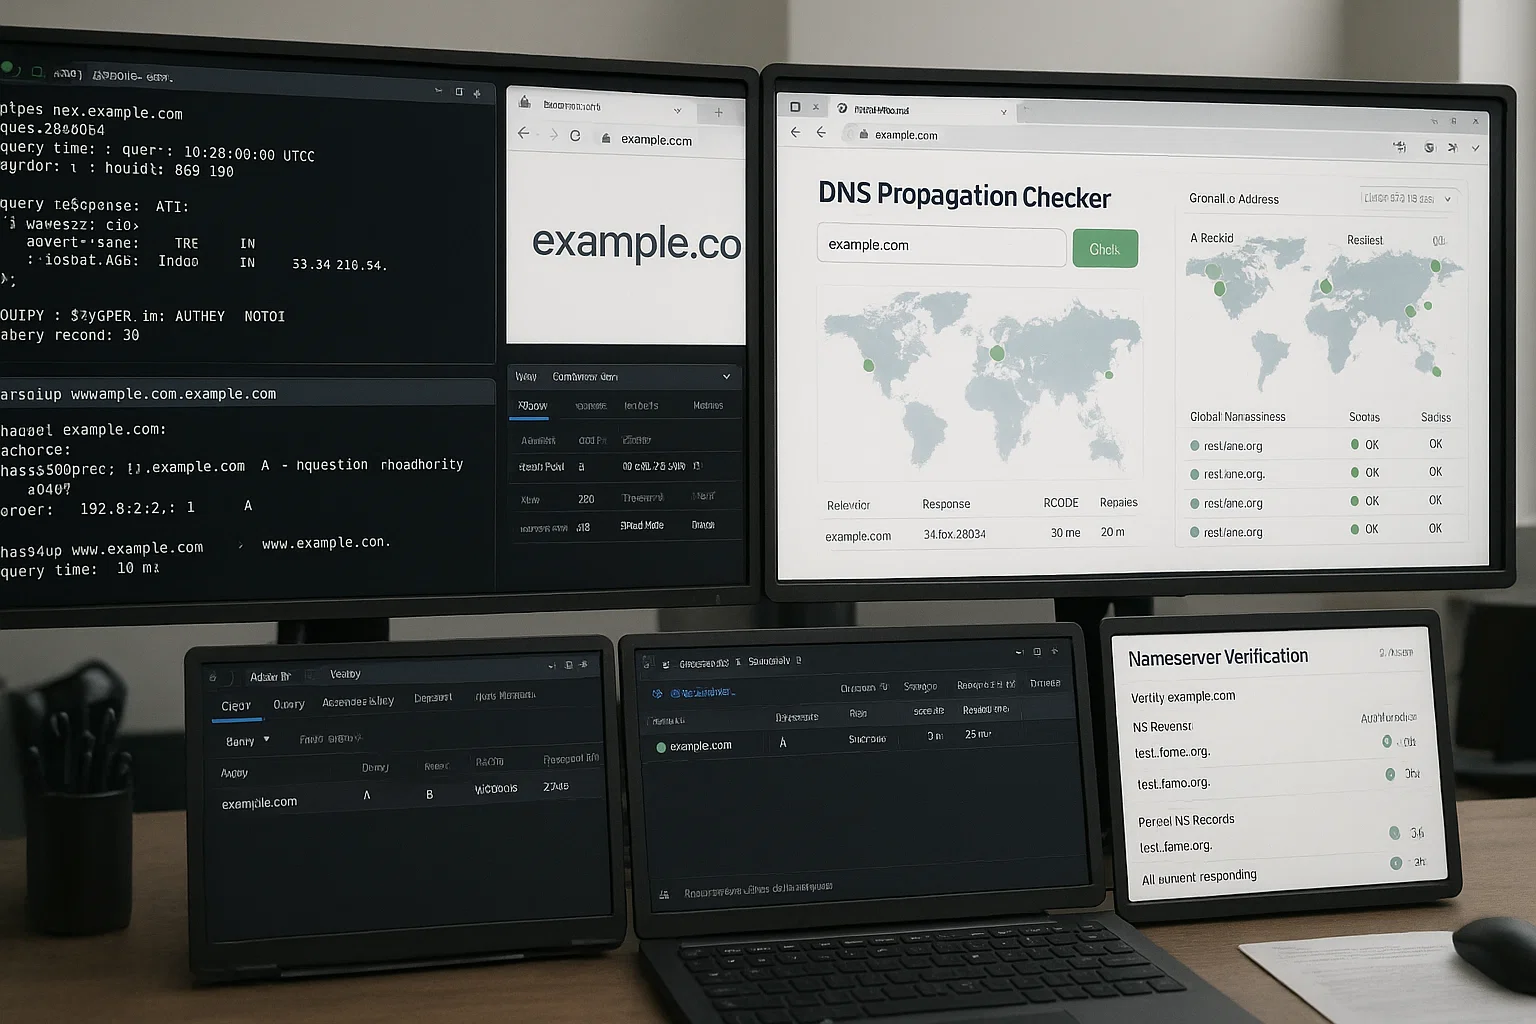
Check Nameservers: Verify that your domain is using the correct nameservers:
dig NS yourdomain.com +shortThis should return your custom nameservers (ns1.yourdomain.com and ns2.yourdomain.com) if you used the custom nameserver method, or your registrar’s nameservers if you used the A record method.
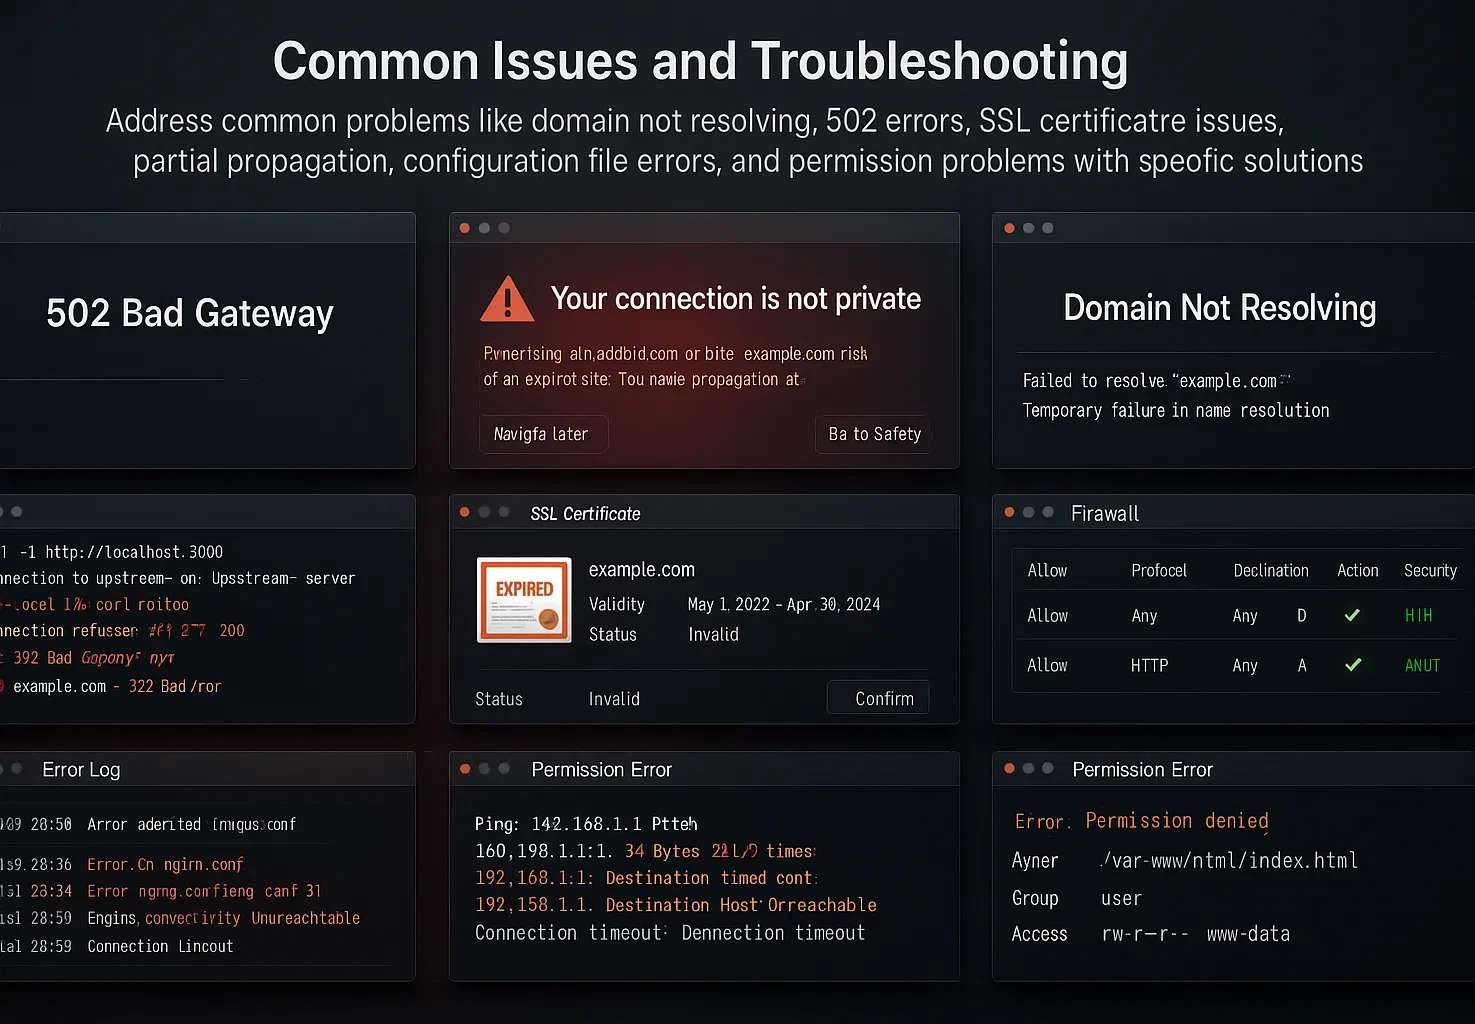
Common Issues and Troubleshooting
Even with careful configuration during domain setup, you may encounter problems. These common issues and their solutions help you resolve most problems quickly.
Domain Not Resolving: If your domain doesn’t resolve after 48 hours, check that you correctly updated the nameservers at your registrar. Verify that the nameserver entries match exactly what you configured, including proper spelling and no extra spaces.
Confirm that your VPS’s DNS service is running with sudo systemctl status bind9.
502 Bad Gateway or Connection Refused Errors: These errors mean DNS is working, but your web server isn’t responding correctly. Check that your web server (Apache, Nginx, etc.) is running on your VPS.
Verify that firewall rules allow traffic on ports 80 (HTTP) and 443 (HTTPS). Verify your web server configuration includes your domain name in the virtual host or server block configuration.
SSL Certificate Errors: If visitors see SSL warnings, your domain might be resolving correctly, but your SSL certificate isn’t properly installed or doesn’t match your domain. Verify that you’ve installed an SSL certificate for your domain and that the certificate hasn’t expired.
Services like Let’s Encrypt provide free SSL certificates that can be installed using tools like Certbot.
Partial Propagation: Some networks can access your site while others cannot. This is normal during propagation and typically resolves within 48 hours. Users experiencing issues can try flushing their local DNS cache or using a different DNS resolver temporarily.
Configuration File Errors: If BIND9 won’t start after configuration changes, check for syntax errors using:
sudo named-checkconf

sudo named-checkzone yourdomain.com /etc/bind/zones/yourdomain.com.forward
Any errors will be displayed with details about the problem. Common issues include missing semicolons, incorrect file paths, or typos in domain names.
Permission Problems: If you receive “permission denied” errors when editing configuration files, ensure you’re using sudo before commands that require elevated privileges. Check that your zone files have the correct ownership and permissions.
Conclusion
Now you know how to point a domain name to a VPS using both the A record method and the custom nameservers approach. The A record method gets you up and running quickly when you just need basic domain connectivity. Custom nameservers give you complete DNS control when managing multiple domains or requiring advanced configurations.
Remember to allow 24 to 48 hours for DNS propagation after making changes. Use verification tools like dig and online DNS checkers to confirm your configuration works across different locations.
If you run into issues, the troubleshooting section covers the most common problems and their solutions. With your domain properly connected to your VPS, you’re ready to host websites, run applications, and build your online presence.
FAQ
How to Manage IP Addresses on Your VPS?
What Is the Best Type of Server to Point a Domain To?
Do I Need a DNS Forwarder to Link a Domain to a VPS?