When you install Magento on VPS infrastructure, you gain the control and flexibility needed for serious eCommerce operations. The platform powers over 131,000 websites globally, processing more than $155 billion in transactions annually.
VPS hosting delivers dedicated RAM, processing power, and storage that stay consistent during traffic spikes. This step-by-step Magento installation on Ubuntu guide covers three installation methods to help you get a functional Magento store ready for customization.
Why Install Magento on a VPS?
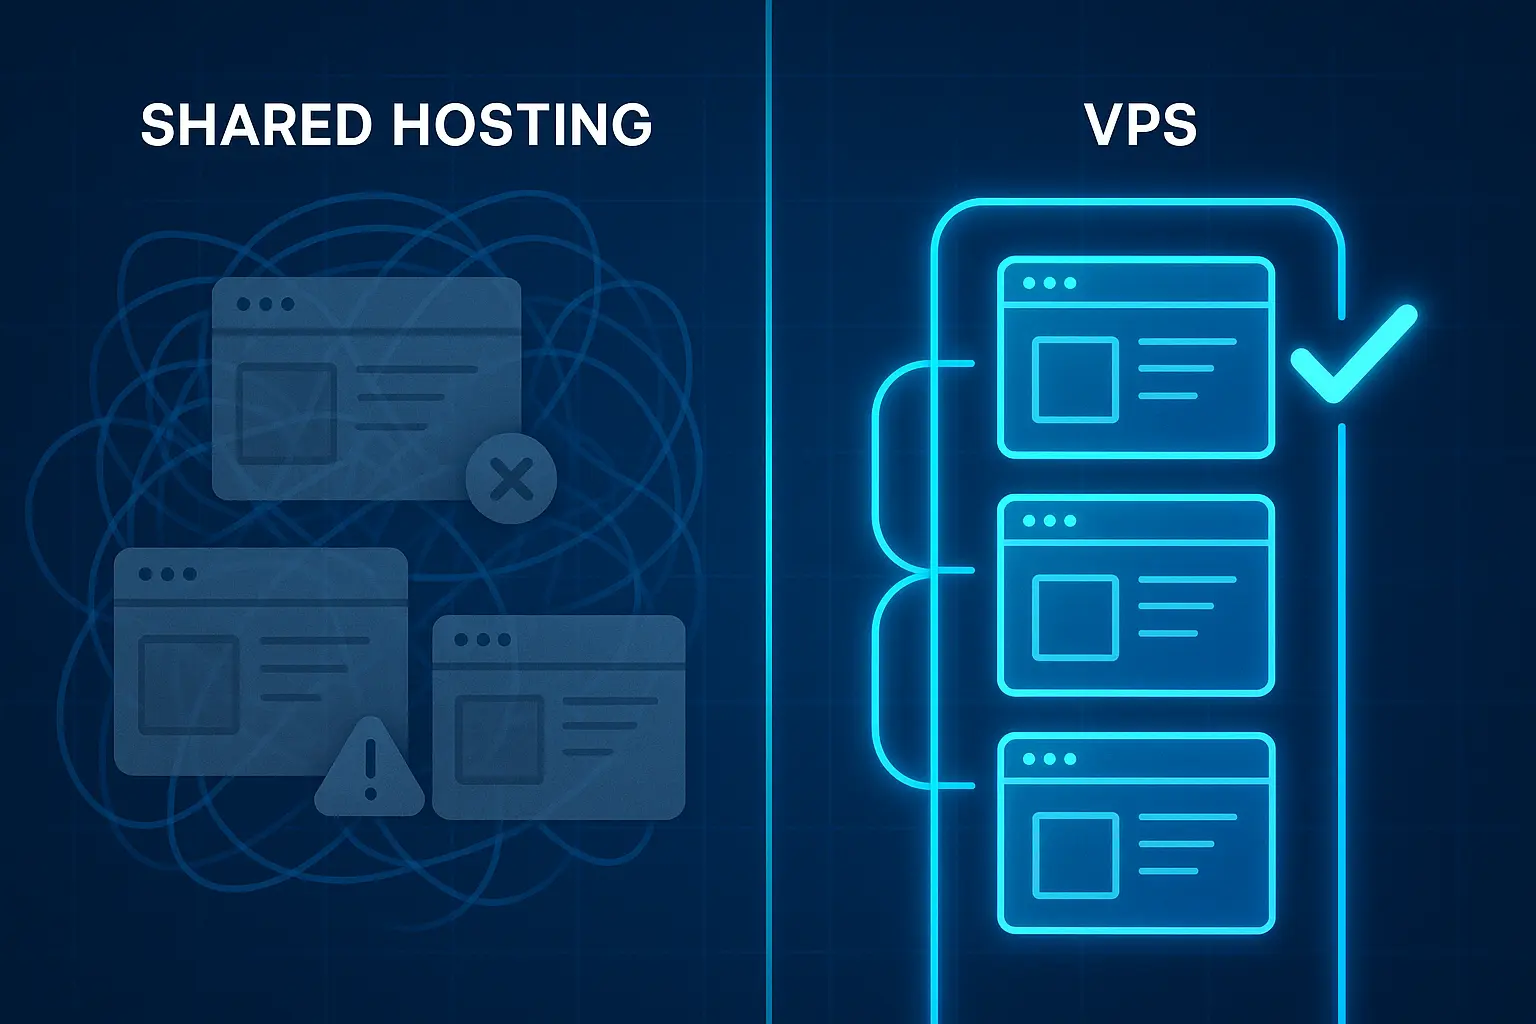
Virtual private servers offer distinct advantages for Magento installations compared to shared hosting environments, as VPS hosting addresses the performance, security, and scalability challenges that often plague Magento stores on shared hosting.
For businesses seeking the best VPS for Magento hosting, understanding both immediate needs and future growth potential remains a priority. Among various content management platforms, Magento stands out as one of the best CMS choices for enterprise-level eCommerce.
Key Benefits When You Install Magento on VPS
VPS hosting transforms how your Magento store performs by providing dedicated resources, enhanced security, and complete control over your environment. These advantages directly impact your store’s speed, reliability, and ability to scale as your business grows.
Performance and Speed
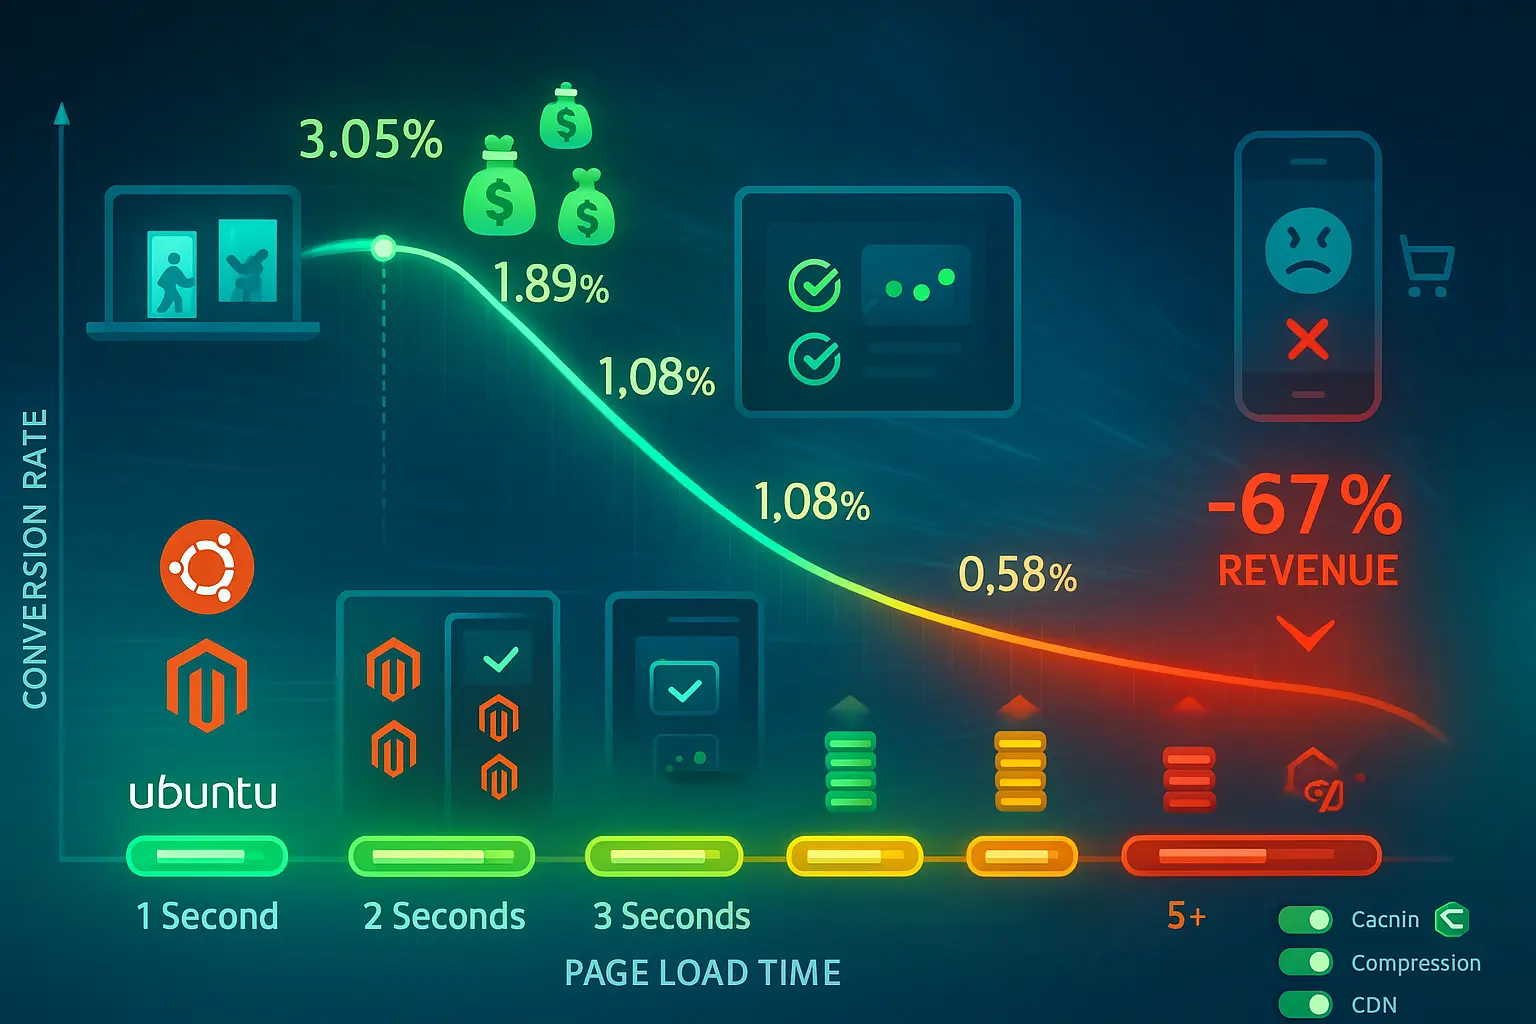
VPS hosting provides dedicated CPU, RAM, and bandwidth that keep your product pages and checkout process fast, even during promotional campaigns or seasonal traffic increases. Research from Portent shows that sites loading in one second convert 2.5x better than those taking five seconds, which translates directly to measurable revenue differences for your store.

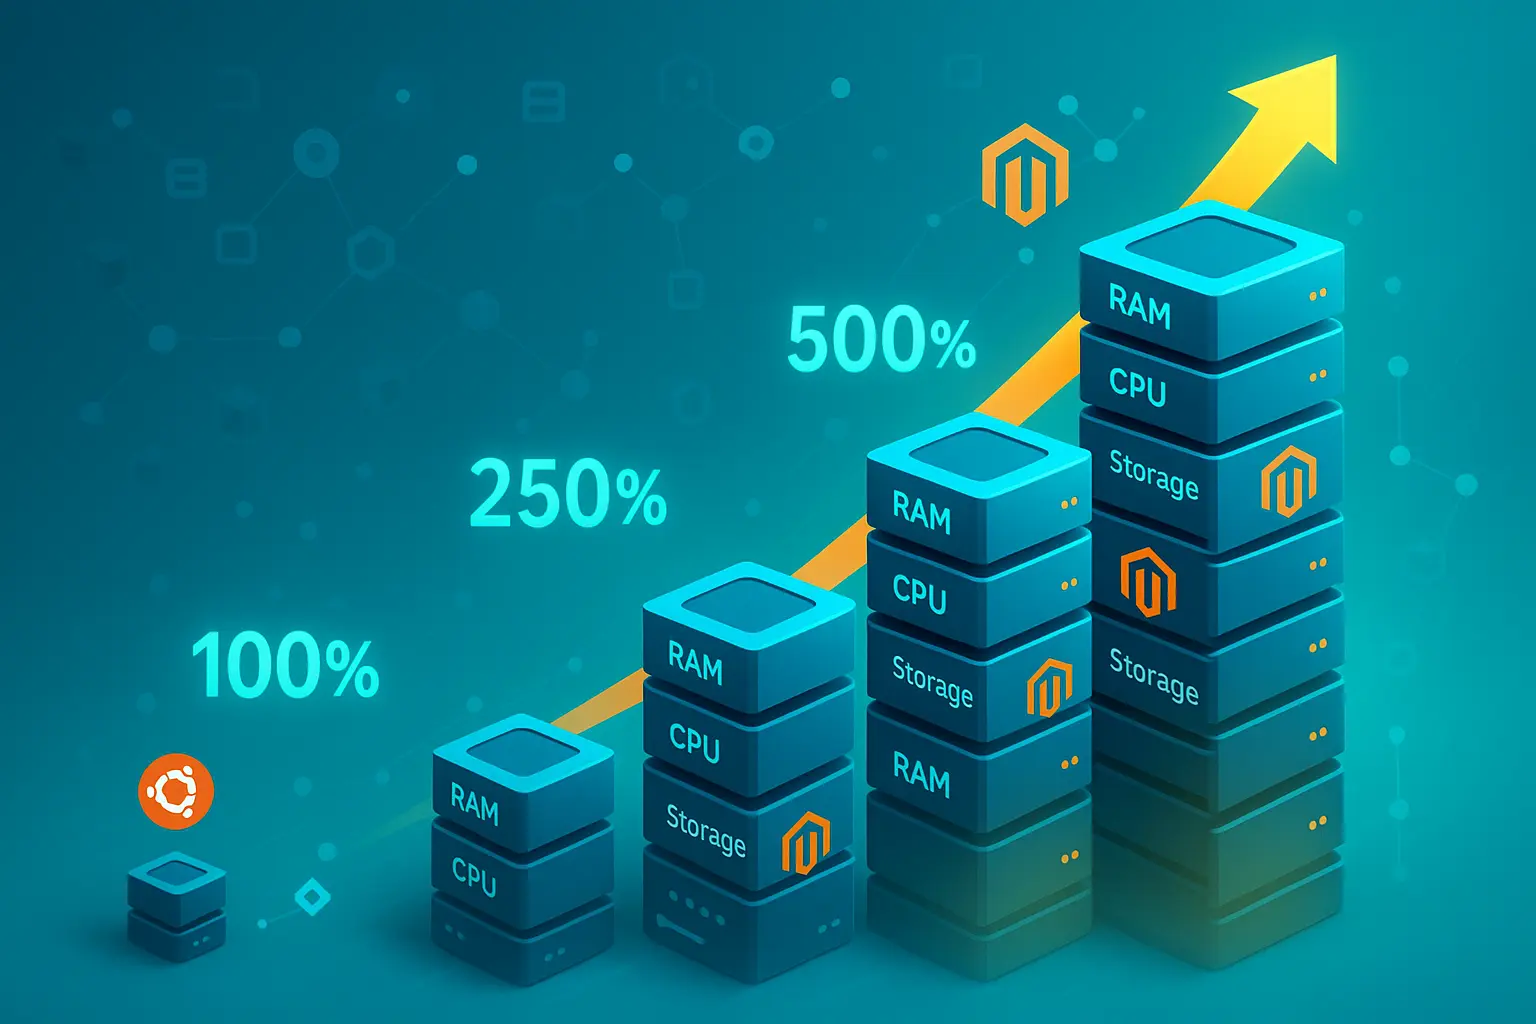
Scalability for Growth
As your business expands, VPS plans scale vertically without requiring migration to completely new infrastructure. You can add RAM for handling additional product images or upgrade your CPU to process more concurrent customers during flash sales, all without experiencing downtime or dealing with file transfers.
Complete Control and Customization
Root access on a VPS lets you install specific PHP versions, configure web server settings, and optimize database performance exactly how Magento needs it. In contrast, shared hosting locks you into whatever configuration the provider offers all their customers, which limits your ability to optimize for Magento’s specific needs.

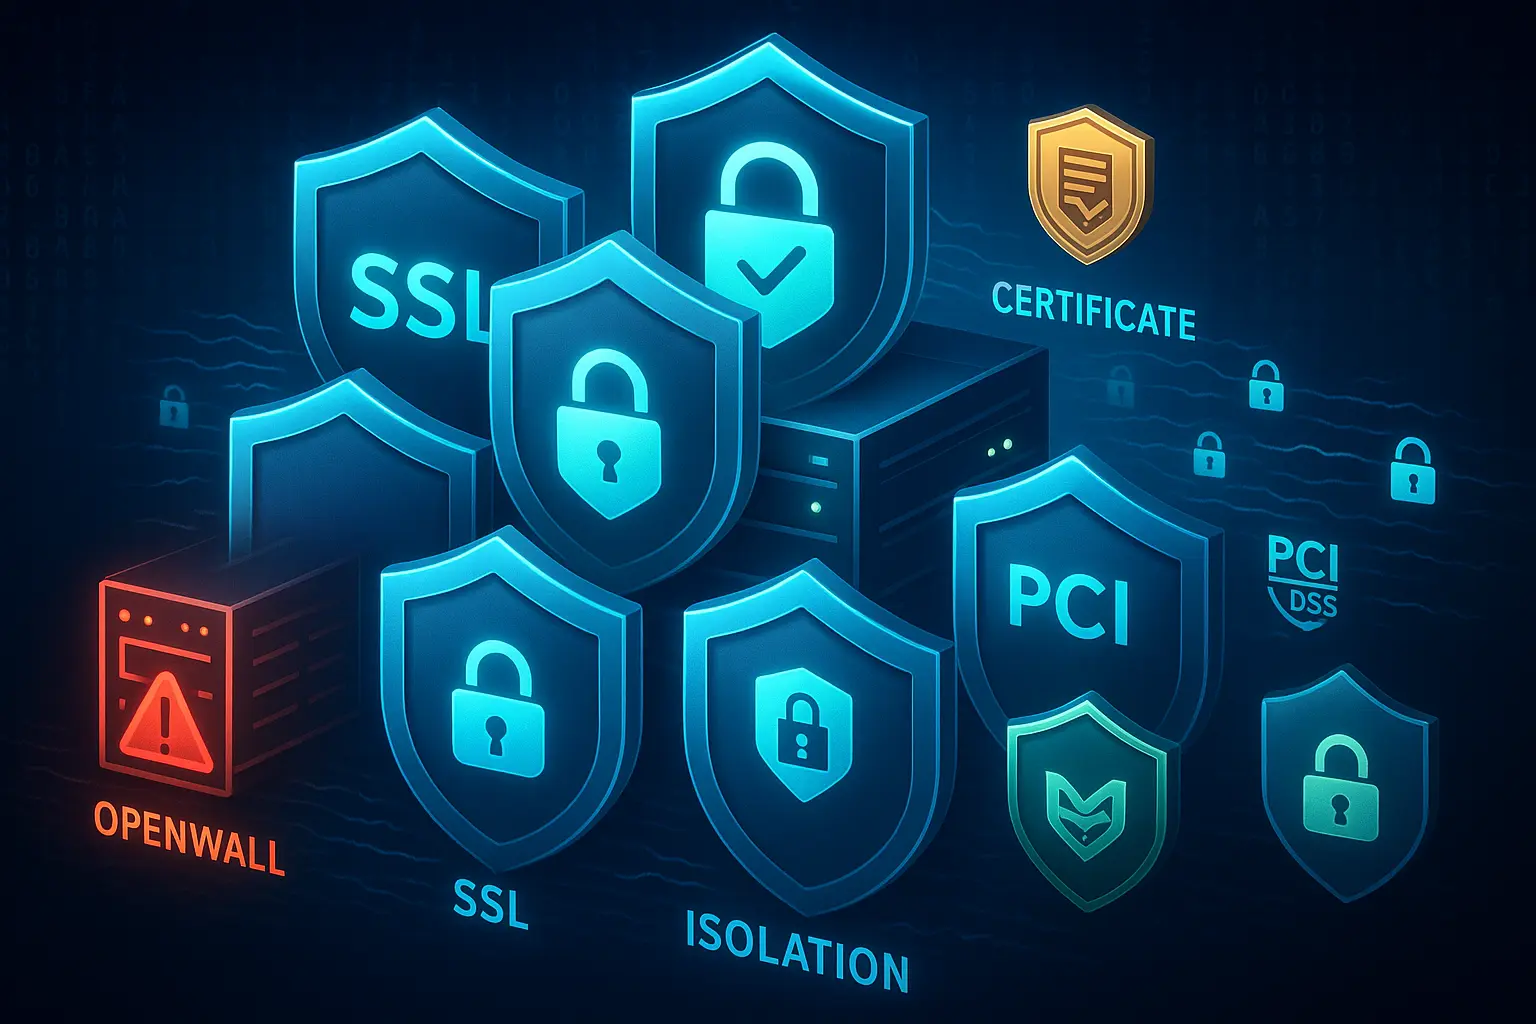
Enhanced Security
VPS hosting isolates your environment from other users, which reduces security risks that come from sharing resources with potentially compromised websites. This isolation becomes particularly important when handling credit card transactions, as it’s often required for maintaining PCI compliance standards.
Geographic Flexibility
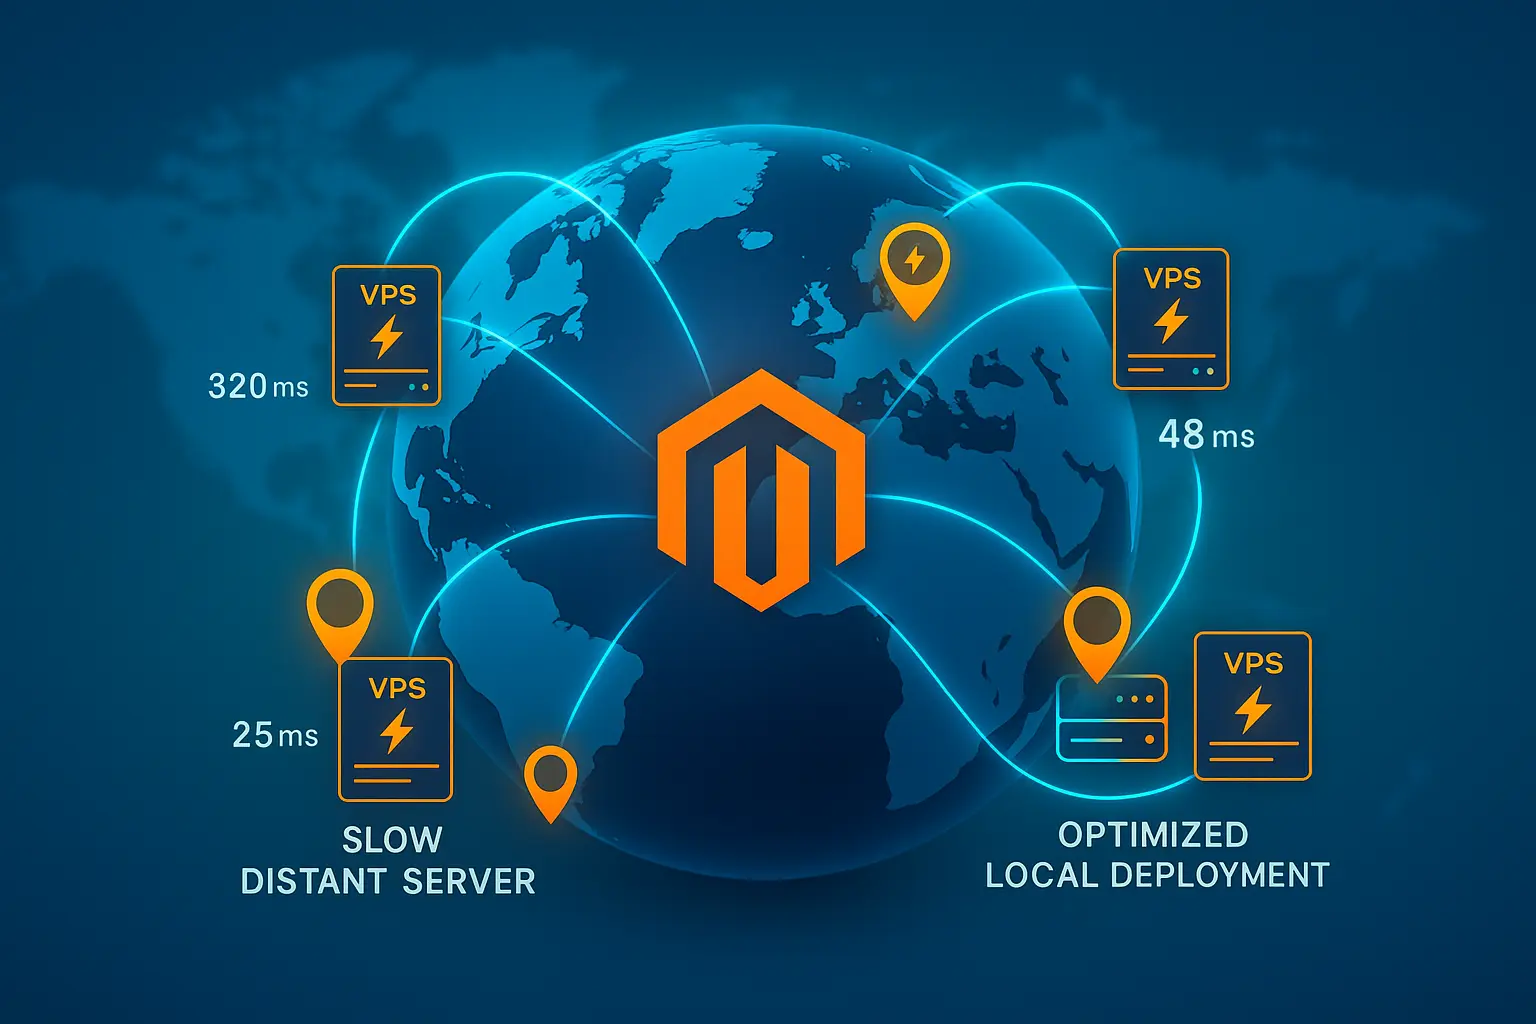
VPS providers offer servers in multiple regions, allowing you to position your store closer to your target audience for better performance. An American company selling to European customers can deploy a VPS in Germany or the Netherlands, which cuts load times in half and improves the shopping experience for international visitors.
Requirements to Install Magento on Ubuntu
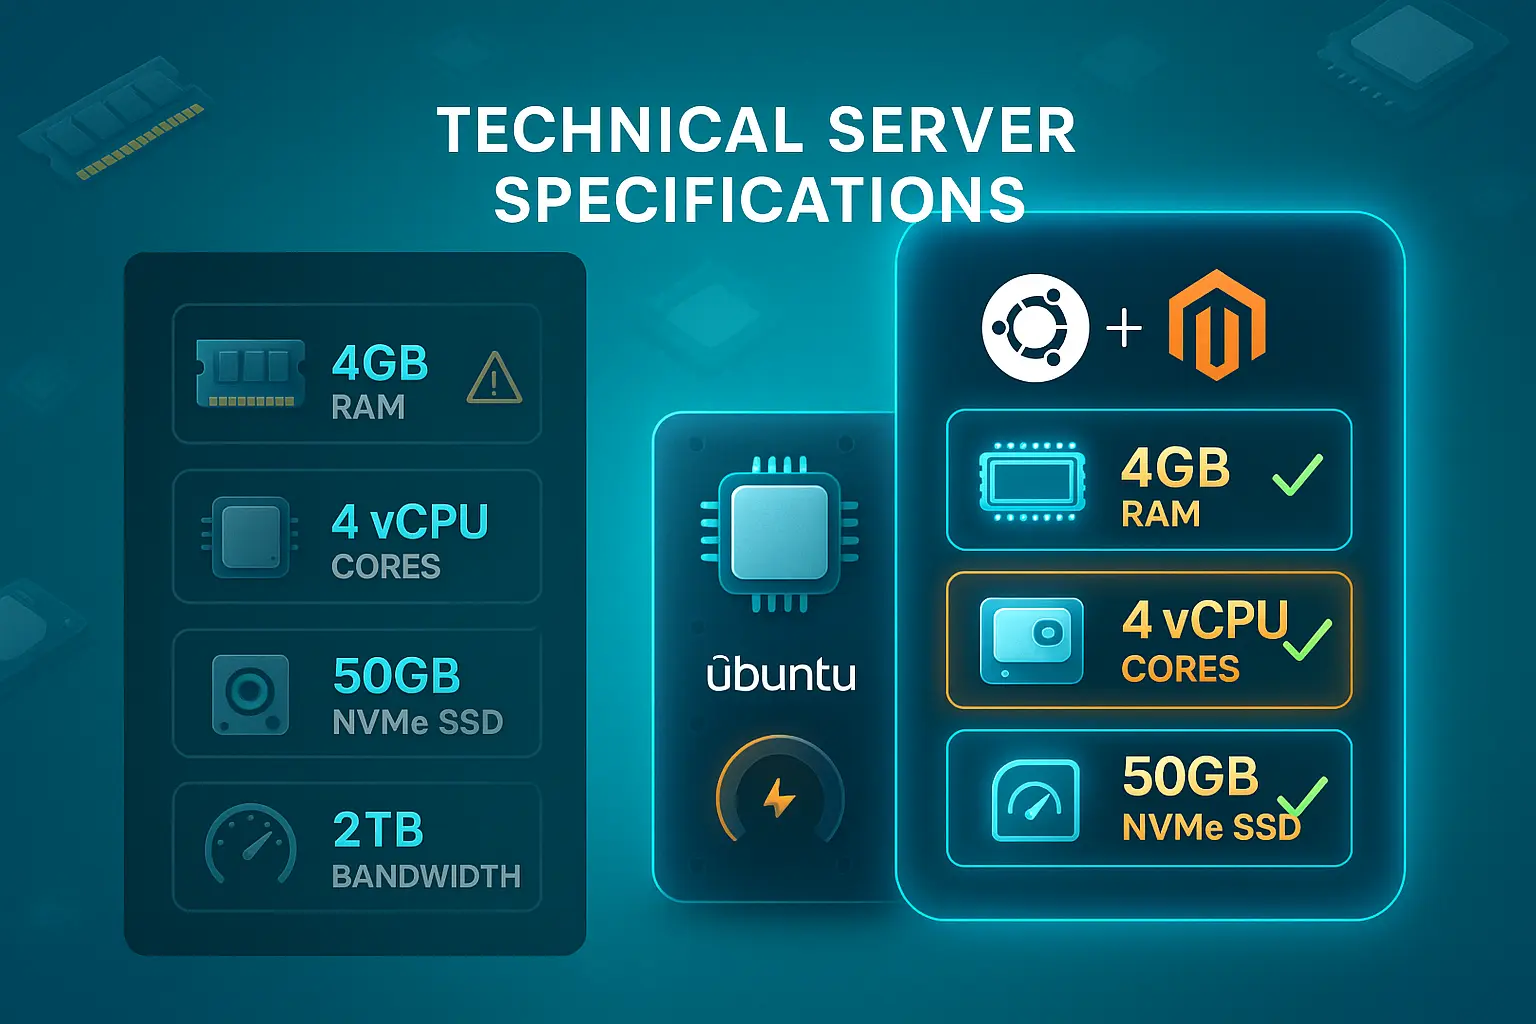
Before starting the installation process, verify that your VPS meets both hardware and software requirements. Magento 2.4.8-p3 (the current stable release as of November 2025) has specific needs that must be met for optimal performance when you install Magento on VPS.
Running Magento on insufficient hardware leads to slow page loads, timeout errors during checkout, and poor customer experiences that drive potential buyers to competitor sites.
Similarly, using outdated software versions can cause compatibility issues or security vulnerabilities that put customer data at risk.
Server Requirements:
| Requirement | Minimum | Recommended |
| RAM | 2 GB | 4 GB or higher |
| vCPU | 2 cores | 4 cores or higher |
| Storage Type | SSD | NVMe SSD |
| Storage Space | 25 GB | 50 GB or more |
| Bandwidth | 1 TB/month | 2 TB/month or more |
For production stores expecting moderate to high traffic, the recommended specifications provide much better performance and room for growth. NVMe SSD storage significantly improves database query speeds and page load times compared to traditional SSD or HDD options, especially when running complex product filters or generating reports.
The difference becomes noticeable when customers perform catalog searches or when you generate sales reports that query thousands of order records.
Software Stack
Magento requires a complete Magento LEMP/LAMP stack setup. Here are the specific versions compatible with Magento 2.4.8. Each component plays a critical role in how Magento operates throughout every customer interaction.
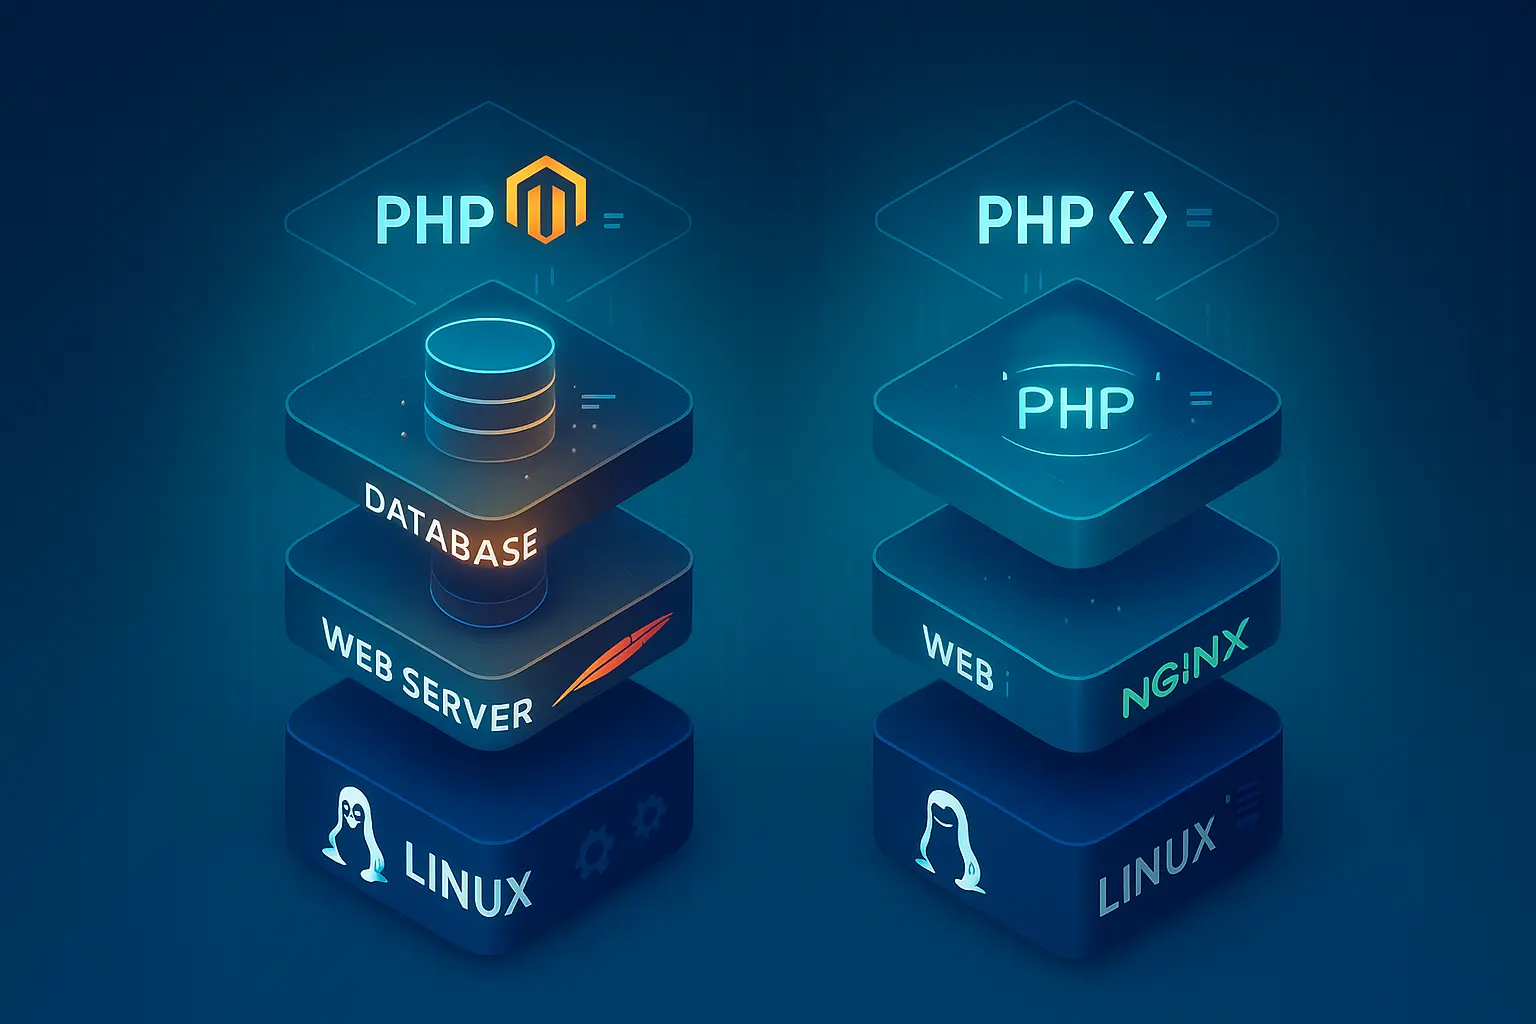
Here are the specific versions compatible with Magento 2.4.8. Ubuntu 24.04 LTS is the preferred choice due to its long-term support and extensive documentation. If you are deciding between distributions, check out Ubuntu Server Vs Desktop to understand which version suits your needs. For web server configuration, setting up Magento with Nginx on VPS often provides better performance for serving static assets.
Here are the specific versions compatible with Magento 2.4.8:
| Component | Required Version(s) | Notes |
| Operating System | Ubuntu 24.04 LTS, Ubuntu 22.04 LTS, Ubuntu 20.04 LTS, Debian 12, RHEL 8/9 | Ubuntu 24.04 LTS recommended for long-term support |
| Web Server | Apache 2.4 or Nginx 1.x | Nginx preferred for static asset performance; Apache for simpler configuration |
| Database | MySQL 8.4, MySQL 8.0, MariaDB 11.4, MariaDB 10.6+, Percona Server 8.0 | MariaDB 11.4 or MySQL 8.4 recommended |
| PHP | PHP 8.4 or PHP 8.3 | PHP 8.4 recommended for Magento 2.4.8 (PHP 8.2 for upgrade compatibility only) |
| PHP Extensions | bcmath, ctype, curl, dom, gd, hash, iconv, intl, mbstring, openssl, pdo_mysql, simplexml, soap, xml, xsl, zip, sockets | All extensions required for full functionality |
| Search Engine | OpenSearch 2.19+ or OpenSearch 3.x | Elasticsearch support removed in Magento 2.4.8 |
| Package Manager | Composer 2.8 or later | Required for managing PHP dependencies |
| Version Control | Git (latest stable) | Optional but recommended for tracking code changes |
| Caching | Redis 7.x or Valkey 8.x | Required for session storage and full-page caching |
| SSL Certificate | Valid SSL from Let’s Encrypt or commercial CA | Mandatory for production; self-signed not supported for payments |
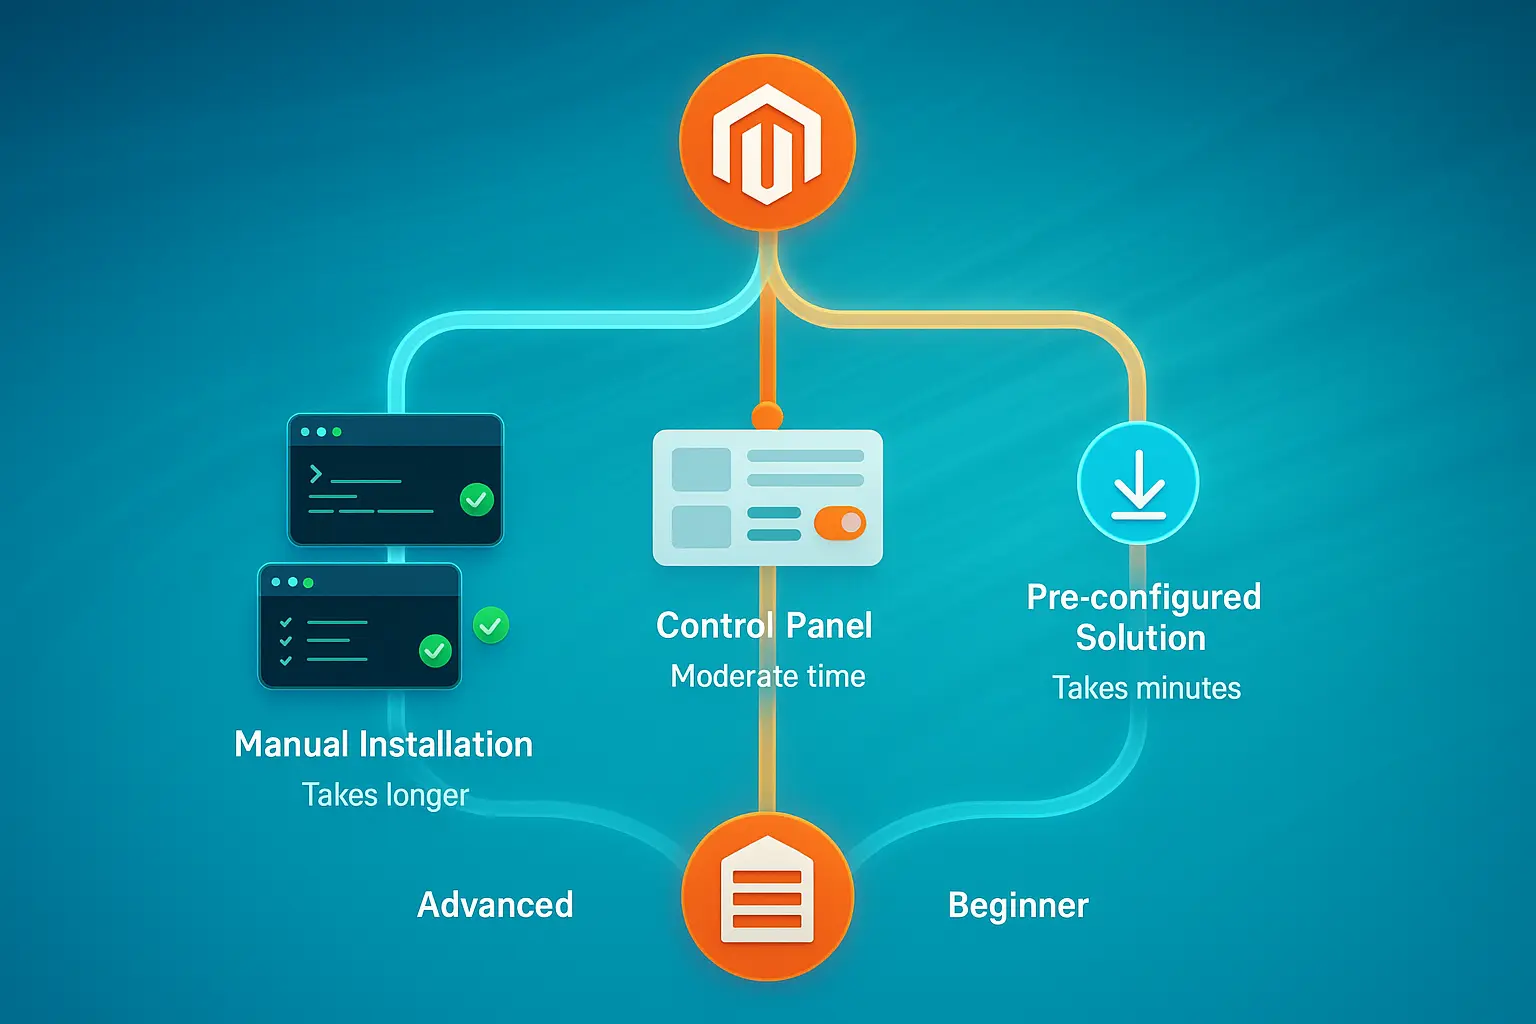
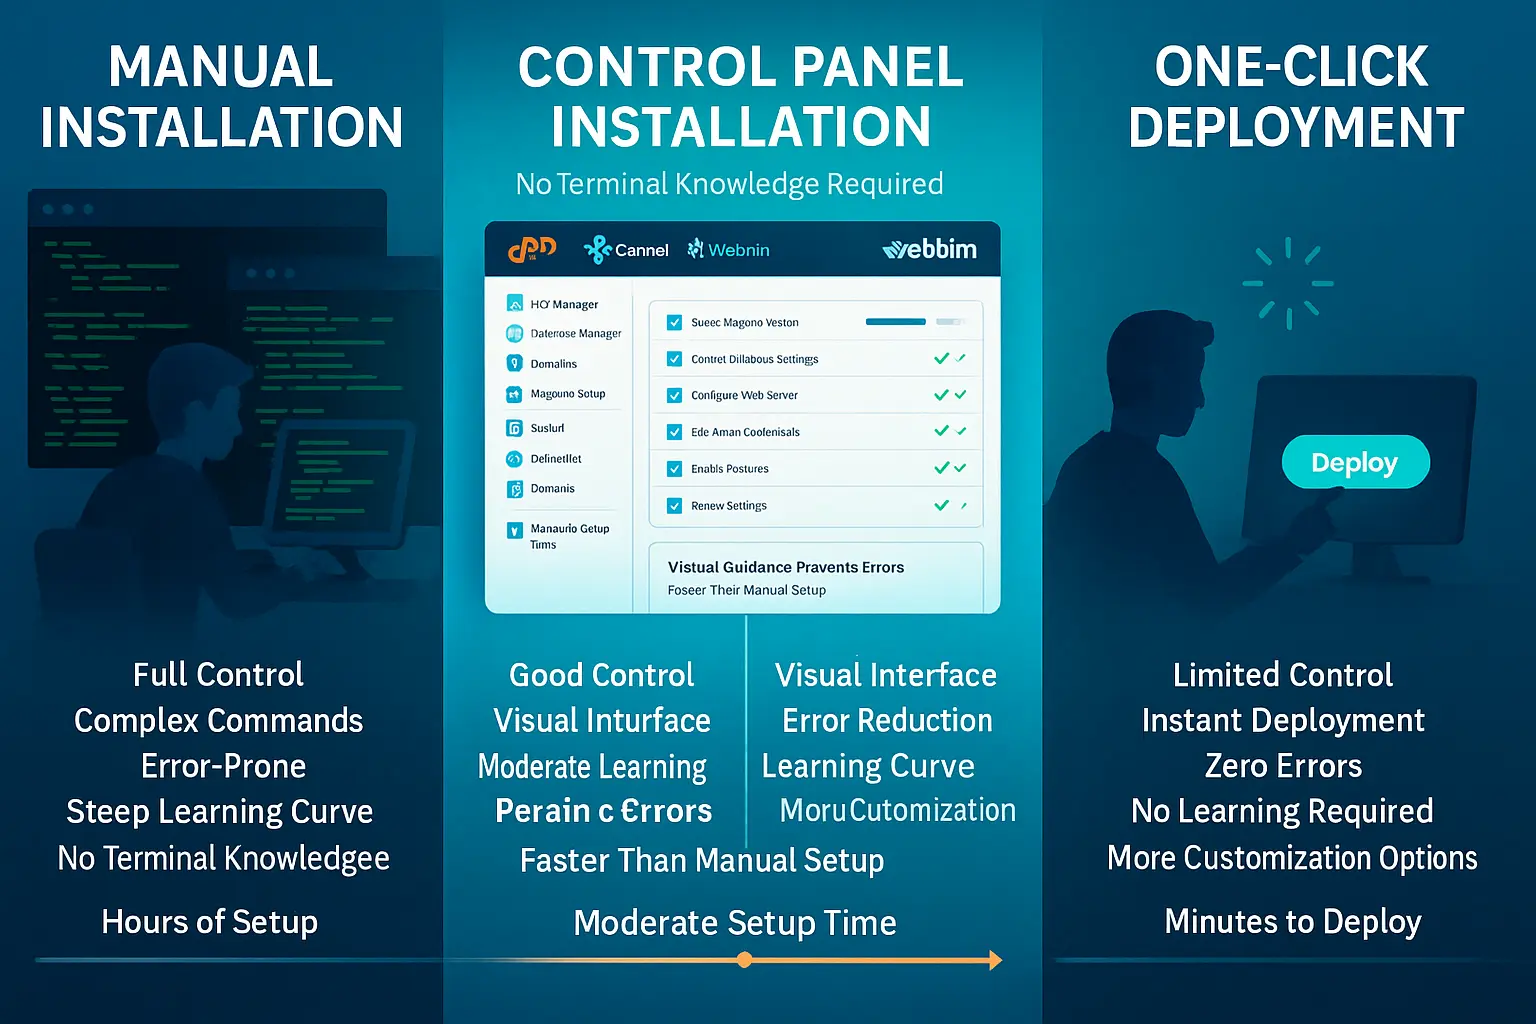
Method 1: Manual Installation (Apache + PHP + MySQL)
Manual installation gives you complete control over every component and helps you understand how Magento works under the hood. This method takes longer but provides the deepest understanding of your environment.
When you install Magento with Apache on VPS, you will install each software component individually, configure settings specifically for Magento’s requirements, and build your stack from the ground up without relying on automated scripts that hide what they are doing.
This approach works best for experienced system administrators or developers who want full control over their server configuration and need to understand exactly what runs on their system. For those looking to install Magento 2 on Ubuntu VPS with complete transparency, this manual method provides that visibility.
While more time-consuming than automated methods, manual installation teaches you exactly how each piece of your Magento infrastructure functions together. This knowledge becomes invaluable when troubleshooting issues or optimizing performance later, since you will know which configuration files to check and which services to restart when problems occur.
Additionally, understanding how to install Magento on VPS manually prepares you for advanced customizations.
Step 1: Update System and Install Apache
Connect to your Ubuntu VPS via SSH and update the package repositories to get the latest versions:
sudo apt update && sudo apt upgrade -yInstall the Apache web server:
sudo apt install apache2 -yEnable Apache to start on boot and start the service:
sudo systemctl enable apache2sudo systemctl start apache2Verify Apache is running by visiting your server IP in a web browser. You should see the Apache default page confirming the web server is accepting connections.
Step 2: Install MySQL Database
Install MySQL server:
sudo apt install mysql-server -ySecure the MySQL installation by running the security script:
sudo mysql_secure_installationFollow the prompts to set a root password, remove anonymous users, disable remote root login, and remove the test database. Create a database and user for Magento:
sudo mysql -u root -pInside the MySQL prompt, run these commands (replace PASSWORD with a strong password you create):
CREATE DATABASE magentodb;

CREATE USER 'magentouser'@'localhost' IDENTIFIED BY 'PASSWORD';

GRANT ALL PRIVILEGES ON magentodb.* TO 'magentouser'@'localhost';

FLUSH PRIVILEGES;

EXIT;
Step 3: Install PHP 8.4 with FPM
Install PHP 8.4 with PHP-FPM and required extensions:
sudo apt install php8.4-fpm php8.4-mysql php8.4-cli php8.4-common php8.4-opcache php8.4-curl php8.4-gd php8.4-mbstring php8.4-intl php8.4-soap php8.4-xml php8.4-zip php8.4-bcmath php8.4-xsl php8.4-sockets -yEnable required Apache modules for PHP-FPM:
sudo a2enmod proxy_fcgi setenvif rewrite headers sudo a2enconf php8.4-fpmConfigure PHP settings for Magento by editing the FPM php.ini:
sudo nano /etc/php/8.4/fpm/php.iniUpdate these settings:
memory_limit = 2G

max_execution_time = 1800

zlib.output_compression = On
Restart PHP-FPM and Apache:
sudo systemctl restart php8.4-fpmsudo systemctl restart apache2Step 4: Install Composer
Composer manages Magento’s PHP dependencies and is essential for Magento installation using Composer on Ubuntu. Download and install it:
cd ~

curl -sS https://getcomposer.org/installer | sudo php -- --install-dir=/usr/local/bin --filename=composer
Verify the installation:
composer --versionStep 5: Install OpenSearch
OpenSearch provides search functionality for your Magento store. Install it from the official APT repository, which handles service configuration and security hardening automatically.
Add the OpenSearch repository and GPG key:
curl -fsSL https://artifacts.opensearch.org/publickeys/opensearch.pgp | sudo gpg --dearmor -o /usr/share/keyrings/opensearch-keyringecho "deb [signed-by=/usr/share/keyrings/opensearch-keyring] https://artifacts.opensearch.org/releases/bundle/opensearch/2.x/apt stable main" | sudo tee /etc/apt/sources.list.d/opensearch-2.x.listUpdate and install OpenSearch with an initial admin password:
sudo apt updatesudo env OPENSEARCH_INITIAL_ADMIN_PASSWORD='StrongPass#1' apt -y install opensearchConfigure the required kernel parameter for OpenSearch:
echo "vm.max_map_count=262144" | sudo tee /etc/sysctl.d/60-opensearch.confsudo sysctl --systemEnable and start OpenSearch:
sudo systemctl enable --now opensearchStep 6: Download and Install Magento
Create a directory for Magento:
sudo mkdir -p /var/www/magentocd /var/www/magentoGet your Magento authentication keys from the Magento Marketplace access keys page. You need these credentials to download Magento via Composer.
Download Magento using Composer (replace <public_key> and <private_key> with your actual keys when prompted):
sudo composer create-project --repository-url=https://repo.magento.com/ magento/project-community-edition .Set file permissions:
sudo chown -R www-data:www-data /var/www/magento

cd /var/www/magento

find var generated pub/static pub/media app/etc -type f -exec chmod g+w {} +

find var generated pub/static pub/media app/etc -type d -exec chmod g+ws {} +
Step 7: Configure Apache Virtual Host
Create an Apache configuration file:
sudo nano /etc/apache2/sites-available/magento.confAdd this configuration (replace yourdomain.com with your domain):
<VirtualHost *:80>

    ServerAdmin [email protected]

    DocumentRoot /var/www/magento/pub

    ServerName yourdomain.com

    <Directory /var/www/magento/pub>

        Options Indexes FollowSymLinks

        AllowOverride All

        Require all granted

    </Directory>

    ErrorLog ${APACHE_LOG_DIR}/magento_error.log

    CustomLog ${APACHE_LOG_DIR}/magento_access.log combined

</VirtualHost>
Enable the site and required Apache modules:
sudo a2ensite magento.conf

sudo a2enmod rewrite

sudo systemctl restart apache2
Step 8: Complete Installation via CLI
Modern Magento versions require command-line installation since the web setup wizard was removed. Run the installation command with your specific configuration:
cd /var/www/magento

sudo -u www-data bin/magento setup:install \

--base-url=http://yourdomain.com \

--db-host=localhost \

--db-name=magentodb \

--db-user=magentouser \

--db-password=PASSWORD \

--admin-firstname=Admin \

--admin-lastname=User \

[email protected] \

--admin-user=admin \

--admin-password=Admin123! \

--language=en_US \

--currency=USD \

--timezone=America/New_York \

--use-rewrites=1 \

--search-engine=opensearch \

--opensearch-host=localhost \

--opensearch-port=9200
Replace the database credentials, admin details, timezone, and URLs with your actual values. The installation process takes several minutes as it sets up the database schema and configures your store.
After installation completes, disable maintenance mode:
sudo -u www-data bin/magento maintenance:disableMethod 2: Installing with a Control Panel (cPanel/Plesk)
Control panels provide a graphical interface that simplifies server management when you install Magento on VPS. This method balances ease of use with customization options, making it ideal for users who want a user-friendly interface without sacrificing control.
cPanel and Plesk automate many of the manual configuration steps, handle updates automatically, and provide built-in backup solutions. While not as educational as manual installation, control panels save significant time and reduce the chance of configuration errors.
Using Softaculous in cPanel
Log in to your cPanel dashboard and locate the Softaculous Apps Installer. Search for Magento in the available applications list and click the Install button.
Configure your installation by providing:
- Installation domain and directory
- Admin email and password
- Store name and description
- Database name (auto-generated by default)
Click Install to begin the automated installation process. Softaculous handles downloading files, creating the database, and configuring basic settings. The process typically completes within 5-10 minutes.
Using Plesk Application Installer
Access your Plesk control panel and navigate to Applications. Find Magento in the application catalog and select Install.
Follow the installation wizard to configure:
- Domain and subdirectory settings
- Administrator credentials
- Initial store configuration
- Email settings for order confirmations
Plesk creates the necessary databases, sets file permissions, and configures web server settings automatically. After installation, you can access your admin panel and begin customizing your store.
Method 3: Pre-Configured Magento VPS Solution
For the fastest deployment when you install Magento on VPS, consider pre-configured solutions that come with everything set up and optimized. At Cloudzy, our Magento VPS hosting eliminates server configuration entirely, letting you launch your store in minutes instead of spending hours on manual setup.

Our pre-configured packages include optimized Magento 2.4.8-p3, PHP 8.4 with required extensions, MySQL 8.4 or MariaDB 11.4 tuned for Magento, OpenSearch 2.19+ configured properly, and Redis caching for session and full-page caching. NVMe SSD storage and DDR5 RAM deliver maximum performance during database operations and concurrent customer sessions.
We offer server locations across 12 global regions in North America, Europe, Asia, and the Middle East, positioning your store closer to your target customers. Our infrastructure provides up to 40 Gbps bandwidth, multiple payment methods, 24/7 support, 99.95% uptime guarantee, and full root access for complete control over your environment.
Security Configuration After You Install Magento on VPS
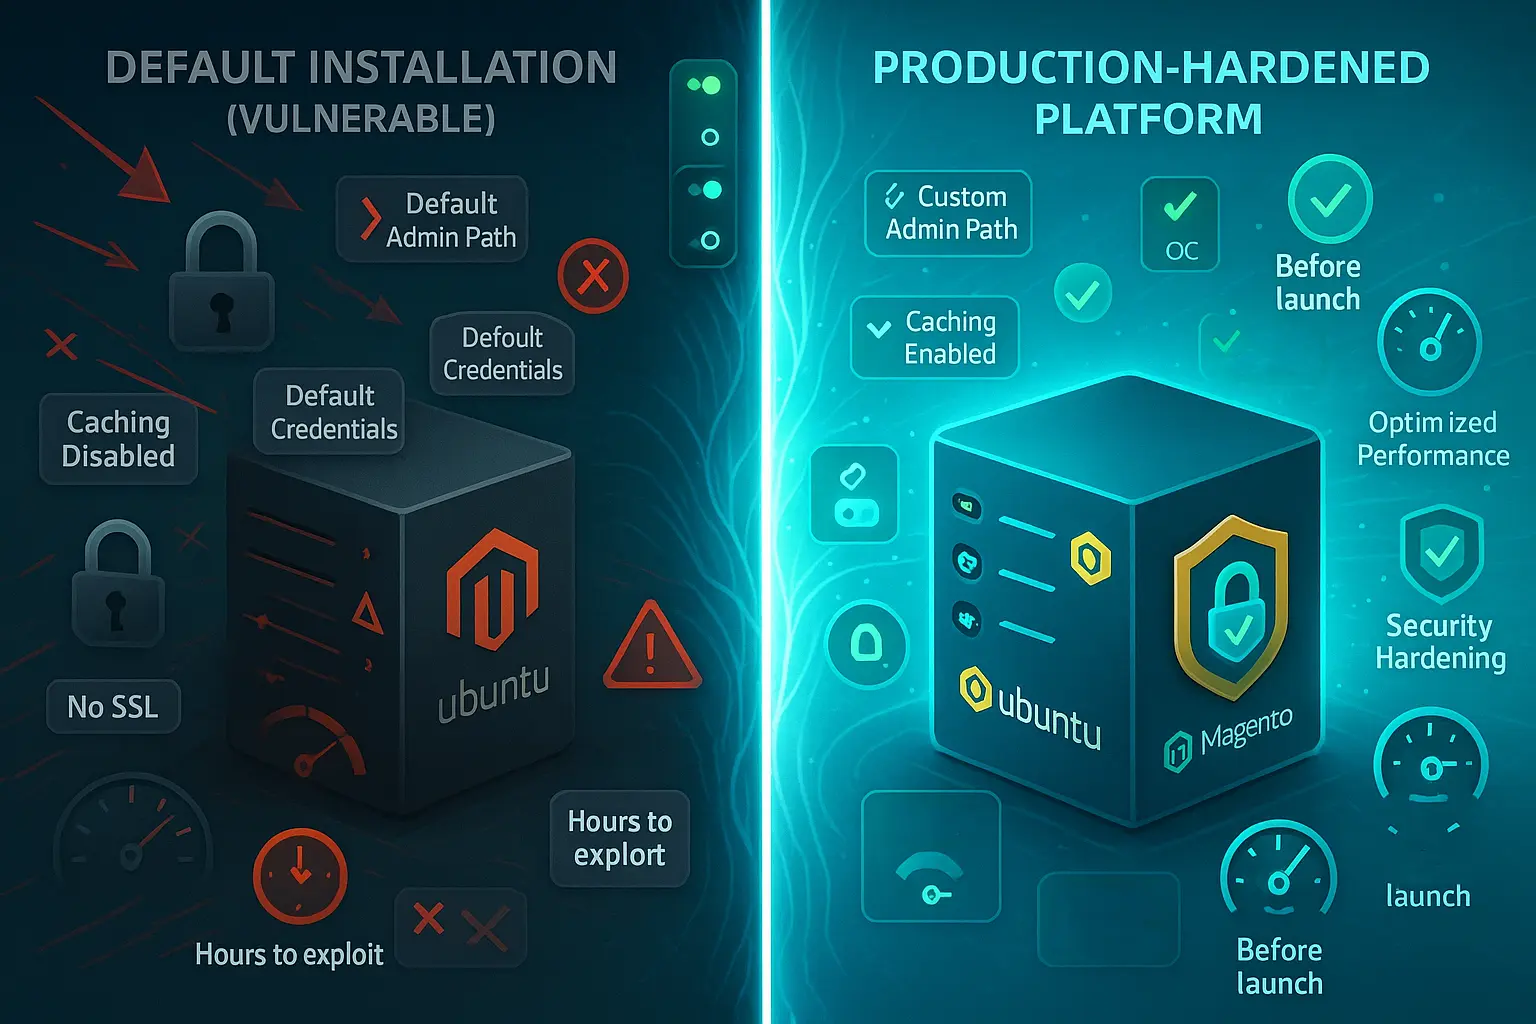
Security must be your top priority before accepting real customer orders or processing payments through your Magento store. Implementing a secure Magento installation on VPS requires multiple layers of protection against different attack vectors.
Magento stores become targets for attackers seeking customer data, payment information, or server resources to use in larger attacks against other targets.
Each security layer adds protection against different attack vectors, from brute force login attempts trying thousands of password combinations to malware injection that could compromise customer data. For comprehensive guidance, review our detailed tutorial on how to secure Linux VPS.
Enable Two-Factor Authentication
Protect admin accounts with two-factor authentication that requires both a password and a time-based code from an authenticator app. Install the Google Authenticator module:
cd /var/www/magento

sudo -u www-data bin/magento module:enable Magento_TwoFactorAuth

sudo -u www-data bin/magento setup:upgrade

sudo -u www-data bin/magento cache:flush
Enable Two-Factor Authentication
Protect admin accounts with two-factor authentication that requires both a password and a time-based code from an authenticator app. Two-factor authentication is enabled by default in Magento 2.4+, so configure your provider like this:
cd /var/www/magento

bin/magento config:set twofactorauth/general/force_providers google

bin/magento cache:flush
After configuration, enroll admin users through the admin panel by scanning the QR code with your authenticator app.
Configure Firewall Rules
Use UFW (Uncomplicated Firewall) to restrict access to your VPS. Allow only necessary ports:
sudo ufw allow 22/tcp

sudo ufw allow 80/tcp

sudo ufw allow 443/tcp

sudo ufw enable
This configuration allows SSH access on port 22, HTTP on port 80, and HTTPS on port 443 while blocking all other incoming connections that might be used for attacks.
Install SSL Certificate
Secure your store with HTTPS using Let’s Encrypt. Install Certbot:
sudo apt install certbot python3-certbot-apache -yObtain and install a certificate:
sudo certbot --apache -d yourdomain.com -d www.yourdomain.comCertbot automatically configures Apache to use the certificate and sets up automatic renewal. Your store now serves all traffic over encrypted HTTPS connections that protect customer data.
Set Proper File Permissions
Incorrect permissions create security vulnerabilities that attackers exploit to inject malicious code. Set correct ownership and permissions:
sudo chown -R www-data:www-data /var/www/magento

cd /var/www/magento

find var generated pub/static pub/media app/etc -type f -exec chmod g+w {} +

find var generated pub/static pub/media app/etc -type d -exec chmod g+ws {} +
Configure Admin URL and Security Settings
Change the admin URL from the default path to something unique that attackers cannot easily guess:
sudo -u www-data bin/magento setup:config:set --backend-frontname="custom_admin_path"Enable security headers in your web server configuration to prevent clickjacking and cross-site scripting attacks. Edit your Apache virtual host to include:
Header always set X-Frame-Options "SAMEORIGIN"

Header always set X-Content-Type-Options "nosniff"

Header always set X-XSS-Protection "1; mode=block"
Performance Optimization When You Install Magento on VPS
Magento performance directly affects conversion rates and customer satisfaction. Proper optimization ensures your store operates at peak efficiency. Research shows that 47% of users expect two-second loads, and optimized infrastructure paired with proper configuration delivers the speed that drives sales.
Enable Production Mode
Magento runs in three modes. Production mode provides the best performance for live stores by enabling all optimizations:
cd /var/www/magento

sudo -u www-data bin/magento deploy:mode:set production

sudo -u www-data bin/magento setup:di:compile

sudo -u www-data bin/magento setup:static-content:deploy -f

sudo -u www-data bin/magento cache:flush
Configure Varnish Cache
Varnish dramatically improves page load times by caching full pages in memory. Install Varnish:
sudo apt install varnish -yConfigure Apache to listen on port 8080 while Varnish handles port 80. Create a systemd service override:
sudo systemctl edit varnish

Paste this configuration in the editor:

[Service]

ExecStart=

ExecStart=/usr/sbin/varnishd -a :80 -b 127.0.0.1:8080 -s malloc,1G
Apply the changes:
sudo systemctl daemon-reload && sudo systemctl restart varnishConfigure Magento to use Varnish for full-page caching and generate the VCL configuration:
bin/magento config:set system/full_page_cache/caching_application 2

bin/magento varnish:vcl:generate --export-version=7 > /tmp/varnish.vcl

sudo cp /tmp/varnish.vcl /etc/varnish/default.vcl
Update your Apache virtual host to listen on port 8080 and restart services:
sudo systemctl restart varnish apache2Optimize Indexing
Keep indexers in “Update by Schedule” mode rather than “Update on Save” for better performance:
sudo -u www-data bin/magento indexer:set-mode scheduleRun the indexer:
sudo -u www-data bin/magento indexer:reindexUse Production mode with Full Page Cache and Varnish for optimal performance. Studies show conversion rates peak at 3.05% for pages loading in one or two seconds. Remember that page speed directly impacts your revenue.
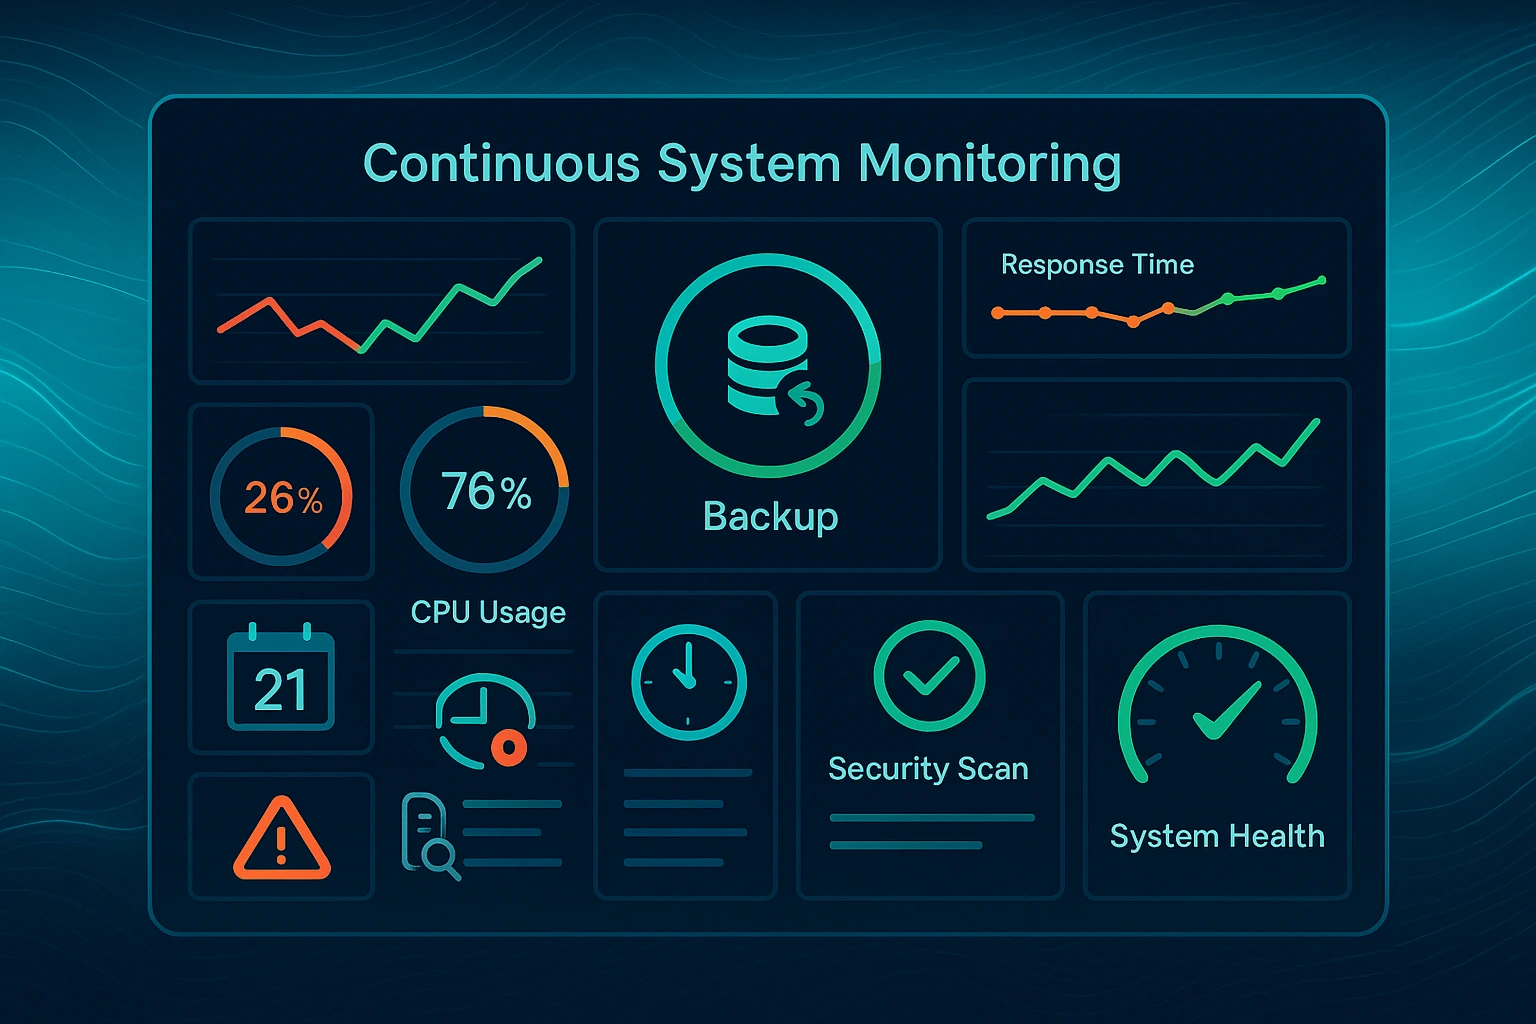
Monitor Performance
Install New Relic or other application performance monitoring tools to identify bottlenecks as they develop. Track these key metrics: page load times for different pages, database query performance to find slow queries, server resource utilization to know when to upgrade, and cache hit rates to keep caching working properly. Regular performance testing helps you maintain fast load times as your catalog grows from 100 products to 10,000.
Maintenance Tasks for Your Magento VPS Installation
Ongoing maintenance keeps your Magento store secure, fast, and reliable over time instead of slowly degrading into an unusable mess. Neglecting maintenance leads to security vulnerabilities that attackers exploit, performance degradation that drives customers away, and eventual system failures that take your entire store offline for hours or days.
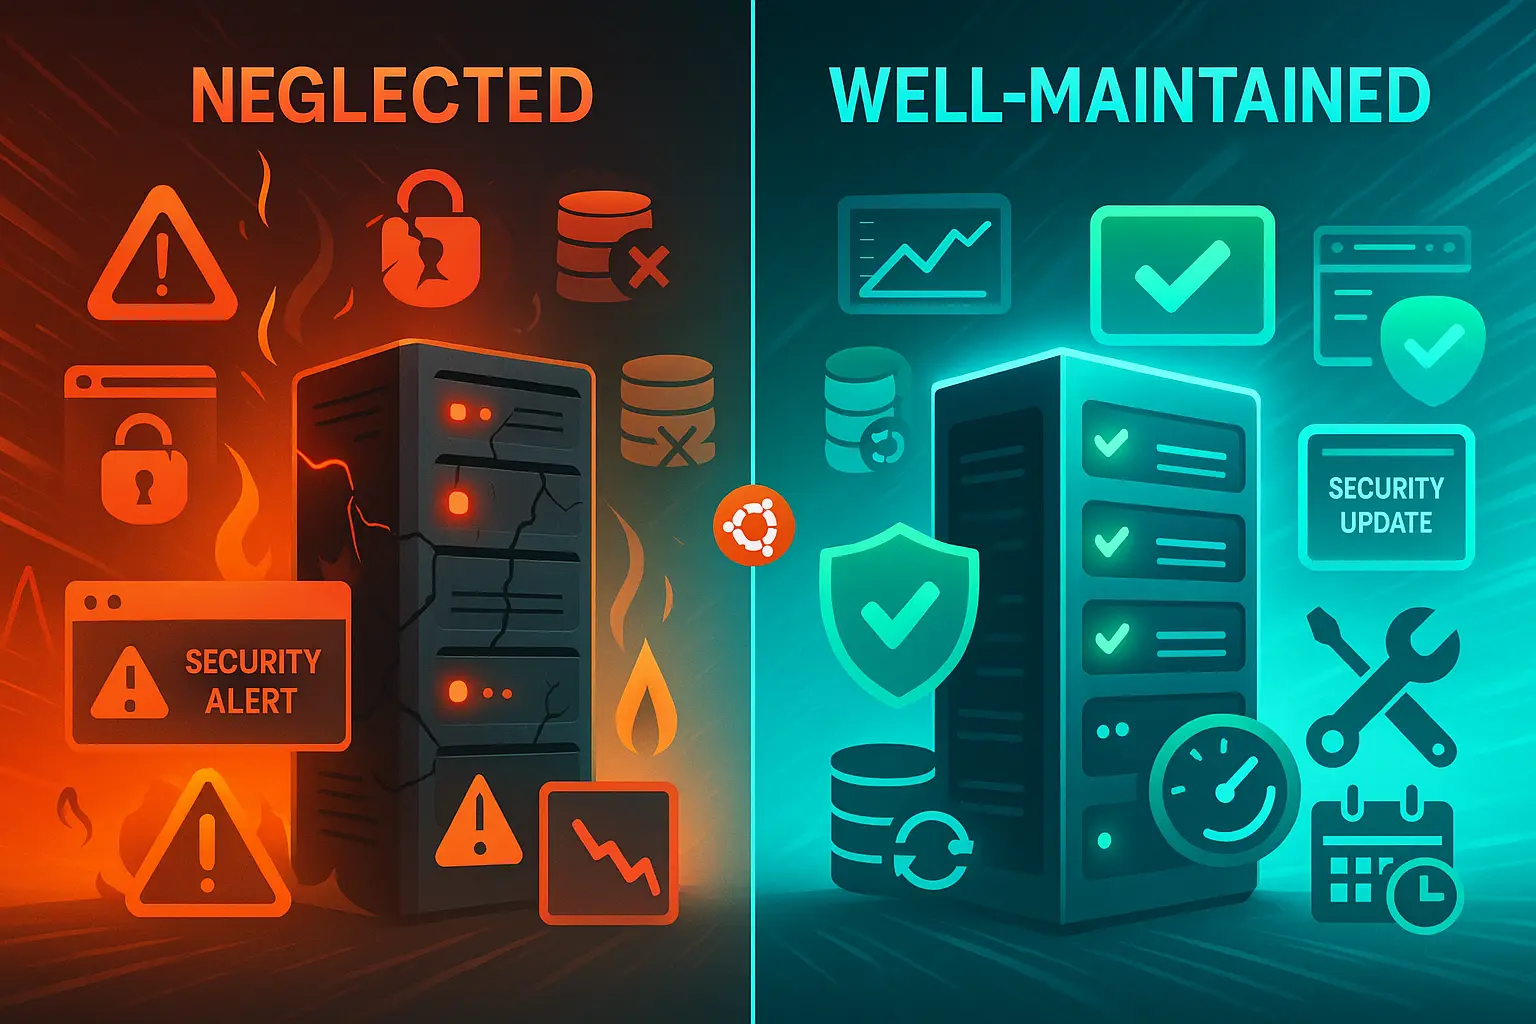
Regular updates patch security holes before attackers exploit them in the wild. Backups protect your business from data loss due to hardware failures, software bugs, or human error, like accidentally deleting important product data.
Routine maintenance tasks seem tedious when nothing is broken, but they prevent catastrophic problems that cost far more time and money to fix. Schedule these activities regularly and follow through consistently to maintain a healthy eCommerce platform that stays online when you need it most.
Regular Updates
Keep Magento, PHP, and system packages updated to patch security vulnerabilities:
cd /var/www/magento

sudo composer update

sudo -u www-data bin/magento setup:upgrade

sudo apt update && sudo apt upgrade -y
Backup Strategy
Implement automated backups covering the database (daily), media files (weekly), and configuration files (after each change). Store backups off-site or in a different data center to protect against server failure or data center outages.
Reindexing
Magento maintains indexes for faster database queries when customers search for products. Reindex regularly:
sudo -u www-data bin/magento indexer:reindexSet up cron jobs to handle this automatically during low-traffic periods like 3 AM.
Log Monitoring
Review logs regularly to catch issues early before they affect customers:
tail -f /var/www/magento/var/log/system.log

tail -f /var/www/magento/var/log/exception.log
Configure log rotation to prevent log files from consuming excessive disk space and filling your drive.
Conclusion
When you install Magento on a VPS, you get performance, security, and control that shared hosting cannot deliver. The three methods covered(manual installation, control panels, and pre-configured solutions) each offer different advantages depending on your technical expertise and time constraints.
Security and optimization are not optional extras. They affect conversion rates from day one. SSL certificates, firewalls, caching, and performance monitoring should go live immediately after installation.
Linux dominates Magento deployments for good reasons. Better performance and wider community support make it the platform of choice. The platform rewards fast, secure stores with higher conversions and punishes slow sites with abandoned carts. Different hosting platforms offer unique advantages. Check out our comparison of Linux vs. Windows hosting options for more details.
Pick your installation method based on your technical skills and available time. Then focus on what matters: growing your business.
FAQ
What makes VPS hosting better than shared hosting for Magento?
Can Magento run on Windows VPS?
How much traffic can a basic Magento VPS handle?
Do I need technical knowledge to install Magento?
How often should I update Magento?
What is the difference between Magento Open Source and Adobe Commerce?
Can I migrate my existing Magento store to a new VPS?
How do I choose between Apache and Nginx for Magento?
What Magento VPS backup strategy should I implement?
Is Cloudzy suitable for production eCommerce stores?