If you ever need to change your Cloud VPS operating system, you can
do so on your own in the Cloudzy Cloud VPS panel. The following simple
steps will teach you how to change your Cloud VPS operating system.
- Log in to your account in the Cloudzy panel.

- From the sidebar on the left side, click on
Services.
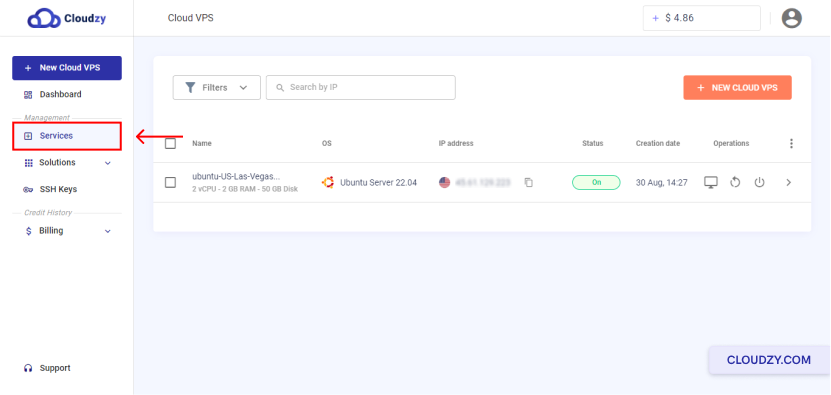
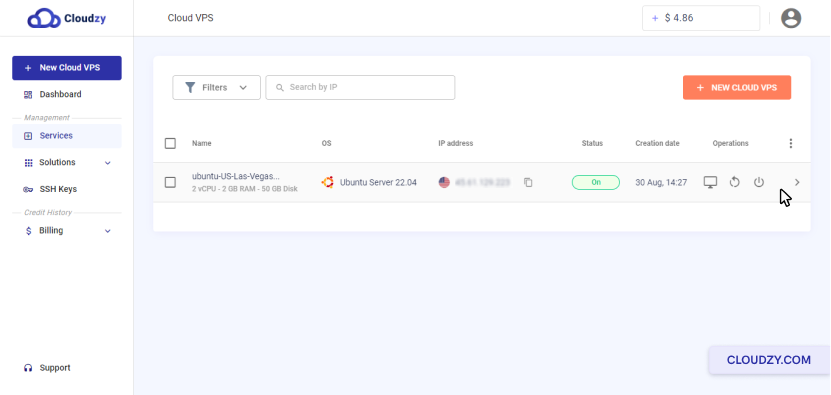
- Click on the row of a Cloud VPS you want to change its operating
system.
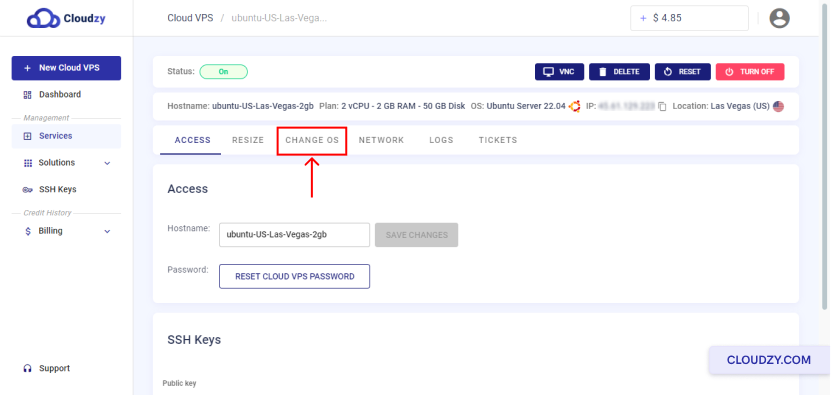
- At the top of the page, click on the CHANGE OS
button.
- Now, you can choose an operating system that you want to select as
your new operating system for your existing Cloud VPS. Then, click on
the CHANGE OS button.

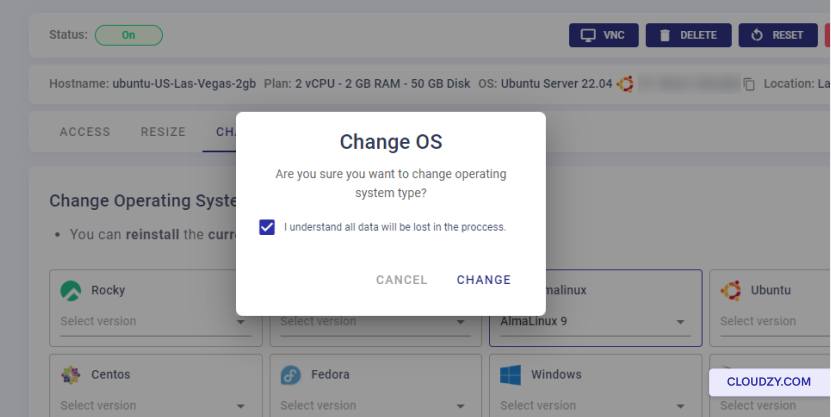
- If you are not worried about data loss, check “I understand all data
will be lost in the process” and then click on the
CHANGE button.
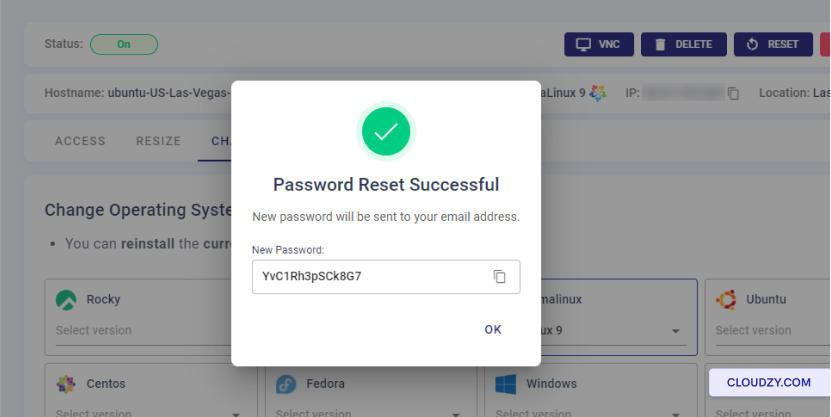
- After your Cloud VPS operating system is changed, a pop-up will show
your new Cloud VPS password. Now you can click on OK
and enjoy using your Cloud VPS.
You have now successfully changed your operating system. If you have
any questions, feel free to contact us by submitting a
ticket.
Also in OS & VPS
Related guides.
Need help with something else?
Median response time under 1 hour. Real humans, not bots.