How to Change or Activate Your Email in the Cloudzy Panel?
This guide explains how to activate a new email or update your existing email in the Cloudzy Panel, helping you maintain account security and full access to all Cloudzy services.
Email Verification for New Users
When registering a new Cloudzy account, you must verify your email to ensure account security and gain full functionality. Without verification, certain actions-such as creating a VPS-will be restricted.
After registration, you will receive a verification email containing a link. This link expires in two days. If you do not receive the email, check your junk or spam folder. If it is still missing, you can request a new verification email directly from the Cloudzy Panel.
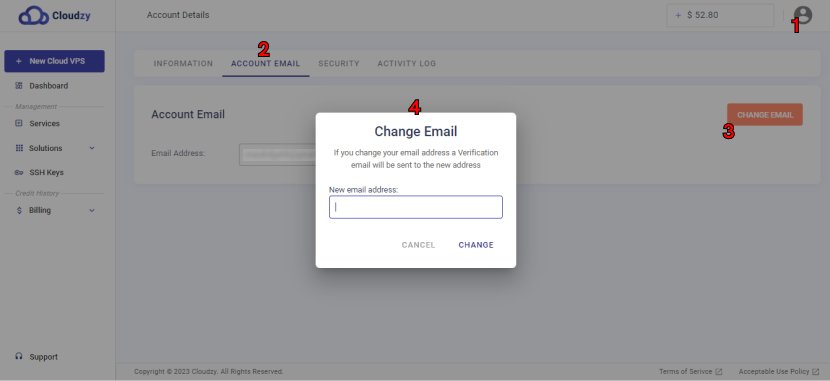
Changing Your Email Address
To update your email in the Cloudzy Panel:
-
Click on the user icon in the top-right corner of the panel.
-
Select Account Details from the dropdown menu.
-
Find the ACCOUNT EMAIL section and click CHANGE EMAIL.
-
Enter your new email address and submit.
Your new email will require verification before it becomes active. This ensures your account remains secure and your email is valid.
You can now easily activate or change your email address in the Cloudzy Panel. Completing email verification is essential for maintaining account security and ensuring uninterrupted access to all Cloudzy services.
If you encounter any issues during this process, don’t hesitate to reach out to our support team by submitting a ticket.
Also in Account Settings
Related guides.
Need help with something else?
Median response time under 1 hour. Real humans, not bots.