💡 Note: With our one-click cPanel app, you can install it effortlessly or choose to have it pre-installed on your preferred Linux configuration.
Among web hosting control panels, cPanel is simply the gold standard. It is a tried and true panel with legions of devoted admins and that’s not for nothing. It’s got ease of use down pat, with an all-in-one dashboard that lets you find whatever you need in just a glance.
It offers a lot of app integrations using Softaculous, including the three most popular CMSs, WordPress, Joomla, and Drupal. It offers a lot of cool features for developers, including phpMyAdmin, Ruby on Rails, Perl Pears, and Git support. It’s also the only control panel to offer multi-factor authentication, a great way to beef up your server’s security.
 Windows 10 VPS Hosting
Get yourself an efficient Windows 10 VPS for remote desktop, at the cheapest price out there. FREE Windows 10 running on NVMe SSD storage and high-speed internet.
Check Out Windows 10 VPS PlansHow to Install WHM/cPanel on Our Self-Managed VPS
Log in to Your VPS
First, you need to log in to your VPS using SSH. If you don’t know how; read our tutorial here or call our customer support hotline and we’ll have you logged in and working in no time.
Install Perl
First, you need to install Perl, which is essential to running WHM/cPanel. Here, we’ll assume you’re running CentOS, but all the commands can be replicated with minor alterations in Ubuntu and Debian as well. Type the following command into the CentOS Command-Line Interface (CLI) to install Perl:
yum install perl
Next, to download the installation, you’ll be using the curl command. You probably already have one installed but if not, you can install it like this:
yum install curl
Now that you’ve got Perl, you’re almost ready to install WHM, the server-side twin of cPanel. You’ll be downloading the installation files so, of course, you’ll need to have a working Internet connection. The download and installation will take some time and since you’re using a remote connection, it’d be a good idea to use a screen so you don’t end up losing all your downloads halfway if your internet connection gets suddenly cut off. To run the “screen” simply type:
screen
Now you’re all set. Download and install WHM using the following command:
cd /home && curl -o latest -L https://securedownloads.cpanel.net/latest && sh latest
You may be asked to set a password for your root user, or the administrator. Make sure you use a strong password. You will then be using this password to log in to your WHM account. Once the download and installation are done, you should be seeing something like this (your server’s IP address will be shown instead of the white box we’ve used to ensure privacy):
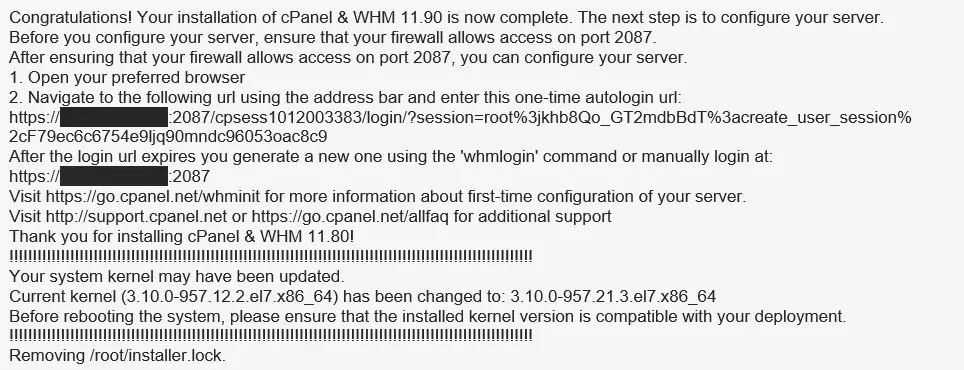
Now the installation is completely done. Use the reboot command in the CLI to reboot your server:
reboot
Now the rest is done using a normal web browser like Firefox or Chrome. Use the one-time auto-login URL provided at the end of the installation to log in to WHM. In the above address, 2087 is the default port for WHM, you can change that later to give your security a boost. You’ll immediately face the license agreement for WHM/cPanel. Make sure you read it through and then accept the terms:
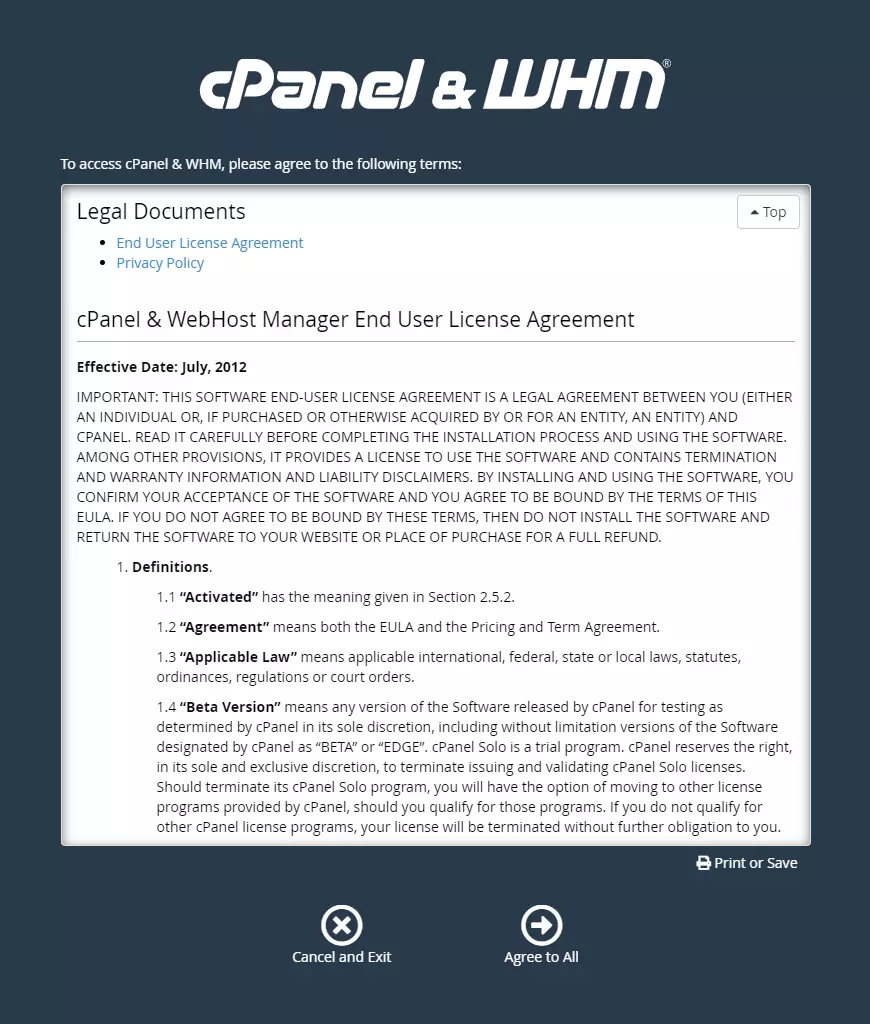
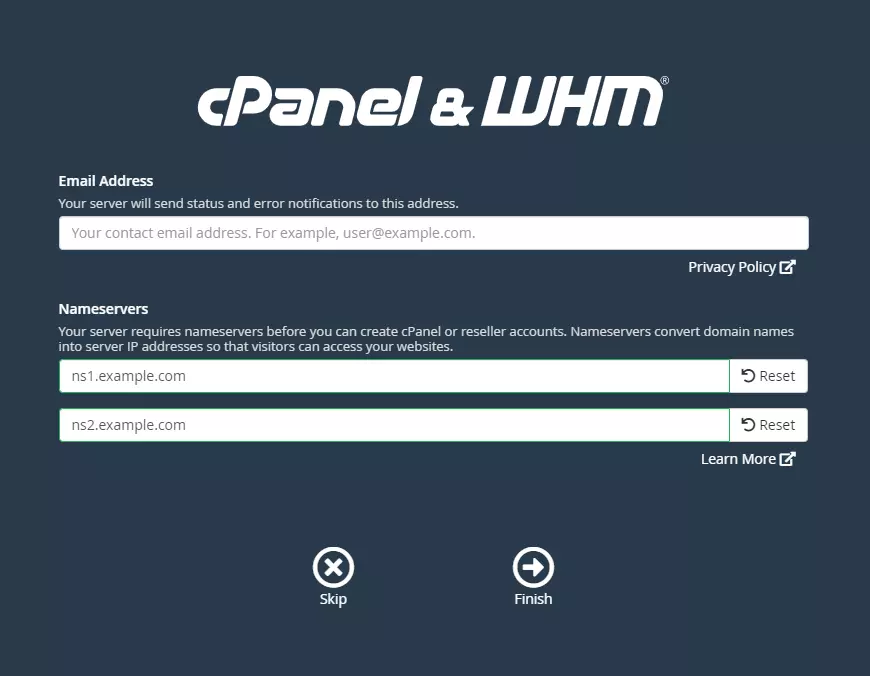
After clicking Agree to All, you’ll be directed to a page where you set up your name servers. You should have already received your name servers when you got your Cloudzy cPanel VPS plan. If you don’t, please call our customer support and we’ll give you a hand.
Also Read: Install Cpanel/WHM on CentOS 8
Just a few more clicks and you’ll be done. You just need to configure WHM, the server-side panel. All that remains then is to set up cPanel and you’ll be ready to rock your new VPS.
Create a New cPanel
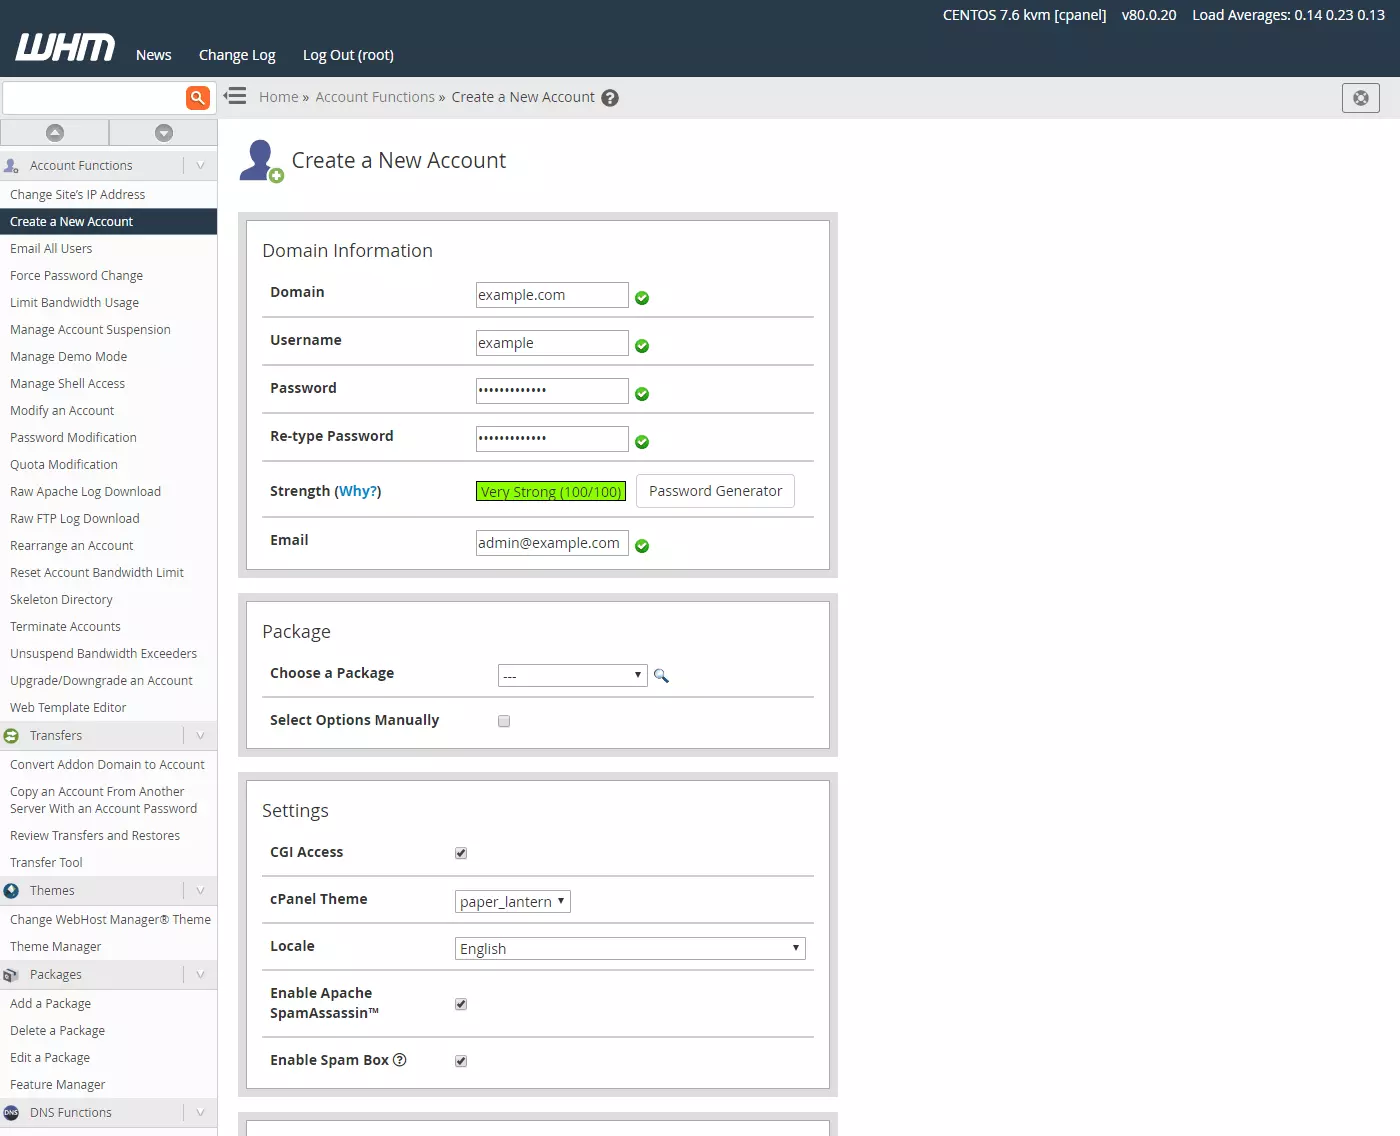
To create the user-side cPanel, you need to create a new account. If you look at the sidebar to the left, you’ll see the Create New Account menu. Click on that and you’ll see the following page:
Just fill out all the information according to your preferences and click the create button. If all went well, you’ve successfully created your first cPanel. You can test it out by logging into the following address using your browser:
https://cpanel.example.com:2083
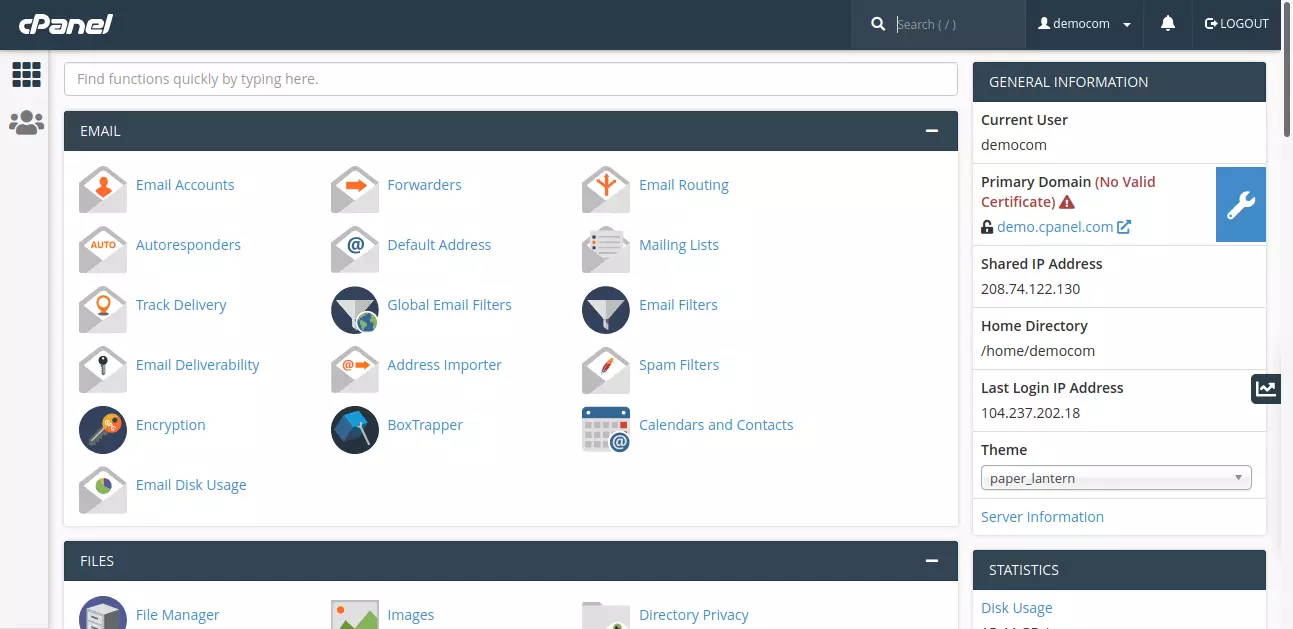
You should see something like this:
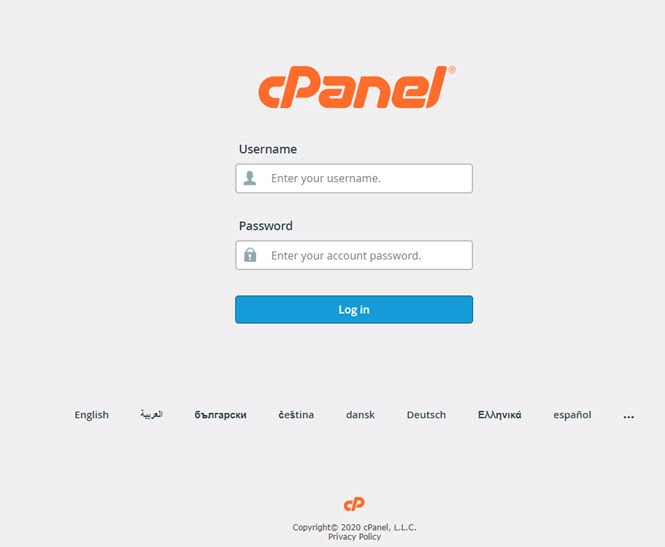
That’s it. You’ve set up both WHM and cPanel on your new Cloudzy VPS. We highly recommend hiring a cPanel antivirus option for enhanced protection. Enjoy!
Choose A reliable Cpanel Hosting plan to boost your online presence!
Try our Self-Managed cPanel VPS plans tailored for hardcore admins and developers or opt instead for our Managed VPS plans at affordable prices also you can host cPanel free alternatives. We don’t cheap out on our cheap cPanel VPS plans: get the exact Linux distro you want from a wide array of options including CentOS 7, Ubuntu 20, Debian, CloudLinux, and more. With more than 15 server locations, Cloudzy will have you hosting near yourself or your customer base, ensuring minimum latency and maximum uptime.
[rh-cta-cpanel type=”2″ ]
Conclusion
When you choose a VPS, efficiency, and performance are everything. Since you’re getting fewer resources, the ones that you do get have to be at top shape, the absolute best. That’s what we’re offering at Cloudzy. Our superior KVM-powered Virtual Private Servers run on infrastructure at the forefront of the industry.
Get yourself the best there is at unbelievably affordable prices not matched elsewhere. All our cheap VPS plans feature SSD hard drives for ultimate speed and cutting-edge gear to launch your business effectively and efficiently.
