Seeing irql not less or equal in Windows 10/11 usually means a kernel driver (or Windows itself) tried to touch memory it had no business touching while running at a priority level that’s too “high” for that kind of memory access.
In plain terms, a driver got impatient, reached into the wrong drawer, and Windows slammed the brakes with a BSOD. For most people, the fix is driver-focused (network, GPU, chipset, VPN, security software), with a quick reality-check on RAM and system file health. Microsoft’s own guidance for error 0xA points to drivers and memory as the usual suspects.
What the Stop Code Means: IRQL Not Less Or Equal Meaning
Windows has a priority system for interrupts called IRQL (Interrupt Request Level). At higher IRQL, Windows blocks certain actions because they can’t safely pause, page memory in from disk, or wait around.
So if a driver tries to access paged memory while running at a raised IRQL, Windows treats it like someone trying to stop in the middle of a highway. It’s not just slow, it’s unsafe for the system, so you get a stop.
Microsoft describes bug check 0xA as Windows or a kernel driver accessing paged memory at an invalid address while at a raised IRQL, typically due to a bad pointer or a pageability problem. Microsoft’s own 0xA checklist is a good sanity check if you want the official baseline.
Two practical takeaways for irql not less or equal:
- A driver is the favorite culprit, even if the “What failed” line points at something that looks Microsoft-owned.
- RAM issues can mimic driver issues, so we test memory, but we don’t start by buying new sticks.
Quick Triage Checklist for IRQL Not Less Or Equal Windows 10 and 11
Before the bullets, you should know that irql not less or equal windows crashes tend to be triggered by a driver path that’s active under load, gaming, large downloads, heavy USB activity, VPN use, or waking from sleep.
This checklist is the “get stable first” path for irql not less or equal, and it also covers the common cousin, 0xD1. Make sure you do this in order.
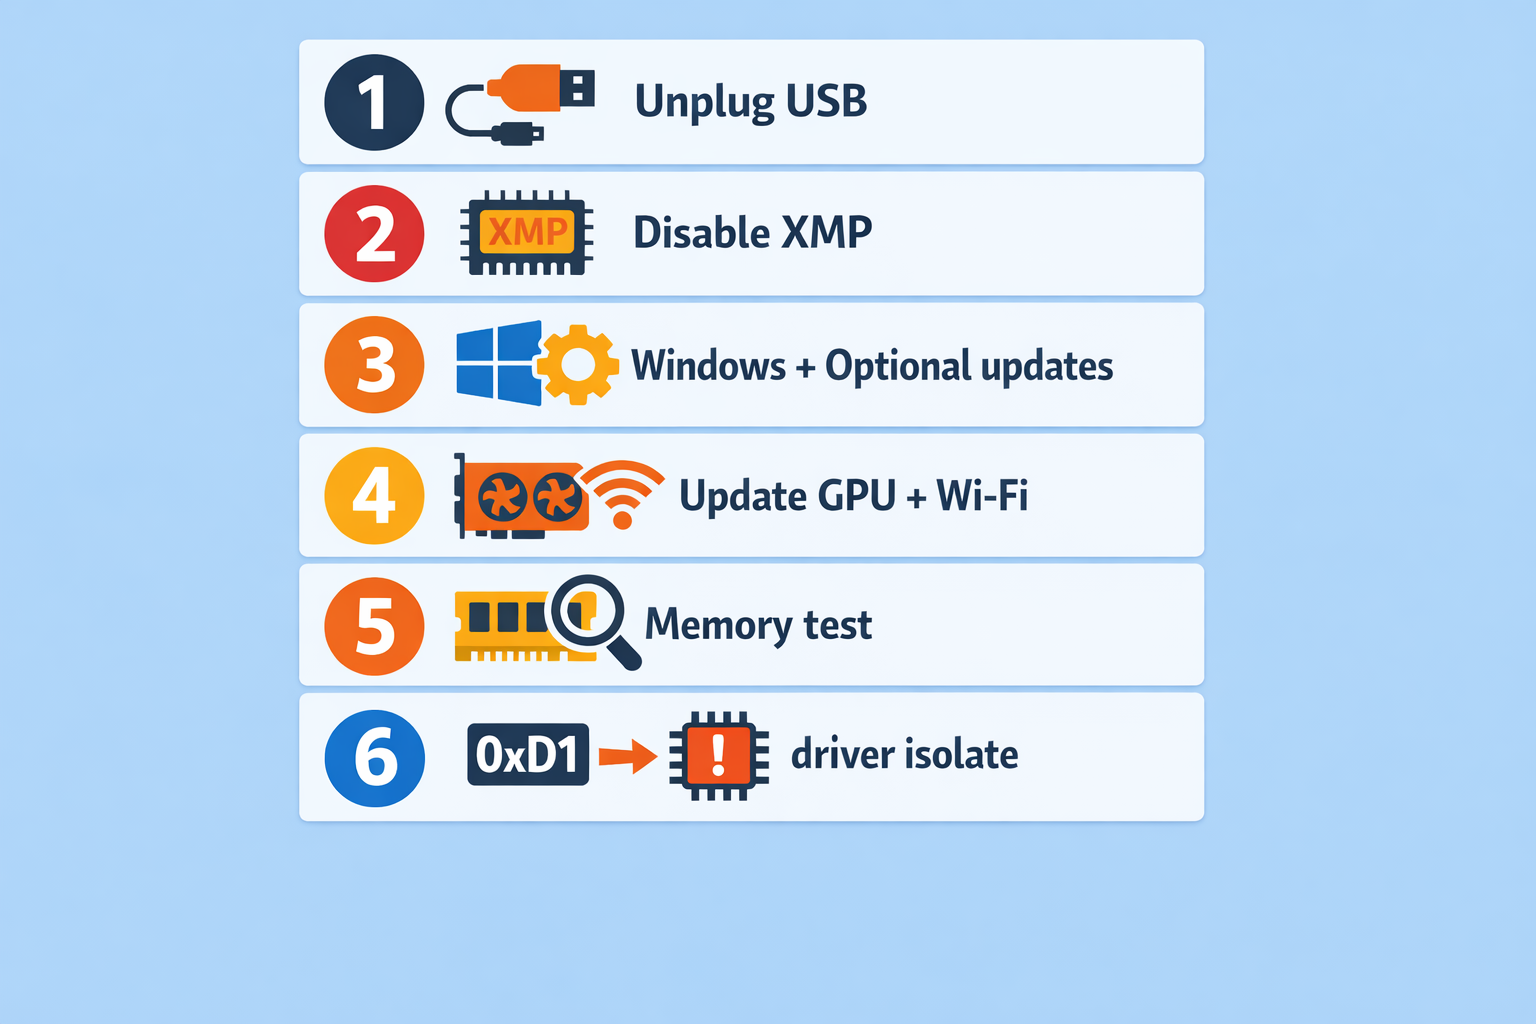
Do this now (in order):
- Unplug non-essential USB gear (dock, audio interface, capture card, controller, external drive), then reboot and try to reproduce the crash.
- Roll back any overclock, undervolt, XMP/EXPO tweak, or “gaming turbo” profile in BIOS/UEFI, then test again.
- Update Windows fully, including Optional updates in Windows Update, because those often carry driver updates tied to your hardware.
- Update GPU driver from the GPU vendor, and update Wi-Fi/Ethernet driver from the laptop/motherboard vendor.
- Run Windows Memory Diagnostic, and if you can, follow up with a longer RAM test later (details below).
- If the crash screen says DRIVER_IRQL_NOT_LESS_OR_EQUAL (0xD1), skip ahead to the Fix Steps For 0xD1 section and focus on isolating the offending driver.
That gets you out of the “random changes” trap and into a repeatable process, which matters because the next step is collecting clues.
Get Useful Clues Before You Change Stuff
Real people troubleshooting these BSODs on forums tend to ask the same thing right away: “Do you have dump files?” because guesses get expensive.
For irql not less or equal and bsod irql_not_less_or_equal, the clues usually live in:
- C:\Windows\Minidump
- C:\Windows\MEMORY.DMP (larger, not always present)
Start with the small ones.
Steps (fast and safe):
- Press Win + R, type C:\Windows\Minidump, press Enter.
- Copy the newest .dmp files to your Desktop.
- Zip them.
- Open Event Viewer → Windows Logs → System and look for critical entries around the crash time (it’s often not “the answer,” but it helps confirm patterns).
If you don’t already have WinDbg installed, Microsoft’s install page is the quickest path.
A note on the “What failed” line: files like Wdf01000.sys show up a lot in community reports, but that can be the framework that the real buggy driver sits on top of. People see that and assume “Windows is broken,” then they reinstall, and the crash comes back.
Now, once you’ve got at least one dump and a rough idea of when it happens, the fixes are targeted to your exact problem.
Fix Steps For 0xA: IRQL Not Less Or Equal Fix In A Safe Order
This section is the main runbook for irql not less or equal (0xA). It’s also a solid base for irql not less or equal windows crashes that don’t name a clear driver.
Step 1: Undo The Last Change That Touched Drivers Or Hardware
Start by listing what changed in the last 1–2 weeks:
- New USB device, dock, headset, controller
- New GPU, Wi-Fi card, RAM
- New VPN, antivirus, “driver updater,” RGB utility
Then remove or uninstall that change and test again. If you can reproduce the crash (same game, same download, same sleep/wake), you’re doing it right.
Step 2: Update Drivers The Way People Forget To
A very common forum reply is “don’t update through Device Manager.” That’s not snobbery. Device Manager often says “best driver already installed” while you’re sitting on an outdated vendor driver.
For irql not less or equal, prioritize:
- Chipset driver (motherboard/laptop vendor)
- Wi-Fi/Ethernet driver (vendor site, not generic)
- GPU driver (vendor clean install option if available)
- Storage drivers (NVMe controller updates if your OEM provides them)
If the crash started right after a driver update, rolling back that specific driver is fair, but do it surgically. A full system rollback can hide the actual trigger.
Step 3: Use Windows Update Properly (Including Optional Updates)
Microsoft explicitly calls out updating drivers and installing updates as first-line steps for error 0xA.
Windows 11 (driver optional updates):
- Start → Settings → Windows Update
- Advanced options
- Under “Additional options” select Optional updates
- Open Driver updates, tick what you want, select Download and install
- Go back to Windows Update and run Check for updates
Windows 10 (driver optional updates):
- Start → Settings → Update & Security → Windows Update
- Select View optional updates (this appears when optional updates exist)
- Open Driver updates, tick what you want, select Download and install
Optional updates are where a surprising amount of “quiet” driver fixes live. If the crashes calm down after updates, we usually do a quick cleanup pass so the machine isn’t running five vendor trays and overlays at boot. This checklist is a solid one: How to Speed Up Windows 10.
Step 4: Check Memory Without Jumping To Conclusions
Yes, memory can trigger irql not less or equal, and Microsoft points to RAM checks as part of the fix path.
Do this in layers:
- Run Windows Memory Diagnostic first.
- If you still crash, do a longer RAM test later (overnight is ideal) using a trusted bootable tester.
Also: if you had XMP/EXPO on, keep it off while testing. Plenty of borderline-stable profiles fail only under specific interrupt-heavy conditions.
Step 5: Repair System Files
Corrupted system files can make driver troubleshooting noisy. This is where SFC and DISM help.
Run these in Command Prompt (Admin):
sfc /scannow

DISM /Online /Cleanup-Image /RestoreHealth
If DISM fails or needs an ISO source, our guide on repairing Windows images with DISM is a good step-by-step reference: DISM RestoreHealth Command: Repair Windows Image.
If you’re getting a mix of stop codes while you troubleshoot drivers, this runbook uses the same repair toolkit and is handy to keep nearby: How to Fix Kernel Security Check Failure.
This step also overlaps with the kind of cleanup that can help general instability, not just irql not less or equal.
Step 6: Clean Boot To Catch Third-Party Driver Side Effects
If you suspect a background tool (VPN, antivirus, RGB, fan control, “network optimizer”):
- Run msconfig
- Hide Microsoft services
- Disable the rest
- Disable Startup apps in Task Manager
- Reboot and retest
If the crash disappears, re-enable in batches until the offender shows itself.
Step 7: BIOS/UEFI Update, But Only After the Above
BIOS updates can fix real compatibility bugs, but they can also add noise to troubleshooting. Do them after you’ve ruled out the easy wins.
At this point, most irql not less or equal cases either stop completely or narrow down to one driver category. If your blue screen is 0xD1, the next section is your faster route.
0xA vs 0xD1: Why DRIVER_IRQL Not Less Or Equal Feels Similar
If you’ve seen both irql not less or equal and DRIVER_IRQL_NOT_LESS_OR_EQUAL, you’re not imagining it. They share the same “wrong memory at wrong IRQL” theme, but 0xD1 is more explicitly driver-shaped, and Microsoft documents 0xD1 in detail here.
Microsoft’s 0xD1 definition is straightforward: a kernel-mode driver attempted to access pageable memory at an IRQL that was too high.
Here’s the difference broken down and directed to the fixes you’ll need to do:
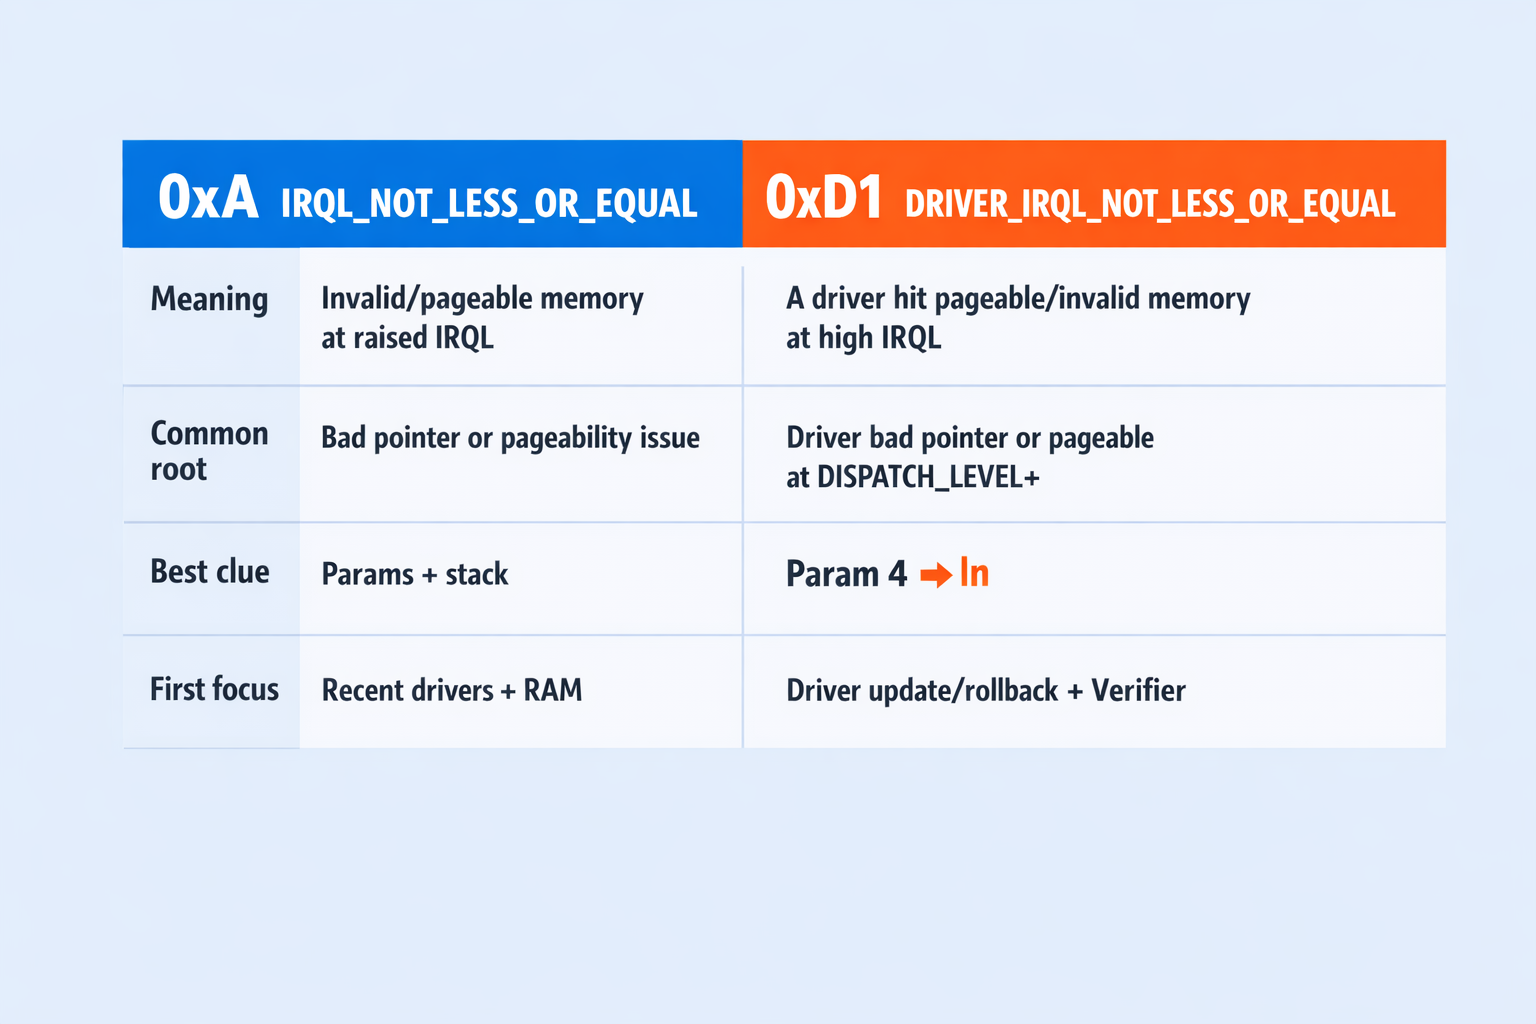
| Bug Check | What You Usually See | What It Usually Points To | Best First Move |
| 0xA (IRQL_NOT_LESS_OR_EQUAL) | “What failed” can be vague | Driver bug, RAM instability, or system-level corruption | Driver updates + remove recent hardware + memory test |
| 0xD1 (DRIVER_IRQL_NOT_LESS_OR_EQUAL) | Often names a specific driver file | A specific third-party driver path is misbehaving | Identify driver from dumps, then update/roll back, then Driver Verifier |
In other words: treat irql not less or equal as “driver first, then memory,” and treat 0xD1 as “which driver, specifically?”
Fix Steps For 0xD1: DRIVER_IRQL_NOT_LESS_OR_EQUAL
This is the “driver is guilty until proven otherwise” track. If your screen or dump says stop code irql_not_less_or_equal but the bug check is 0xD1, treat it as a driver isolation job.
Microsoft’s 0xD1 write-up makes it clear: a driver accessed pageable memory at an IRQL that’s too high, and the practical advice includes checking Event Viewer and updating or disabling the identified driver.
Step 1: Identify The Driver File From Dumps
Look for patterns like:
- Netwtw10.sys (Wi-Fi driver paths show up a lot)
- Vendor Ethernet drivers like l1c63x64.sys in community examples
- Framework files like Wdf01000.sys that may be “the messenger,” not the real cause
If you have a named third-party driver, your next move is update or roll back that one driver, not a full reinstall.
Step 2: Reinstall The Suspect Driver Cleanly
For GPU and network drivers, a clean reinstall often beats “update in place.”
- Uninstall from Apps and Features or Device Manager
- Reboot
- Install the newest driver from the vendor/OEM
- Retest the exact workload that triggers the crash
Step 3: Use Driver Verifier Carefully (And Only On Third-Party Drivers)
Driver Verifier is mentioned as a tool in Microsoft’s bug check references, but it adds overhead and can push a shaky system into faster crashes. That’s good, as long as you can still boot.
Safe way we run it:
- Create a restore point.
- Open Command Prompt (Admin), type verifier, press Enter.
- Select Standard settings.
- Instead of selecting “unsigned” or “older Windows” drivers, target a small set of likely suspects. In Driver Verifier Manager, pick Select driver names from a list, then tick a few non-Microsoft drivers tied to the crash (or recently installed/updated). Verifying every driver can slow the PC and may cause extra BSODs that add noise.
- Reboot and reproduce the crash.
If you get stuck in a boot loop:
- Boot into Safe Mode (details below)
- Open Command Prompt (Admin)
- Run:
verifier /reset
That’s the difference between “Verifier helped” and “Verifier ruined my evening.”
Once you can boot reliably again, you can use the same driver update process as the 0xA track, but now you have a much shorter suspect list. That’s also where Safe Mode and WinRE become useful.
If You Can’t Boot: WinRE and Safe Mode Moves That Work
If irql not less or equal hits on startup, you don’t get the luxury of testing one change at a time inside Windows. Use Windows Recovery Environment (WinRE):
- Power on, then interrupt boot (power off) as Windows starts loading, repeat 2–3 times.
- You should land in Recovery.
- Go to Troubleshoot → Advanced options.
From there, the best “get back in” options are:
- Startup Settings → Safe Mode
- System Restore (if you created restore points)
- Uninstall updates (if this began right after an update)
If you were using Driver Verifier, Safe Mode + verifier /reset is usually the clean exit.
Once you’re back in Windows, return to the earlier runbook and keep your changes small and testable. That’s also the moment where a temporary workaround can save your week.
Typical Reasons Why You’re Seeing the irql not less or equal error

This error code is not random; you’ll either see it when there’s a crash during big downloads, crash after sleep, crash when the Wi-Fi disappears, crash right after a GPU driver update, and so on.
Here are the repeat offenders tied to irql not less or equal and driver irql not less or equal cases:
Network Drivers Under Load (Wi-Fi and Ethernet)
Large Steam/Epic downloads or Windows updates trigger 0xD1, and the dump points at a network driver like Netwtw10.sys (Intel Wi-Fi) or a vendor Ethernet driver. If your crashes cluster around downloads and the network stack, we also like to rule out Windows-side networking weirdness that can muddy testing, like proxy misconfig and stuck detection.
This walkthrough covers the quick checks and resets: Windows Could Not Automatically Detect This Network’s Proxy Settings.
GPU Driver Paths (Gaming, Multi-Monitor, Video Playback)
People will report it as “random,” but it’s often tied to switching windows fast, closing apps, or a game alt-tab. GPU drivers run in complicated paths, and a bad install or a mismatch can show up as irql not less or equal, even if you rolled back once.
USB, Docks, and “Too Many Things Plugged In”
USB hubs, audio interfaces, capture cards, and some docking stations can trigger nasty driver interactions. If unplugging gear changes the crash frequency, that’s a real lead.
Security Tools, VPNs, and “Network Helpers”
Firewall/VPN drivers sit deep in the network stack. If your crash started right after installing a VPN client, packet capture tool, or third-party security suite, you’re not paranoid.
BIOS/XMP Instability That Looks Like A Driver Bug
A slightly-too-aggressive memory profile can pass quick checks but still fail under certain interrupt-heavy workloads. This is why we reset XMP/EXPO early during an irql not less or equal fix.
Keep Working While You Fix The Crash
If your PC is throwing irql not less or equal and you still need to work today, the fastest “keep moving” option is using a remote Windows machine for a few days. That way you can finish your tasks, download drivers, run tests, and keep your main system powered down while you troubleshoot.
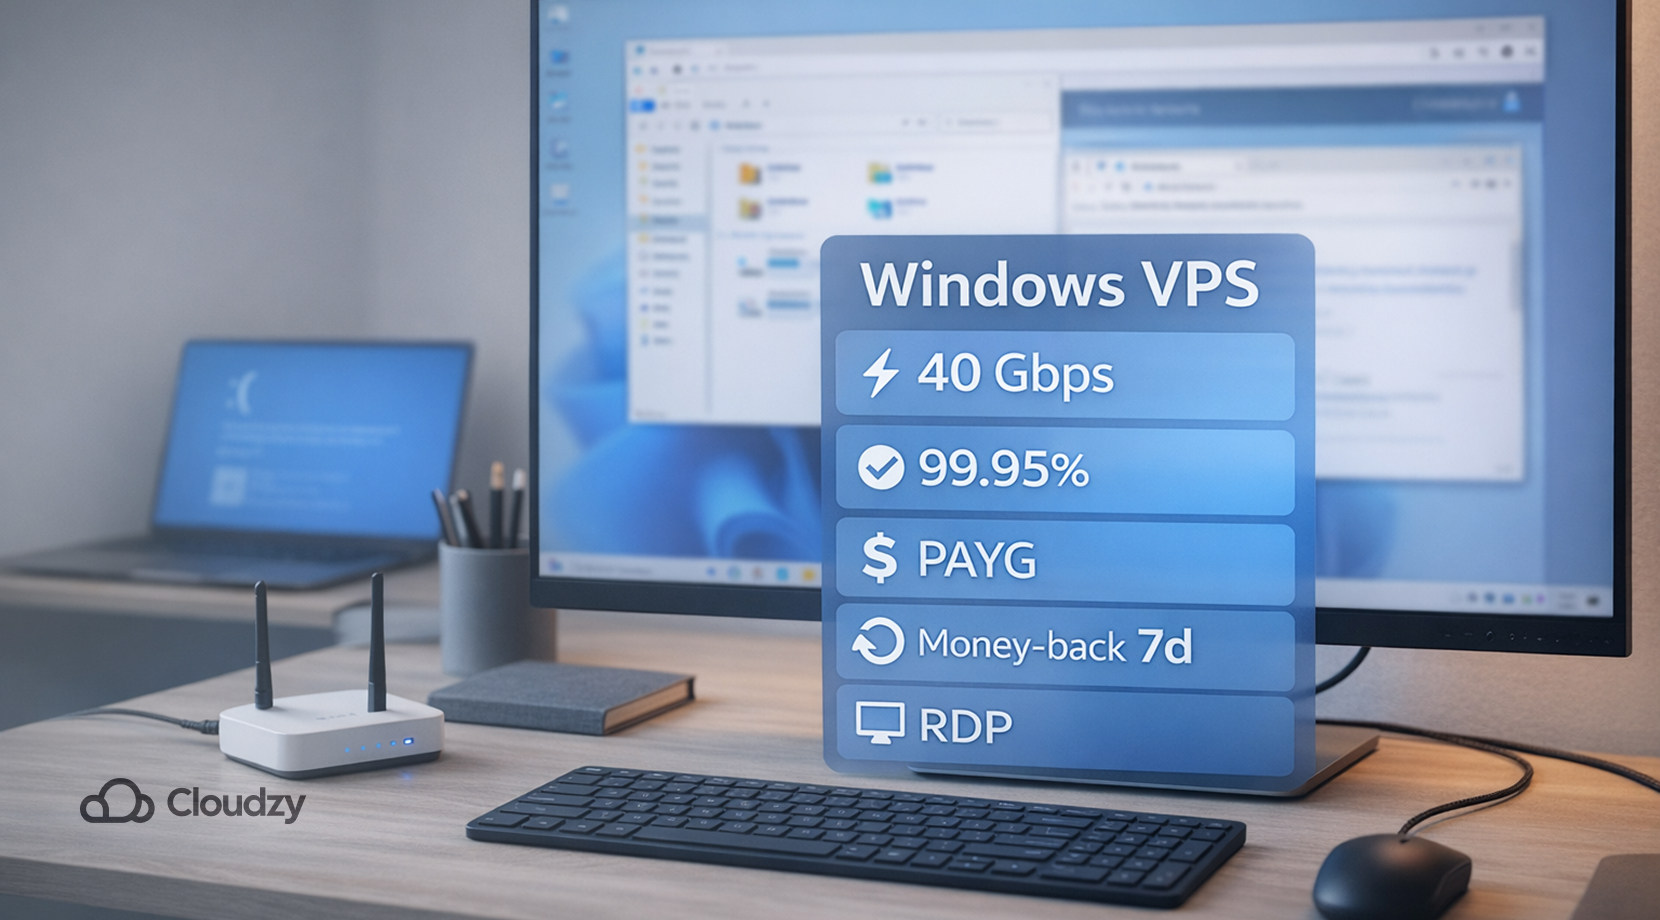
That’s also where our Cloudzy Windows VPS options fit nicely. You can spin up a Windows 10 VPS or Windows 11 VPS, connect over RDP, and carry on with a clean environment while your local box gets sorted out. Our Windows 10 and Windows 11 VPS services provide 40 Gbps networking and a 99.95% uptime, which is plenty for remote desktop workflows and big downloads.
For short-term use, pricing flexibility matters more than big promises, so we lean on billing and refunds:
- Hourly PAYG billing: cancel any time, pay for used hours only.
- 14-day money-back window, plus day 8–14 unused-credit refunds if you end up not needing the server after all.
You can check the product details here: Cloudzy Windows VPS, Cloudzy Windows 10 VPS, and Cloudzy Windows 11 VPS.
If you’re worried about files while your local install keeps crashing, here’s how you can get your data out first: Recover Files From Corrupted Windows VPS (the same process works for a normal Windows OS system).
Once you’re out of the panic zone, preventing repeat crashes becomes much easier.
How We Stop IRQL Not Less Or Equal From Coming Back
After an irql not less or equal crash finally stops, it’s tempting to celebrate and move on. We still like to do a small “stability pass,” because this stop code loves returning right after the next driver change, sleep cycle, or USB plug-in spree.
Before we list anything, one rule to keep in mind is to change one thing, then test the same trigger. If the crash used to happen on downloads, do a long download. If it happened on sleep, do a few sleep and wake cycles. That way, we’re not guessing.
The habits that reduce repeat crashes:
- Create a restore point before chipset, GPU, Wi-Fi, VPN, or antivirus changes.
- Keep XMP/EXPO off until the system stays stable for a few days, then re-enable it only after longer memory testing.
- Avoid stacking driver tools and “helper” suites, especially network boosters, overlay packs, and vendor trays that insert themselves into the kernel path.
- If crashes clustered around sleep or shutdown, disable Fast Startup for a week and test again. It’s a simple toggle and it’s easy to undo.
- Treat docks and USB hubs like real suspects. If stability improves with fewer devices, update dock firmware and USB drivers before adding everything back.
Once things are stable, we can reintroduce the nice-to-haves, one at a time. That keeps irql not less or equal from becoming a monthly surprise.
FAQ
What does irql not less or equal meaning point to most often?
How to fix irql not less or equal error after a Windows update?
Why does irql not less or equal windows crash during downloads or gaming?
Is bsod irql_not_less_or_equal always a RAM problem?
What’s the fastest driver irql not less or equal troubleshooting approach?
What is stop code irql_not_less_or_equal and how is it different from 0xD1?
What’s a sane irql not less or equal fix order if I have no dump tools?
I keep seeing irql_not_less_or_equal in different contexts, is that normal?
How to fix irql not less or equal error if Windows won’t boot?