💡 Note: Struggling with your remote desktop connection? You’re not alone. Many RDP users face similar challenges, often due to limitations in their current setup. Our RDP VPS service is the game-changer you need. Offering high-quality RDP with full admin access, it ensures a seamless remote desktop experience.
Microsoft’s Remote Desktop Protocol (RDP) lets you work on another computer from anywhere. System administrators and remote workers value this feature for its flexibility. Yet there are times when the graphical interface is unavailable or too slow, and you need to turn to the console instead. This guide shows you how to enable Remote Desktop via CMD across modern Windows versions while covering safety measures, troubleshooting, and alternatives.
- Why Use the Command Line for Remote Desktop?
- System Requirements & Safety Considerations
- Enable Remote Desktop via CMD: Step‑by‑Step Guide
- Enable & Verify RDP via PowerShell
- Disable Remote Desktop via Command Line
- Troubleshooting & Additional Tips
- Choosing the Right Remote Desktop Solution
- Additional Security and Management Practices
- Final Thoughts
- FAQ
Why Use the Command Line for Remote Desktop?

Remote Desktop is a built‑in tool on Windows Pro, Enterprise, and Education editions. When configured, it opens a channel on port 3389 that allows you to log in from afar. Normally, you would toggle the feature in Settings, but there are good reasons to switch to the console:
- Corrupted or missing GUI — if the Settings app fails to load after an update or an administrator has disabled it, using the command line can get you back online quickly.
- Fine‑grained control — command‑line tools let you set registry keys, start services, and configure firewall rules precisely.
- Automation and remote scripting — administrators managing several machines often automate RDP enabling through scripts instead of clicking through Windows.
To get started, it’s important to reiterate that Remote Desktop is only offered on Windows 11 Pro, Enterprise, and Education editions and their Windows 10 counterparts. Home editions cannot host a session and need third‑party tools. You also need administrator rights and network access to the target machine. These requirements frame the rest of the tutorial. If you plan to enable RDP command line across multiple machines, double‑check that each host meets these conditions.
System Requirements & Safety Considerations

Before you run a single command to enable RDP, verify the following prerequisites. Skipping these steps may cause connection failures later on.
- Administrator privileges: Log in with an account that has full rights to change system settings. You cannot modify the registry or firewall without these permissions.
- Stable network connection: Both the remote and local computers should have reliable internet access. A cable or strong Wi‑Fi signal will minimise lag.
- Firewall access: The Windows Defender Firewall must allow inbound traffic on the RDP port. We will adjust this later, but if your organisation blocks certain ports, you should check first.
- Network Level Authentication and MFA: Network Level Authentication (NLA) is enabled by default to add a logon layer before the session begins. For even stronger security, you can add multi‑factor authentication to Remote Desktop via tools like Rublon.
Taking time to review these conditions helps you avoid chasing errors after enabling remote desktop via CMD. Now you are ready to adjust the registry.
 Need a Remote Desktop?
Reliable, high-performance RDP servers with 99.95 uptime. Take your desktop on the go to all the major cities in the US, Europe, and Asia.
Get an RDP ServerEnable Remote Desktop via CMD: Step‑by‑Step Guide

Enabling RDP with the command line involves editing a registry value, opening a firewall rule, starting a service, and confirming the changes. In other words, you are setting up your remote desktop via CMD so that it accepts incoming connections. Each step includes an explanation so you know what the commands are doing.
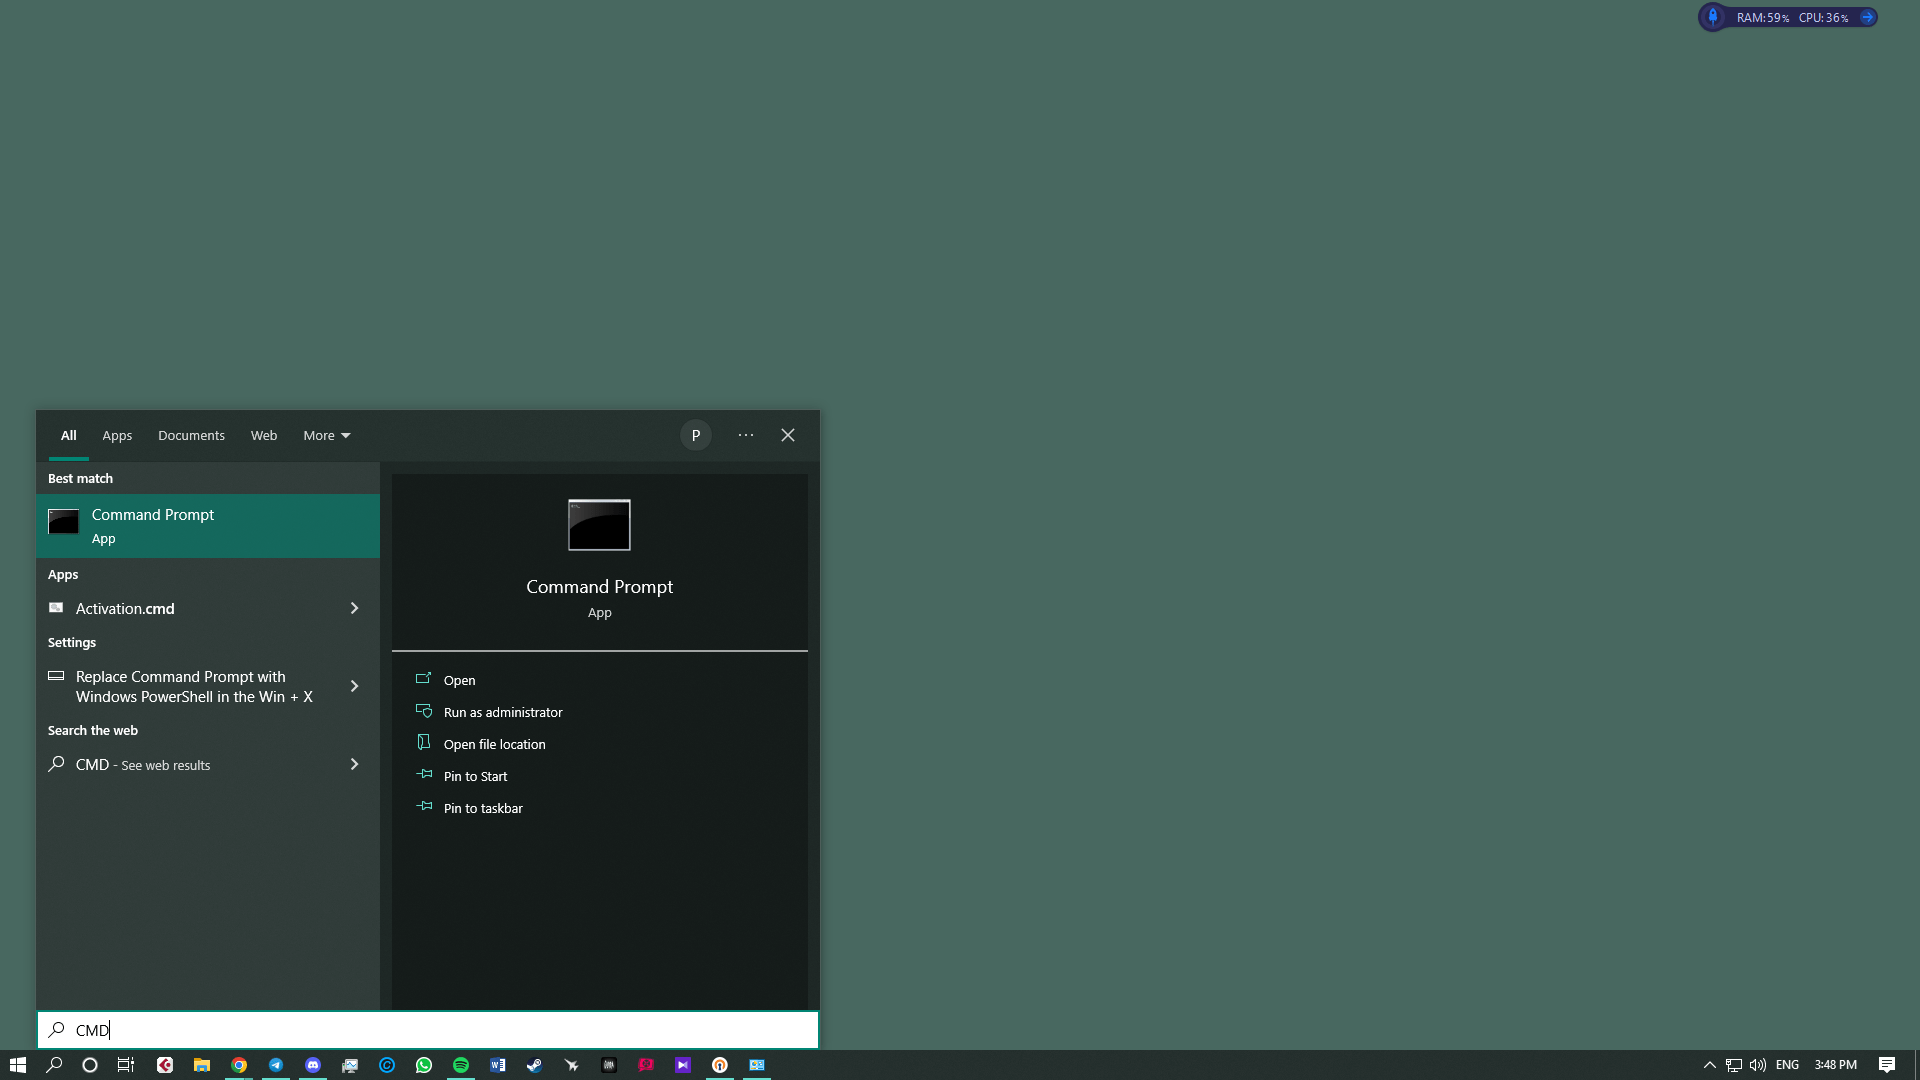
- Check your account and open Command Prompt – Make sure your current account has administrator rights. Click Start, type CMD, then right‑click Command Prompt and choose Run as administrator. When User Account Control prompts you, click Yes.
- Toggle the registry key – Type or paste the following command and press Enter. This modifies the key that controls RDP host access and sets it to allow connections:
reg add "HKEY_LOCAL_MACHINE\SYSTEM\CurrentControlSet\Control\Terminal Server" /v fDenyTSConnections /t REG_DWORD /d 0 /fThis command writes the DWORD value 0 into the fDenyTSConnections key, which tells Windows to permit remote desktop connections.
- Allow Remote Desktop through the firewall – By default, the firewall may block incoming RDP traffic. Run this command to enable the predefined rule for Remote Desktop:
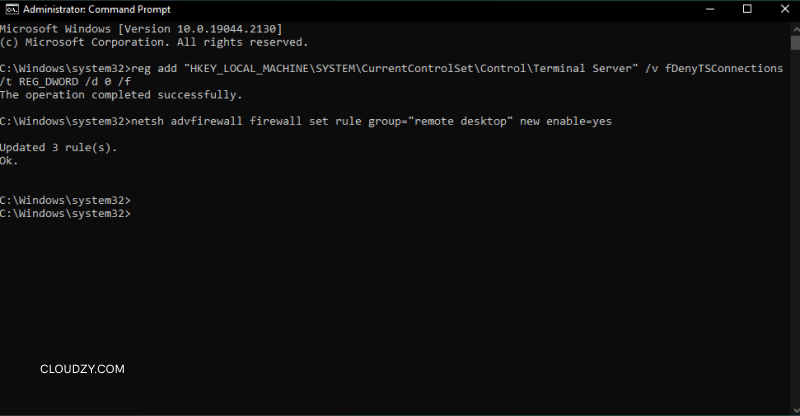
netsh advfirewall firewall set rule group="remote desktop" new enable=YesRunning this command opens port 3389 in the Windows Defender Firewall for both private and public networks.
- Start the Remote Desktop Services service – If the service controlling RDP is stopped, you won’t be able to connect. Enter the following command to check that it is running:
net start termservice
This step starts the TermService service on Windows 10 and Windows 11. If it is already running, the command will tell you so.
- Confirm activation – Open the Run dialog with Win + R and type sysdm.cpl. In the System Properties window, select the Remote tab and verify that Allow remote connections to this computer is checked. You should also make certain that only authorised users are listed under Select Users.
Enable & Verify RDP via PowerShell

PowerShell offers an even more flexible environment for managing Windows features and provides another route to enable RDP command line on supported systems. The commands below achieve the same result as the previous section and include a verification step.
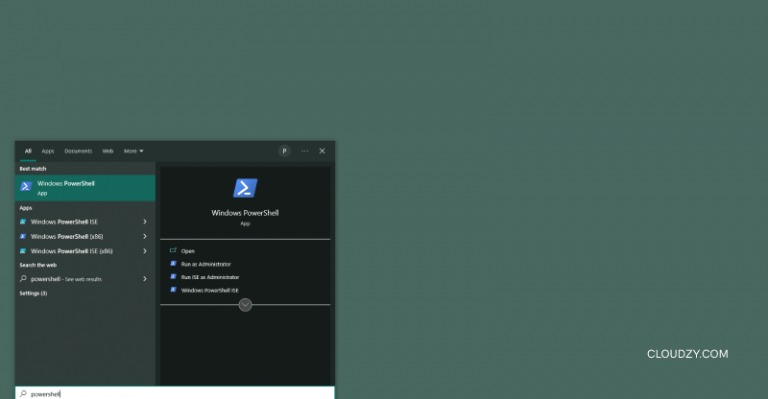
- Launch PowerShell as administrator – Search for PowerShell, right‑click the result, and choose Run as administrator. Accept the User Account Control prompt.
- Enable the registry setting – Run the following command to modify the same fDenyTSConnections value through a CMDlet:
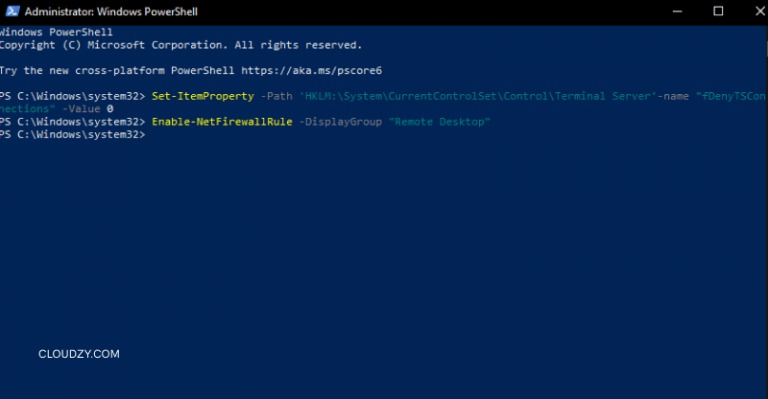
Set-ItemProperty -Path 'HKLM:\System\CurrentControlSet\Control\Terminal Server' -Name 'fDenyTSConnections' -Value 0 -Force- Configure firewall permissions – Allow the Remote Desktop rule in Windows Defender Firewall:
Enable-NetFirewallRule -DisplayGroup "Remote Desktop"- Start the service – Make sure the TermService is running:
Start-Service -Name 'TermService'
Set-Service -Name 'TermService' -StartupType Automatic- Verify activation – Confirm that the value has changed by running:
(Get-ItemProperty -Path 'HKLM:\System\CurrentControlSet\Control\Terminal Server').fDenyTSConnectionsIf the command returns 0, remote desktop has been enabled. With PowerShell, you can also automate these steps across multiple computers using scripts and remoting functions.
Disable Remote Desktop via Command Line

Sometimes you may decide to disable Remote Desktop to reduce attack surface. Turning the feature off is a mirror image of enabling it.
- Switch the registry value – In an administrative Command Prompt, run:
reg add "HKLM\SYSTEM\CurrentControlSet\Control\Terminal Server" /v fDenyTSConnections /t REG_DWORD /d 1 /fSetting the DWORD to 1 blocks any new RDP connections.
- Block the firewall rule – Next, disable the firewall rule that permits inbound traffic:
netsh advfirewall firewall set rule group="remote desktop" new enable=No- Stop the service – Finally, stop the TermService service:
net stop termserviceAfter these three steps, the machine is no longer reachable via RDP. Use these commands when you no longer need remote access or before decommissioning a server.
Troubleshooting & Additional Tips

Even when you follow the commands perfectly, you may encounter problems connecting. The table below lists common issues and recommended fixes. Always start with local checks before assuming the commands failed.
| Issue | Possible Cause | How to Resolve |
| Cannot connect to host | Firewall is blocking port 3389 or router is not forwarding connections | Review firewall settings under Control Panel > Windows Defender Firewall and confirm the Remote Desktop rules are enabled. If connecting over the internet, configure port forwarding on your router and confirm you are using the correct external address. |
| Service not running | TermService stopped or crashed | Open an administrative Command Prompt and run net start termservice again. Check Event Viewer if the service fails repeatedly. |
| Invalid credentials | Incorrect username or user not allowed | Only administrators and users in the Remote Desktop Users group can log on. Use the Select users button in System Properties to add additional accounts. |
| Slow performance or disconnects | Weak network or high latency | Use a wired connection if possible. For wireless connections, move closer to the router or reduce other network traffic. |
| Remote Desktop option missing | Windows edition not supported | Upgrade from Home edition to Pro or choose a third‑party solution. |
Before you proceed further, keep in mind that stacking multiple remote users on a shared host can introduce bandwidth bottlenecks. Our article on types of RDP access explains how switching to an admin plan sidesteps those limits and grants full resource control.
When connecting for the first time, you will need the host computer’s IP address and computer name. To find them quickly on the host machine, run CMD and type ipconfig to display the IPv4 address. To find the computer name, open Settings > System > About and look under Device name. Then, on your local computer, press Win + R, type mstsc, and enter the host’s name or IP in the Remote Desktop Connection window.
Security is another key consideration. Leaving Remote Desktop open with default credentials can invite unwanted visitors. Always use strong passwords, keep your systems patched, and consider adding multi‑factor authentication. If you need to access an on‑premises machine from the internet, connecting through a VPN can help hide your port from public scanners.
Choosing the Right Remote Desktop Solution

The built‑in Remote Desktop feature is convenient and cost‑effective, but it is not the only option. Even with a functioning remote desktop via CMD, some administrators prefer tools that offer multi‑user sessions or mobile clients. If you are using Windows Home or you need features such as session recording or cross‑platform support, consider a third‑party tool. Programs like HelpWire and DeskIn provide one‑click connection links, bypassing edition restrictions and reducing setup time. However, they often come with subscription fees or data‑centre dependencies.
Cloudzy offers RDP servers tuned for low latency with 99.95 percent uptime, DDoS protection, and flexible billing. Choose from strategically placed data centres in New York, Chicago, and Dallas in North America, Frankfurt, Amsterdam, and London in Europe, plus Singapore in Asia‑Pacific, so your session always sits close to your users. Each plan includes NVMe SSD storage, 10 Gbps unmetered bandwidth, free Windows licensing, snapshot backups, and instant resource scaling, all at an affordable rate. When you need a reliable host for your remote desktop, you can count on Cloudzy to buy RDP.
You can also check out other top RDP providers and compare them against us to see which one offers the services and features that fit your specific needs.
Additional Security and Management Practices
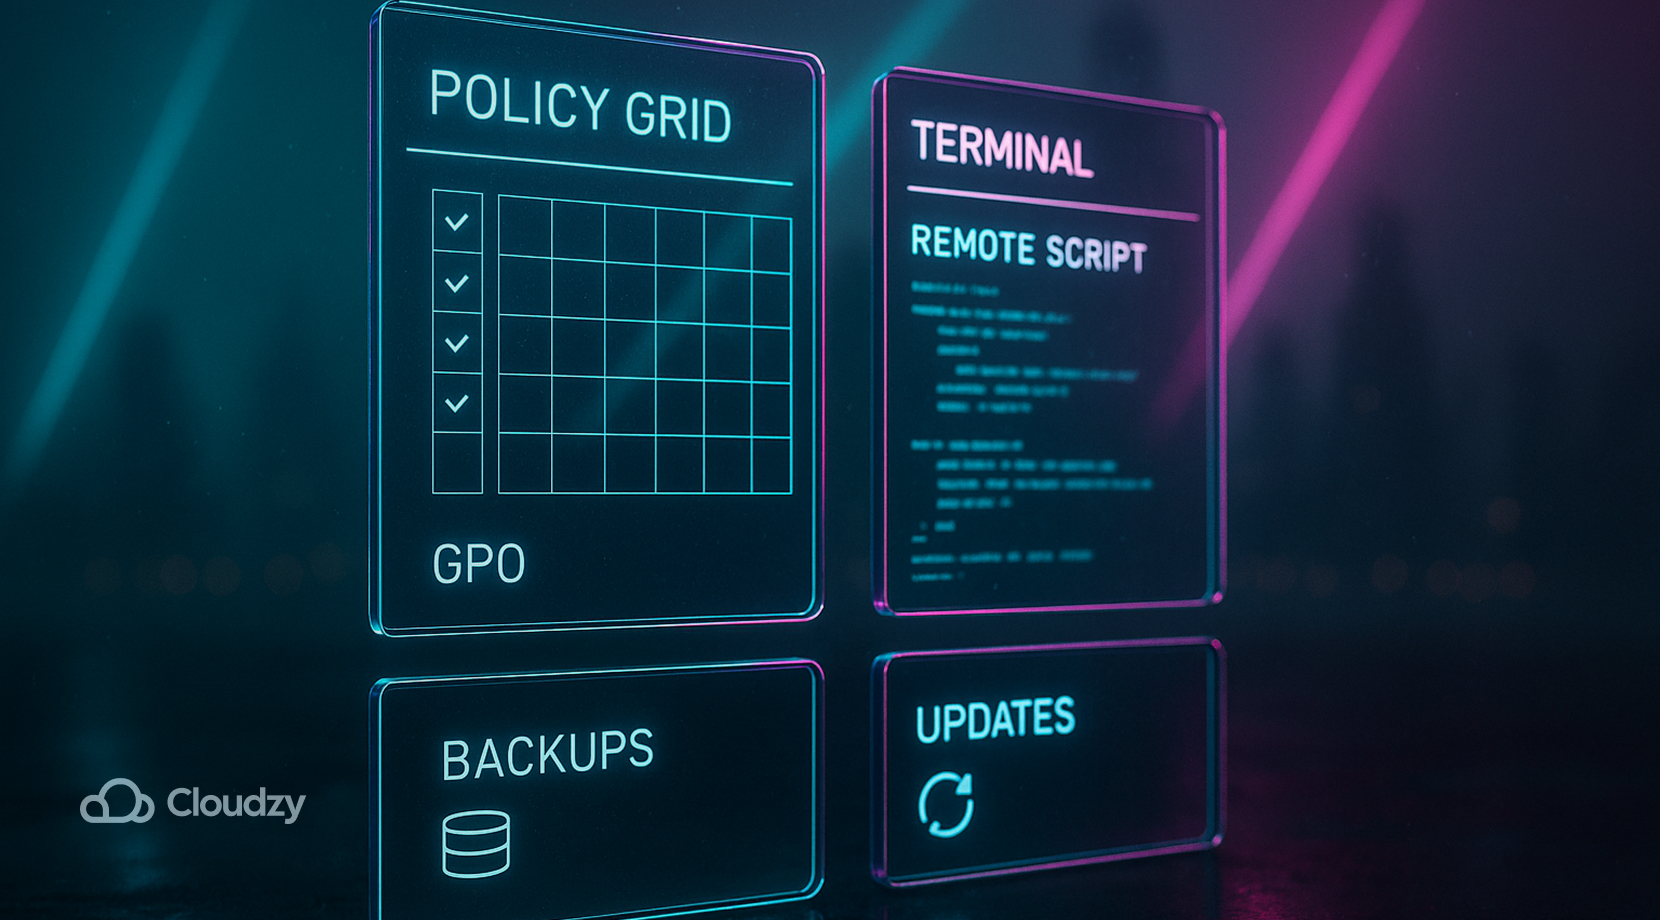
Once your system accepts remote connections, think about how you manage and secure those sessions over time. Modern Windows environments support cross‑platform clients on macOS, Linux, iOS, and Android, so you can connect from a phone or tablet. Even with Remote Desktop enabled, you should regularly update your machines and disable the feature when it is no longer needed.
To keep day‑to‑day administration simple and safe, focus on these tasks:
- Patch promptly — apply Windows Updates and driver patches as soon as they are released to close newly discovered vulnerabilities.
- Use a dedicated RDP user — create an account with limited privileges instead of logging in as a full administrator.
- Dynamic DNS — if your public IP changes, a dynamic DNS service ensures you always reach the correct address.
- Move the listening port — shifting RDP from 3389 to a high, random port reduces automated scans (remember to update your firewall and router).
- Group Policy management — push Remote Desktop settings across multiple machines from a single console, including quick disable when risk levels rise.
- Scripted roll‑outs — PowerShell remoting or PsExec lets you enable or disable RDP, reset services, and audit settings without signing in to each host.
Although RDP provides a smooth graphical experience, it is not the only protocol. Virtual Network Computing (VNC) is often used in Linux environments but lacks encryption by default and does not compress traffic as efficiently, while Secure Shell (SSH) delivers text‑only sessions with strong encryption. Pick the tool that matches your performance and security needs.
Final Thoughts
Enabling remote desktop via CMD gives you control over Windows servers and workstations, even when the graphical interface fails. By meeting the system requirements, editing the registry, opening the firewall, and starting the service, you can configure RDP consistently across multiple machines. PowerShell provides a scriptable alternative, and disabling RDP is just as straightforward when you no longer need it. Along the way, be mindful of security: use strong passwords, consider multi‑factor authentication, and limit user access.
For teams that need dedicated remote desktops with predictable performance, Cloudzy’s offerings provide reliable connectivity across numerous data‑centre locations. Try our service to keep your remote sessions responsive and secure; your work deserves nothing less.


2 Responses
If your system is installed in a different language then English for Example german the following line doesn’t work and needs to be modified:
“netsh advfirewall firewall set rule group=”remote desktop” new enable=Yes”
becuase it seems like the groups also translated so you I modified it as follows:
“netsh advfirewall firewall set rule group=”Remotedesktop” new enable=Yes”
if youre copy pasting and having trouble theres an extra space in the netsh command, change as follows:
As copied:
netsh advfirewall firewall set rule group=” remote desktop” new enable=yes
Needs to be:
netsh advfirewall firewall set rule group=”remote desktop” new enable=yes
The space in remote breaks the search for the groups