Living in a world of technology, we should be able to access systems and devices located at a considerable distance. Remote Desktop Protocol (RDP) lets users access remote systems desktops. The question is, what should we do when using Linux? Well, we can use the xrdp service to help us with this. This article will explain how to install xrdp Ubuntu 20.04 step-by-step, but before that, we should talk about what xrdp is and how does it help us?
What is Xrdp?
Xrdp is an open-source graphical login that you as a user can use to remotely access the Linux desktop. To do so, you need to utilize the RDP client. Moreover, xrdp delivers a login to the remote machines employing Microsoft RDP. If you want to know more about concepts related to RDP, like what it is and what are the best RDP providers, you can read our other articles about this protocol. In this guideline, however, we mostly want to teach you how to install xrdp Ubuntu 20.4 via a step-by-step tutorial.
Advantages of Xrdp
- Easy way to monitor, control and maintain devices
- Facilitates immediate troubleshooting
- Enables you to have easy access to files on the connected devices, servers, or network
- Lower cost of operation
So, xrdp is quite helpful for you, and knowing how to install xrdp Ubuntu 20.4 is essential, which we will discuss in the following section.
Also Read : Introduction to Debian RDP Server
How to install xrdp on Ubuntu?
Before we go through the required steps to install xrdp Ubuntu 20.4, you should have a copy of the Ubuntu 20.4 desktop already installed on your system. Pay attention: If you have a minimal installation that does not contain a GUI, installing a desktop environment like GNOME is recommended.
You can use manual installation step or automated insulation by using our script.
For automated installation, first you should decide to want GNOME or XFCE. Both of the options after installing desktop environment will install xrdp for you.
If you want to use GNOME, enter the flowing commands:
wget https://support.cloudzy.com/dl.php?type=d&id=12
chmod +x Cloudzy_Gnome.sh
./Cloudzy_Gnome.sh
If you want to use XFCE, enter the flowing commands:
wget https://support.cloudzy.com/dl.php?type=d&id=12
chmod +x Cloudzy_xFCE.sh
./Cloudzy_xFCE.sh
If you want to install it manually, we provide you with this helping guide.
Step 1: Installing desktop environment
You can install the Ubuntu desktop environment using the following command:
sudo apt install ubuntu-desktop
Step 2: Installing Xrdp on Ubuntu 20.04
At the starting point, you need to open the terminal and run the following command to install Xrdp on your Linux:
sudo apt install xrdp
Now you will be asked if you want to continue the installation, so press ‘Y’ and enter button to resume with the rest of the xrdp setup.
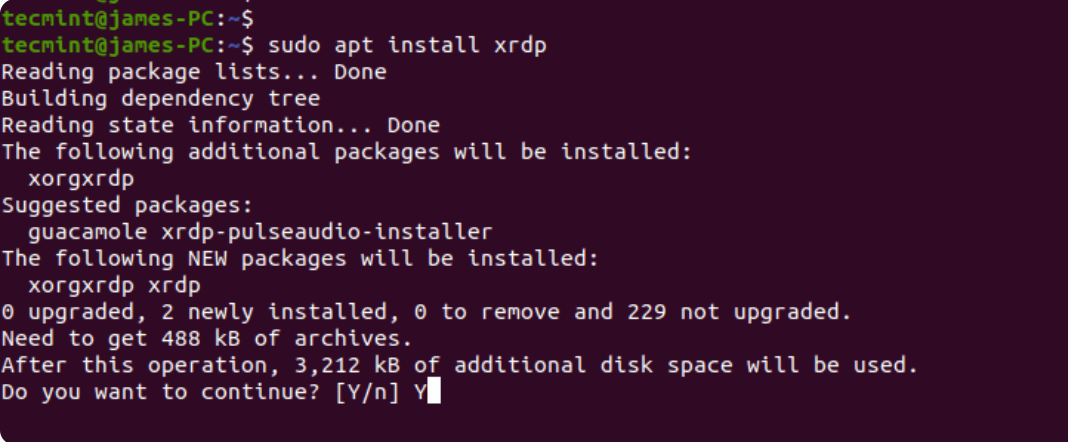
After installation, You verify the Xrdp service by running the command, as it will automatically be started:
sudo systemctl status xrdp

The above output demonstrates that the xrdp daemon is active and running.
Step 3: Configuring Xrdp Ubuntu 20.04
Once you have xrdp installed on your system, an SSL certificate key – ssl-cert-snakeoil.key – is placed in your /etc/ssl/private/ folder. You must add the xrdp user to the ssl-cert group so that it makes the file readable to the user:
sudo adduser xrdp ssl-cert

Step 4: Adjusting the firewall
Xrdp listens on port 3389; if you are behind a UFW firewall, you must open the port to permit inbound traffic from an RDP client. This example will allow traffic from the whole subnet to the Ubuntu system.
sudo ufw allow from 192.168.2.0/24 to any port 3389
After that, reload the firewall and confirm if the port has been opened:
sudo ufw reload
sudo ufw status

Step 5: Accessing Remote Ubuntu Desktop via RDP Client
At this point, you need to access the Ubuntu desktop system from your Windows 10 via Remote Desktop Client. But, before doing this, you have to make sure that you are logged out of the Ubuntu 20.04 as xrdp only is capable of supporting one Xsession.
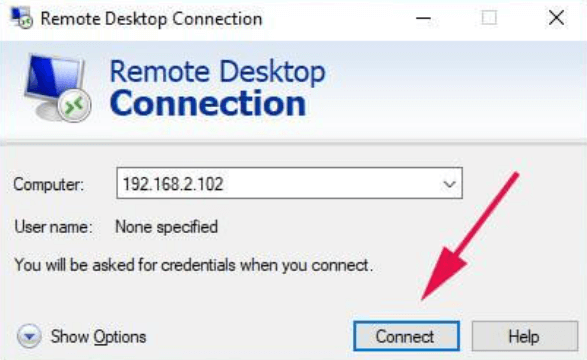
Next, you need to launch your client and key in your remote system’s IP address; now, click on the Connect button as shown below.
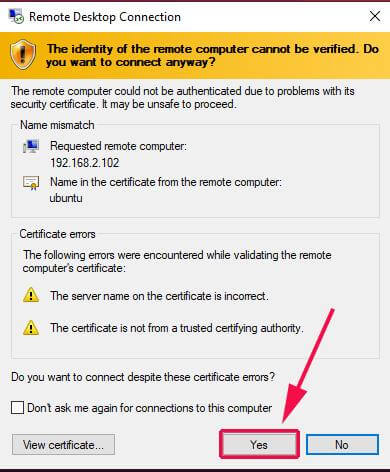
At this step, you will see a pop-up window that helps in verifying the identity of your remote system; don’t pay attention to the certificate errors and click on the Next button to resume the rest of the steps to install xrdp Ubuntu 20.4 for your system.
Step 6: Final authentication
You need to enter your login credentials on the Xrdp login page and click on the Ok button.
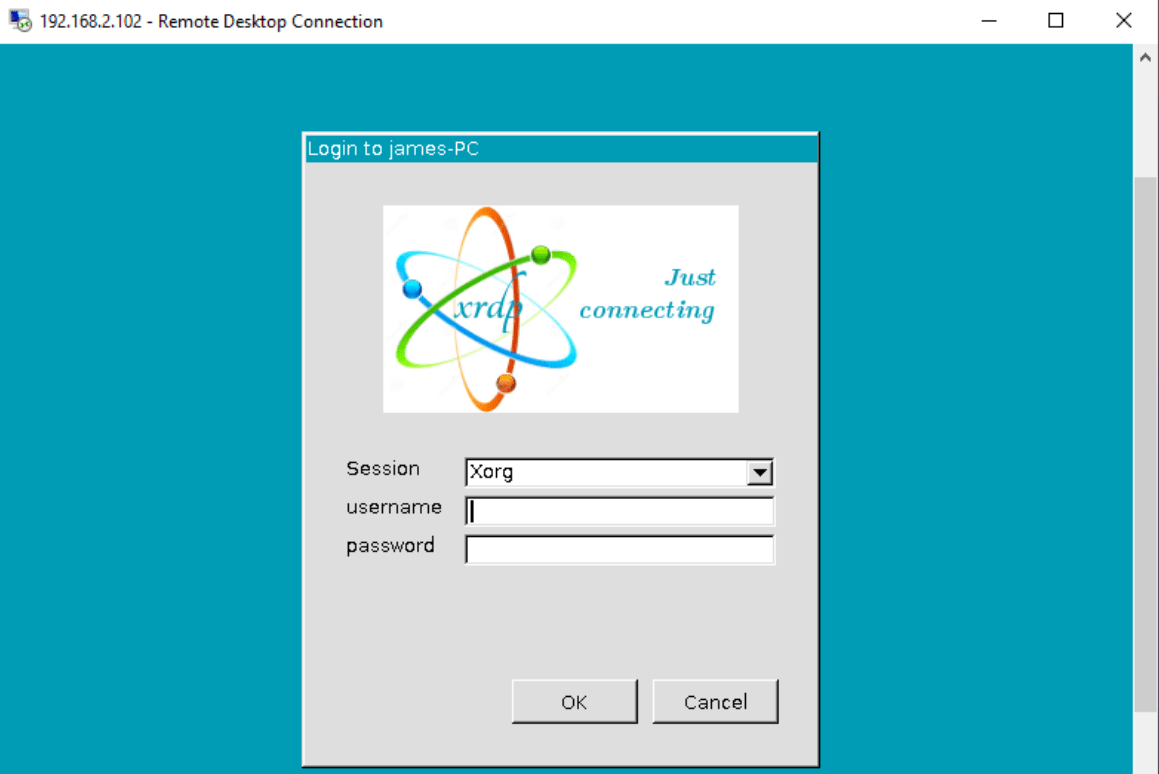
Please pay close attention that you now may see a black screen instead of an Ubuntu desktop background. If you see it, don’t worry because you can fix the black Ubuntu screen with the following approach. just edit the /etc/xrdp/startwm.sh script for remote system.
sudo vim /etc/xrdp/startwm.sh
Add these two lines just before the lines that test & execute Xsession, as shown below.
unset DBUS_SESSION_BUS_ADDRESS
unset XDG_RUNTIME_DIR

After you have saved and exited this file, you need to restart the xrdp service via the following command:
sudo systemctl restart xrdp
In the next step, you should start the connection from the top. After the initial authentication, you must authenticate again, as shown in the following.
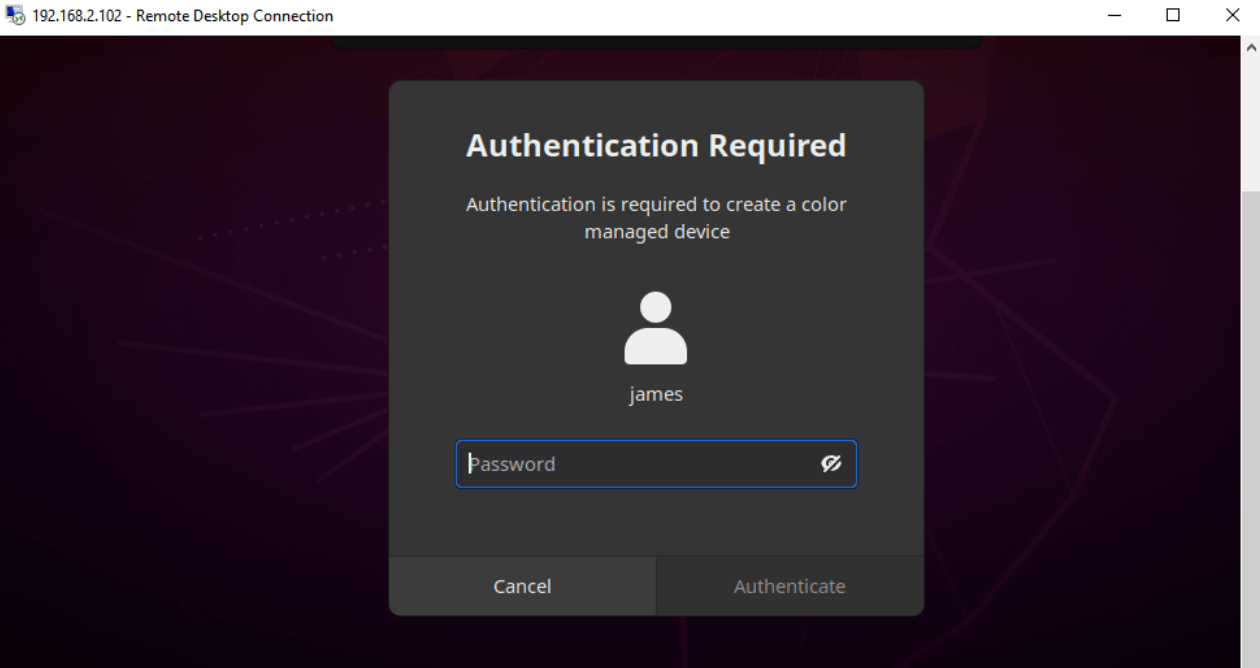
In this step, to install xrdp Ubuntu 20.04, you need to enter your credential and click on the authenticate button. Doing so will direct you to the screen of the remote Ubuntu desktop.
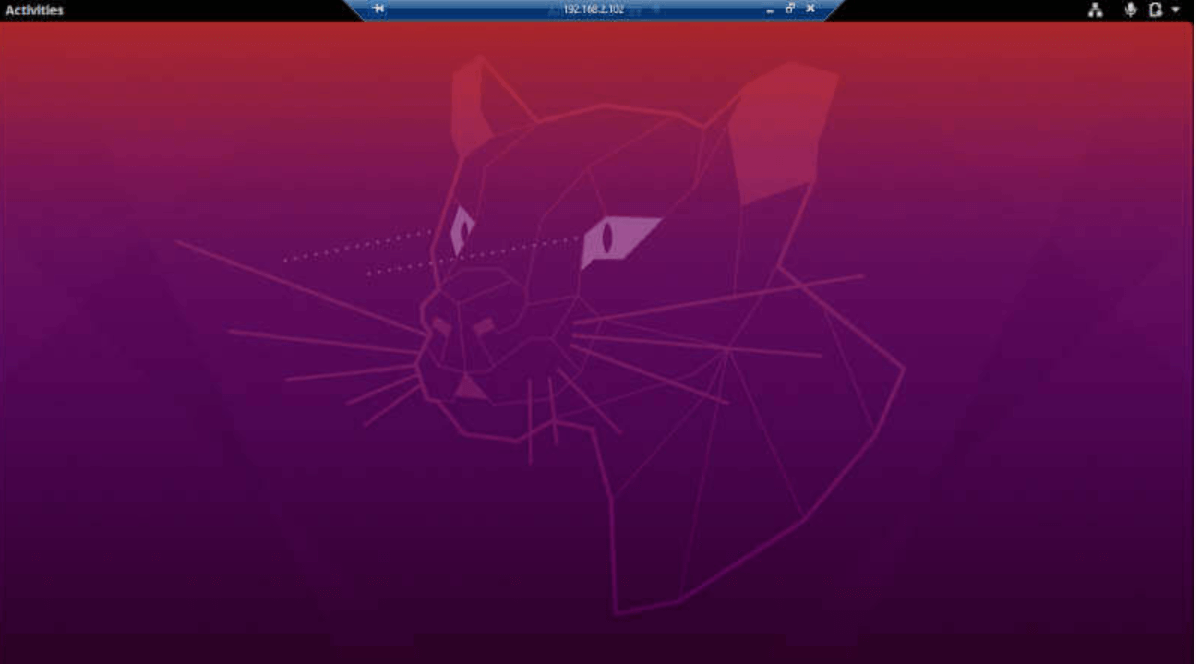
We have gone through all these steps to teach you how to install xrdp Ubuntu 20.04; you may now want to know other methods which you can use to access other systems remotely. Even though this article has guided you on how to install Ubuntu remote desktop and xrdp Ubuntu 20.04, You should know that RDP and VNC (Virtual Networking Computing) are both popular remote desktop standards. RDP and VNC have some significant differences, which is why it is good to compare them in more detail to get the main idea of their functionality.
 Need a Remote Desktop?
Reliable, high-performance RDP servers with 99.95 uptime. Take your desktop on the go to all the major cities in the US, Europe, and Asia.
Get an RDP ServerWhat are the main differences between RDP and VNC?
When it comes to comparing RDP against VNC, multiple distinctions are noticeable, which we will list here.
RDP vs VNC: Speed
RDP is faster and an excellent choice for virtualization. It has multiple advantages, including smaller Instruction sets, more network efficiency, and less bandwidth usage than having the pixels transmitted via VNC. Even though it isn’t possible to share screens in RDP, assigning different profiles to users enables you to share whatever resources are available on the server using RDP, making it ideal for virtualization.
RDP vs VNC: Platform independency
VNC is platform-independent, and framebuffers are present in all operating systems. So user experience remains without change whatever OS you use.
RDP vs VNC: Security
RDP is known to be a more secure option as it supports Secure Sockets Layer/Transport Layer Security (SSL/TLS) and obtains security improvements with each update. Although some VNC software implements Secure Shell (SSH), we can’t assume all of them do this, which may make VNC more vulnerable than RDP.
In this section of the xrdp Ubuntu 20.04 remote desktop configuration, we briefly talked about the main dissimilarities of RDP and VNC. If you want to know them more thoroughly, you can read our RDP vs VNC comparison article to help you pick the best remote desktop technology based on your requirements.
Recap: xrdp Ubuntu 20.04 remote desktop installation
Remote desktop access allows users to access remote devices from other locations. This tutorial was mainly concentrated on how to install xrdp Ubuntu 20.04, helping you utilize remote access for your Linux machine. Additionally, we discuss how RDP differs from VNC to give you a better view of these significant standards. You can also use our reliable RDP VPS plans to benefit from a stable and fast Remote Desktop connection with minimal latency.
At cloudzy, we try our best to provide you with the best plans at affordable costs. Our RDP VPS solutions deliver multiple advantages to you, including guaranteed uptime (99.95%), worldwide 15+ data center locations, ultrafast SSD storage, incredible bandwidth, 7-days money-back guarantee, and 24/7 technical support. Do not delay this any further and get an RDP VPS at a price as low as $7.95.
FAQ
How to install xrdp on Ubuntu 20.04?
Here are the steps to install xrdp Ubuntu 20.04:
- Install Desktop Environment
- Installing XRDP on Ubuntu
- Configure Xrdp
- Adjust your firewall
- Connect to Remote Desktop
What port does xrdp use?
xrdp listen on 3389 port, for which you may need to adjust your firewall to allow inbound traffic from an RDP client.
How does xrdp work?
In simple terms, xrdp, an open-source solution, enables remote access to Linux machines while using the Windows RDP.
How can I fix the xrdp black screen issue on Ubuntu 20.04?
Going through the steps to install Ubuntu remote desktop, you may see a black screen which you can solve with modify /etc/xrdp/startwm.sh as a workaround to run two sessions in parallel for the same user.
