
💡 Note: Embrace the capabilities of MikroTik CHR. Our MikroTik CHR VPS is perfect for those setting up VPNs or managing MikroTik routers remotely, offering seamless functionality and robust performance. Click here to discover how our MikroTik CHR VPS can enhance your remote routing with efficiency and ease.
Trying to set up a Virtual Private Network server? Want to use the incredible load-balancing features of a MikroTik router but remotely? The MikroTik Cloud Hosted Router (CHR) is MikroTik’s elegant solution to setting up a minimal router system on any server environment, including cloud and VPS. And this article will show you just how to install MikroTik on VPS to create your own remote router using a Cloudzy VPS. Before getting down to the actual steps you need to take, I’m going to take a very short look at MikroTik CHR and what it can do.
What is MikroTik CHR and What Can You Do with It?
MikroTik is an industry-favorite hardware company producing a range of modems, routers, and even a few server devices. Its routers were especially popular because of their unique operating system. After a while, MikroTik started releasing that operating system as an independent piece of software, calling it RouterOS. RouterOS basically allows you to turn any computer system into a MikroTik router device, providing practical but straightforward functionality. MikroTik Cloud-Hosted Router (CHR) is a version of RouterOS MikroTik released more recently. CHR is designed to function on clouds, Virtual Private Servers (VPS), and virtual machines.
So, MikroTik CHR is your best bet for turning your remote server into a router, so you can easily create powerful VPN servers, load balancers, and more. It’s up to you to make the most of your virtual, remote MikroTik router, but potentially, there are a lot of incredible use cases for a MikroTik CHR VPS. If you use a Windows PC or laptop, you can also use MikroTik’s Winbox to simplify using MikroTik’s CHR or RouterOS. Naturally, I’ll show you how to do that as well as how to install MikroTik on VPS.
Starting with a Cloudzy MikroTik VPS
So, the first step is to get a VPS to set up CHR. This tutorial will show you how to get Cloudzy’s unique, tailor-made MikroTik VPS.
Step 1: Buy a MikroTik VPS
Head over to Cloudzy.com and buy a MikroTik VPS plan. Make sure to get a plan with decent resources, so your remote router can handle the tasks you have in mind for it. I would suggest the “Growing” plan, which is basically the most affordable plan with the necessary resources and performance. To manually install MikroTik Router (CHR) on your Cloudzy VPS, you need to select a Linux VPS and choose Ubuntu 16 or 18 as your VPS operating system.
Want a better way to host your websites and web apps? Developing something new? Simply don’t like Windows? That’s why we have Linux VPS. Linux Hosting Simplified
Step 2: Prepare to Connect to your VPS
Once you’re done with your payment, you will receive an email with the details you need to connect to your VPS. You can use these details to access your MikroTik VPS. I suggest you first use a remote desktop or SSH client to secure your VPS before starting the next steps.
Setting up an SSH Connection from Windows 10 using PuTTY
Now, of course, you can use Windows Shell to start an SSH session to access your Linux VPS. We’ve already written a guide explaining how to connect to your Linux VPS from Windows and you can use those instructions. But in this article, we’ll take the easier and faster way and use PuTTY to connect via the Secure Shell (SSH) protocol. Of course, you can use any other Windows SSH client to access your VPS, not just PuTTY. For a more customized experience, try installing another candidate from our list of the best SSH clients for Windows in 2022.
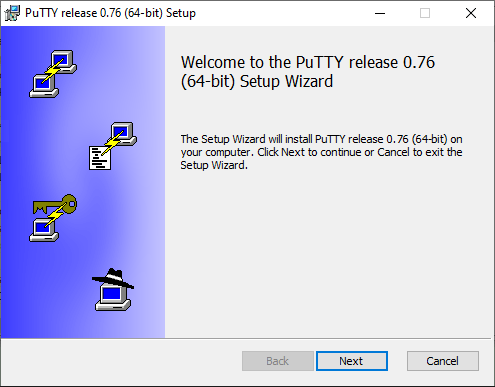
Step 1: Download and Install PuTTY
Simply download and install PuTTY on your Windows computer. You can use this article if you need any help with the installation.
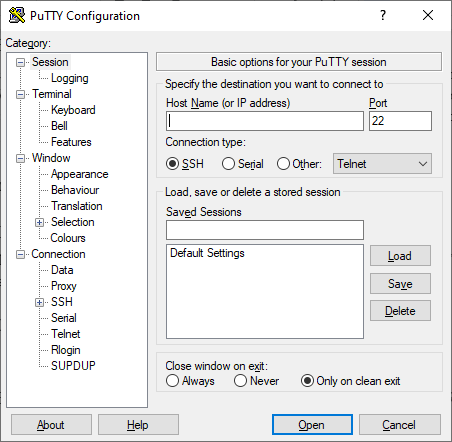
Step 2: Enter your Cloudzy Linux VPS Details
Enter your credentials from the email you received from Cloudzy when you signed up for and got your VPS. You will need your server IP address and a username-and-password pair. You can also use PuTTY to generate and use SSH keys to connect to your MikroTik VPS for added security.
Also Read: DNS configuration on MikroTik
How to Install MikroTik on VPS
Step 1: Launch PuTTY
So, now that you have a Cloudzy VPS and a PuTTY you’ve already installed, it’s time to get to work. First, fire up your PuTTY SSH client to get things started.
Step 2: Connect to your Linux VPS
You have already entered the details for your MikroTik server, so just click on “Open” and let it take you to your Ubuntu server screen. You’ll probably see something like the following screen, with a Command-Line Interface or CLI.
![[PuTTY Terminal showing Ubuntu’s CLI]](https://cloudzy.com/wp-content/uploads/PuTTY-Terminal-showing-Ubuntus-CLI.jpg)
Step 3: Enter the Commands to Download and Install MikroTik CHR
![[PuTTY’s Connection SSH screen]](https://cloudzy.com/wp-content/uploads/PuTTYs-Connection-SSH-screen.png)
wget --user-agent="Mozilla" -O Mikrotik_installer.sh https://support.cloudzy.com/dl.php?type=d\&id=8
chmod +x Mikrotik_installer.sh
./Mikrotik_installer.sh
Step 4: Reboot your Linux VPS
Naturally, you can reboot your VPS from inside the PuTTY but it’s much better to do it using your Cloudzy VPS web-based control panel.
![[Cloudzy Login page]](https://cloudzy.com/wp-content/uploads/Cloudzy-Login-page.png)
![[Cloudzy VPS control panel]](https://cloudzy.com/wp-content/uploads/Cloudzy-VPS-control-panel.png)
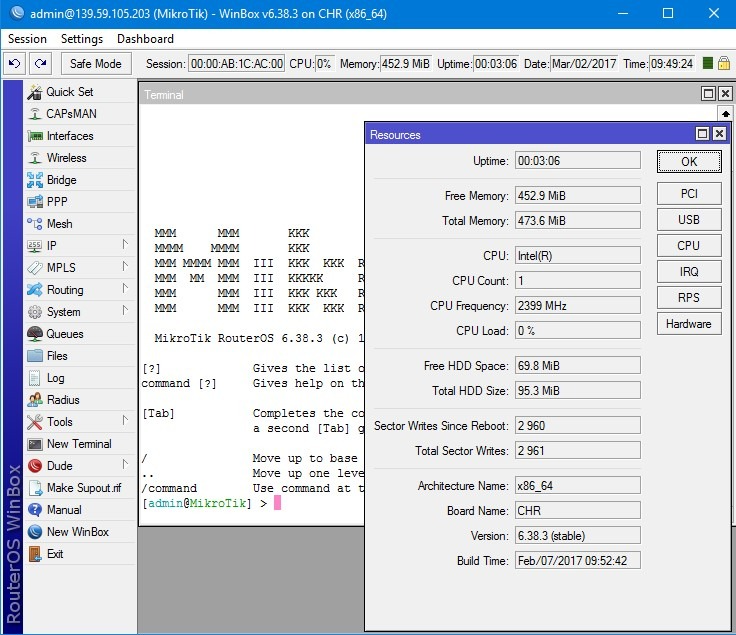
Step 5: Check if you Managed to Install Mikrotik on VPS
Now, once your system is back up, you should be seeing something like this instead of the previous Ubuntu screen:
![[PuTTY Terminal showing MikroTik CHR welcome screen]](https://cloudzy.com/wp-content/uploads/PuTTY-Terminal-showing-MikroTik-CHR-welcome-screen.jpg)
Also Read: How To Install Python On A VPS Server?
Optimizing MikroTik CHR on Your VPS
You can always do better, achieve more, and work faster. When it comes to MikroTik CHR, there are different measures you can take to ensure everything is performing at maximum efficiency. One method is to use Winbox. Winbox is a Windows client software MikroTik has specifically developed to simplify the use of its routers via a helpful Graphic User Interface (GUI):
-
- It can help you streamline and easily perform any number of tasks on your MikroTik VPS. You just need to
-
- and launch it to make using your CHR hosting easier. Also, remember that while we decided to use Ubuntu as the base OS in this guide, you can just as easily decide to install MikroTik on Debian. You don’t even need to change any of the steps or commands — pretty convenient, actually.
Naturally, using a tool like Winbox to simplify things is not the only way to make the most of your remote MikroTik router. You can set up your CHR hosting on any one of a dozen cloud and virtual server providers around. An essential part of ensuring the best routing experience is using the right hosting provider. That’s why I chose to focus on Cloudzy’s MikroTik VPS and Linux VPS in this guide. With NVMe storage, DDR4 RAMS, 1 Gbps bandwidth, and more, each Cloudzy MikroTik VPS is a powerful server capable of handling all the CHR tasks you can throw at it. Don’t hesitate to buy a CHR hosting plan today — with our 7-day money-back guarantee, you’re running precisely zero risks.
FAQ
Can I install MikroTik CHR without buying MikroTik hardware?
Definitely. In fact, the MikroTik CHR is an operating system designed to turn standard servers into routers with the same capabilities as a hardware MikroTik router.
No, unfortunately not. You can only set up a MikroTik Cloud Hosted Router on a VPS, like Cloudzy’s MikroTik VPS. But with our prices being so affordable, you’ll hardly feel any difference in costs.
Does Cloudzy support full root and SSH access?
Of course! We provide full root access on all our VPS plans, and that means you can easily connect to your MikroTik CHR VPS using SSH.

![How to Make a Modded Minecraft Server? 👾 [2024 Guide]](https://cloudzy.com/wp-content/uploads/How-to-Host-a-Modded-Minecraft-Server-1-420x234.png)


0 Comment