If you’ve used Windows long enough, you are bound to have come across the words “.NET Framework” during installation or updating a program. The .NET Framework is a software framework developed by Microsoft to help programmers create and run software written in languages such as C++, C#, and Visual Basic. Windows 10 comes with the latest version of .NET Framework already installed and activated. But, in some cases, such as when you want to install older applications built based on older versions of .NET Framework, you will need to install .NET Framework on Windows 10 manually. Vise versa, if you own an older version of Windows and your application needs newer versions of the framework, you will need to update it.
There are two major versions of .NET Framework, version 3.x and version 4.x. As mentioned, Windows 10 always comes with the latest version of the framework which at the time of writing this article is version 4.8. Version 4.8 covers .NET Frameworks version 4.0 through 4.8. Thus, if you have version 4.8, you will not need to install version 4.2 or 4.6 and so on. The last official release of version 3 of the .NET Framework was 3.5 and it covers versions 1.0 through 3.5. In this article, I’ll show you how to install .NET Framework on Windows 10 and how to update .NET Framework on Windows 10.
Which .NET Framework Is Installed on Your Windows 10?
If during a routine software installation you get a missing .NET Framework error, first write down the version that is usually provided in a prompt window. After that follow the instructions below to install .NET Framework in Windows 10. Windows 10 comes with the latest version 4 of the framework. So, it is a good idea to check which versions of the framework are installed on your operating system.
To find out which .NET Framework version is installed on your Windows:
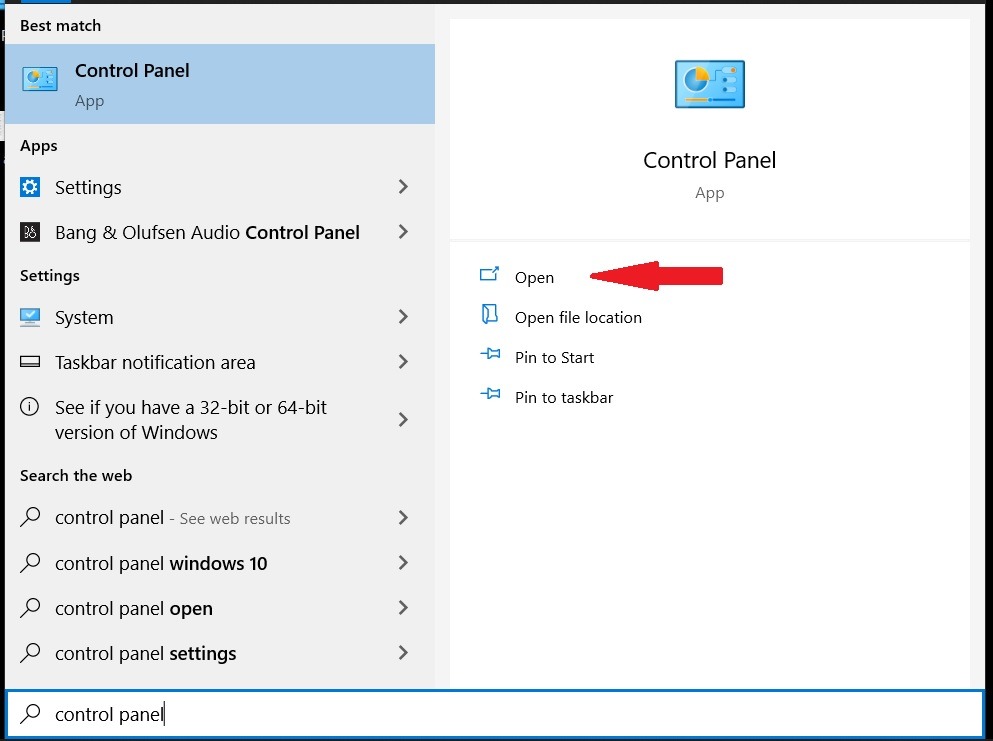
Step 1: Launch Windows Start
Step 2: Open the Control Panel
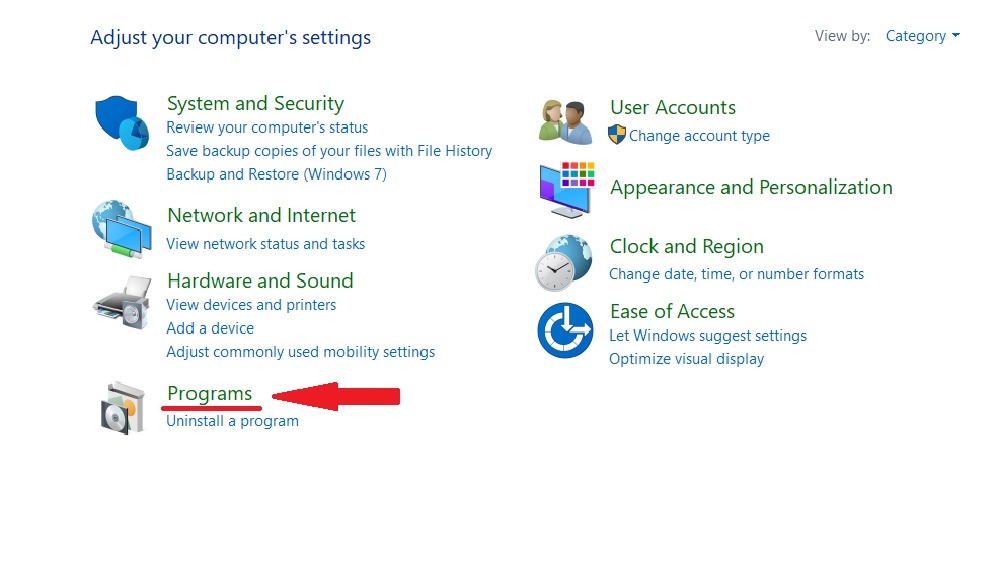
Step 3: Click on Programs.
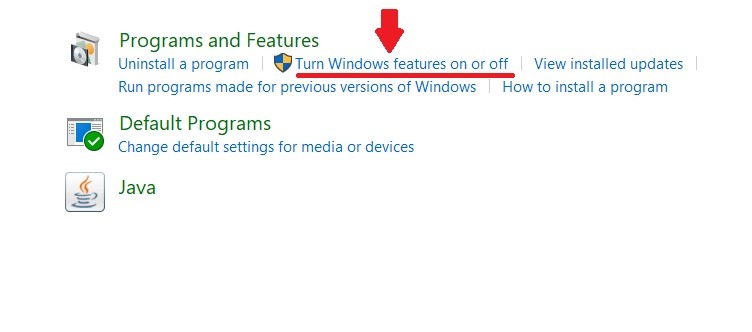
Step 4: In the Programs and Features section, click on Turn Windows features on or off.
Step 5: In the Windows Features window that pops up, you will notice that .NET Framework 3.5 is the first item in the list. If the check box next to .NET 3.5 is colored black it means that it’s installed.
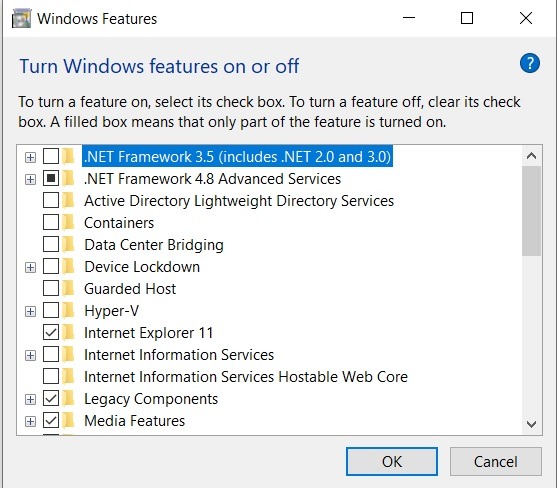
However, if it is empty, then it means that .NET Framework 3.5 is not installed on your Windows 10. Thus, you will have to use one of the following ways to install .NET Framework on your Windows 10.
Installing .NET Framework using Windows Features
Follow the steps in the previous section to get to Windows Features. Next, click on the box next to .NET 3.5 and then click ok. A prompt window such as the one below will appear.
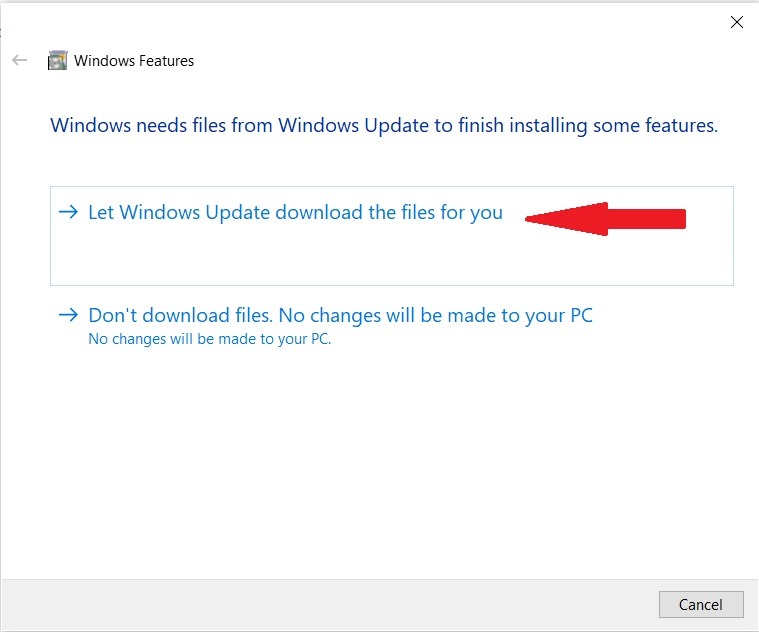
Click on Let Windows Update download the files for you. The Windows will continue to download and install .NET Framework on your Windows 10. After the installation is done, restart your PC and the process is complete.
Get yourself an efficient Windows 10 VPS for remote desktop, at the cheapest price out there. FREE Windows 10 running on NVMe SSD storage and high-speed internet. Windows 10 VPS Hosting
Install Using the Dism Command
In case you do not have access to the internet, If you own a Windows 10 DVD or a bootable flash drive, you can use the following method to install .NET Framework 3.5. The process is easy and not time-consuming.
- Insert the installation media into your PC and look at the drive letter assigned to it. You must check, for example, if it is mounted as drive F or G and so on.
- Press Windows Start key + R, type cmd, and press Ctrl + Shift + Enter to launch Command Prompt as an administrator.
- Execute the following command:
Dism /online /enable-feature /featurename:NetFX3 /All /Source:X:sourcessxs /LimitAccess
Replace X with the drive letter of your Windows DVD or USB Drive
4. After the installation is complete, restart your PC.
Also Read: How to install IIS on Windows 10?
Installing .NET Framework on Windows 10 Using Offline Installer
If for whatever reason you were unable to install .NET Framework on Windows 10, you could directly download the installer files for the framework from the .NET section of the Microsoft Website. However, before you go on and download the installer files, make sure that you’re downloading a supported version of the .NET Framework.
When you visit the .NET webpage, the website will show you a list of the .NET Frameworks which are still supported by Microsoft and a hidden list of unsupported versions. The unsupported versions will no longer be updated and receive security patches and updates.
Installing .NET Framework on Windows 10 using this method is quite straightforward. Simply download the installer file and double click on the installer and begin the installation. After completion, restart your PC.
Get yourself an efficient Windows 10 VPS for remote desktop, at the cheapest price out there. FREE Windows 10 running on NVMe SSD storage and high-speed internet.
Windows 10 VPS Hosting
Confirming the Successful Installation of .NET Framework 3.5
To check whether the specific version of the .NET Framework is now installed on your Windows 10, follow these steps:
Step 1: Launch Command Prompt
Press Windows Start key + R, type cmd, and press Ctrl + Shift + Enter to launch Command Prompt as an administrator.
Step 2: Type command
Type the following command and press Enter:
reg query "HKLM\SOFTWARE\Microsoft\Net Framework Setup\NDP" /s
Step 3: Check Installed Versions
As you see in the image below, you’ll be able to see all the installed versions of the .NET Framework on your Windows 10 listed on the screen.

Get yourself an efficient Windows 10 VPS for remote desktop, at the cheapest price out there. FREE Windows 10 running on NVMe SSD storage and high-speed internet.
Windows 10 VPS Hosting
Updating .NET Framework on Windows 10
Updating .NET Framework on Windows 10 can be done in two ways. If you have a Windows 10 with a valid license, you can simply update your Windows 10 and all the installed versions of the .NET Framework which are still supported by Microsoft will be updated automatically. However, if your license has expired or you are using a cracked version of Windows 10, you can download and install the latest versions manually as explained above.
Conclusion
I hope that this article has helped you install the .NET Framework on your Windows 10. Here at Cloudzy, our Windows 10 VPS servers are up to date and come with all the necessary features such as .NET Framework already installed and updated. Choosing one of our Windows 10 VPS services will guarantee that you will not be tied up with technical issues such as the one mentioned in this article. Our expert support staff are always available to help you deal with any technical issue that may come your way. Last but not least, if you have any questions regarding our services please contact us.


0 Comment